
Getting your walls ready for a new coat of paint boils down to three straightforward steps: clean the surface, fix any damage, and seal it with a good primer. It might sound simple, but mastering these basics is the real secret behind a paint job that looks professional and stands the test of time.
Laying the Groundwork for a Perfect Paint Job
We all love the excitement of picking a new colour, but the hard truth of decorating is that a flawless finish is 80% preparation and only 20% painting. I've seen it countless times: rushing the prep is the biggest mistake you can make. It's what leads to those all-too-common frustrations like peeling paint, hairline cracks showing through, or a patchy, uneven look.
Proper prep is what elevates your work from a quick DIY job to something truly professional. It ensures your new paint sticks properly, covers evenly, and looks fantastic for years. Whether you're working on a previously painted surface or brand-new plaster, taking the time to get the foundation right is everything.
The Three Core Stages of Wall Preparation
You can think of the whole process in three distinct phases. Each one sets the stage for the next, creating that perfect canvas for your chosen colour.
- Assessment: First, you need to know what you're dealing with. Is it plaster or plasterboard? Are there any sneaky damp spots or stubborn stains? This is your planning stage.
- Preparation: Now it's time to get your hands dirty. This involves washing off years of grime, filling in all those little holes and cracks, and sanding everything down to a perfectly smooth surface.
- Priming: The final step before the fun begins. A quality primer seals the wall, hides any repairs or stains, and helps your topcoat go on beautifully, giving you that rich, even colour you're after.
This simple diagram shows how these stages flow together.
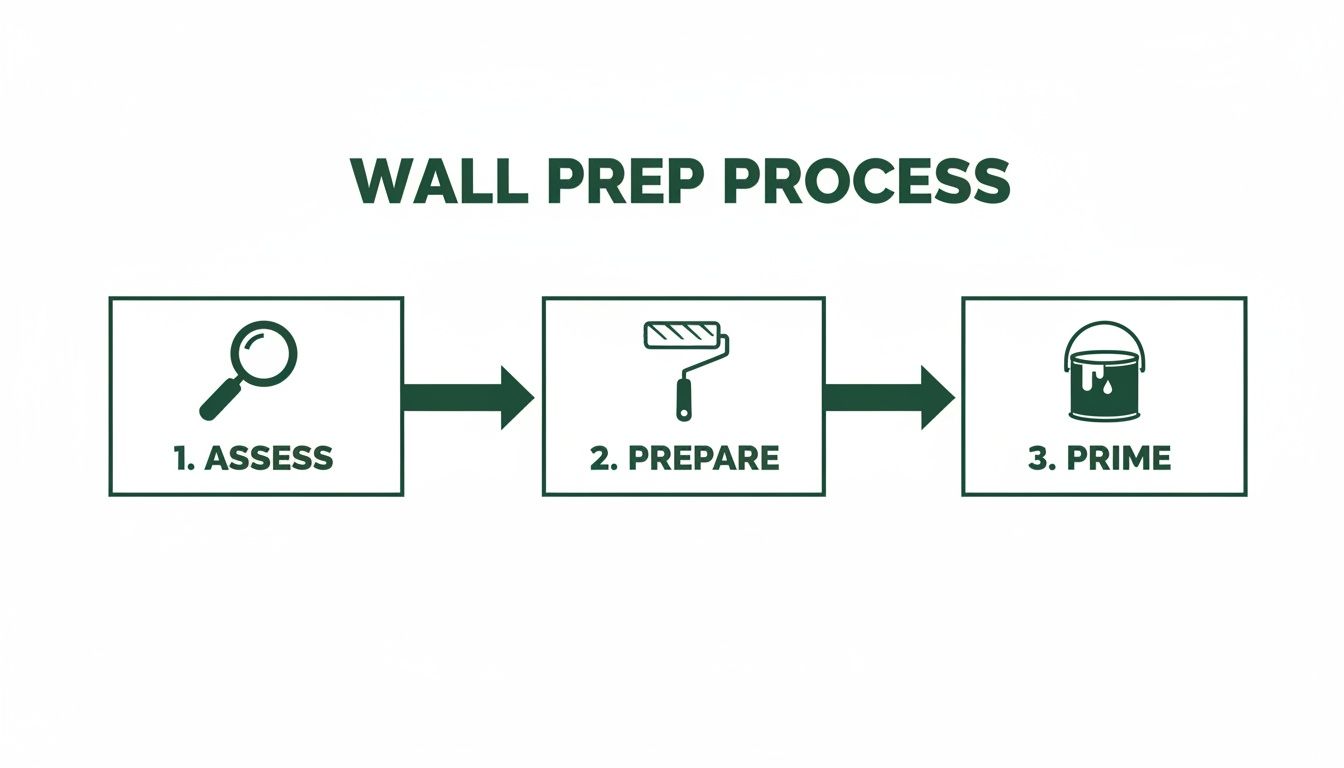
As you can see, taking a methodical approach—thinking before you act—is the key to getting it right.
Wall Preparation at a Glance
To help you plan your project, here’s a quick overview of what each stage involves and a rough idea of the time commitment.
| Stage | Primary Goal | Estimated Time (Per Room) |
|---|---|---|
| Assessment | Identify wall type, locate all defects, and plan repairs. | 30-60 minutes |
| Preparation | Clean, degrease, fill, and sand the surface until smooth. | 2-4 hours |
| Priming | Seal the surface, block stains, and ensure even paint absorption. | 1-2 hours (plus drying time) |
Remember, these are just estimates. A room with lots of damage will naturally take longer than one in good condition.
Why Quality Materials Matter
Trust me on this one: using the right gear makes a huge difference. For a really deep dive into the specifics, this guide on how to prep walls for painting like a pro is an excellent resource. A good quality filler, for example, is far easier to work with, sands down smoothly, and is less likely to shrink and crack as it dries. Likewise, a high-adhesion primer might seem like an extra expense, but it can save you from applying a third or even fourth coat of expensive topcoat paint.
Investing in the right prep materials from the start doesn't just make the job easier—it prevents headaches and costly fixes down the road. A beautiful, lasting finish always starts with a solid foundation.
Getting to Grips with Your Walls: Assessment and Cleaning
Before you even think about cracking open a tin of paint, the real work begins. Getting your walls properly prepped is, without a doubt, the most important part of the job. It's the step that separates a professional-looking finish from one that starts to peel and bubble in a few months. A wall might look clean, but it's often covered in a thin layer of grime, grease, or even nicotine that paint just won't stick to.
Think of yourself as a detective for a moment. Get up close to the wall. Run your hands over it to feel for any rough patches or bumps. An old decorator’s trick is to use a torch, holding it flat against the surface. This low-angle light is brilliant at revealing every little imperfection you’d otherwise miss – things like hairline cracks or old filler that wasn't sanded down properly.
Most modern homes in the UK are built with plasterboard, which gives you a nice, smooth starting point. If you're in an older property, you’re more likely dealing with traditional plaster. This can have a more characterful, slightly uneven texture and might show the ghosts of old repairs. Knowing what you're up against helps you plan your next steps.
What to Look for and How to Fix It
Every room has its own story and its own challenges. Kitchen walls, especially around the hob, will almost certainly have a film of cooking grease. In bathrooms, you’ll be on the lookout for tiny dark spots of mould or mildew, a classic sign of high humidity. Spotting these issues is half the battle.
Here are the usual suspects you need to deal with:
- Grease and Grime: Often invisible, but it's the number one enemy of good paint adhesion.
- Nicotine Stains: That tell-tale yellowish tinge will bleed straight through most paints if you don't treat it first.
- Damp Patches: Common near windows or on exterior walls. These must be completely dry and the source of the damp fixed before you do anything else.
- Old Wallpaper Paste: If you've just stripped the walls, you have to get every last bit of that sticky residue off. For a flawless result, have a look at our guide on the best way to strip wallpaper.
Picking the Right Cleaning Gear
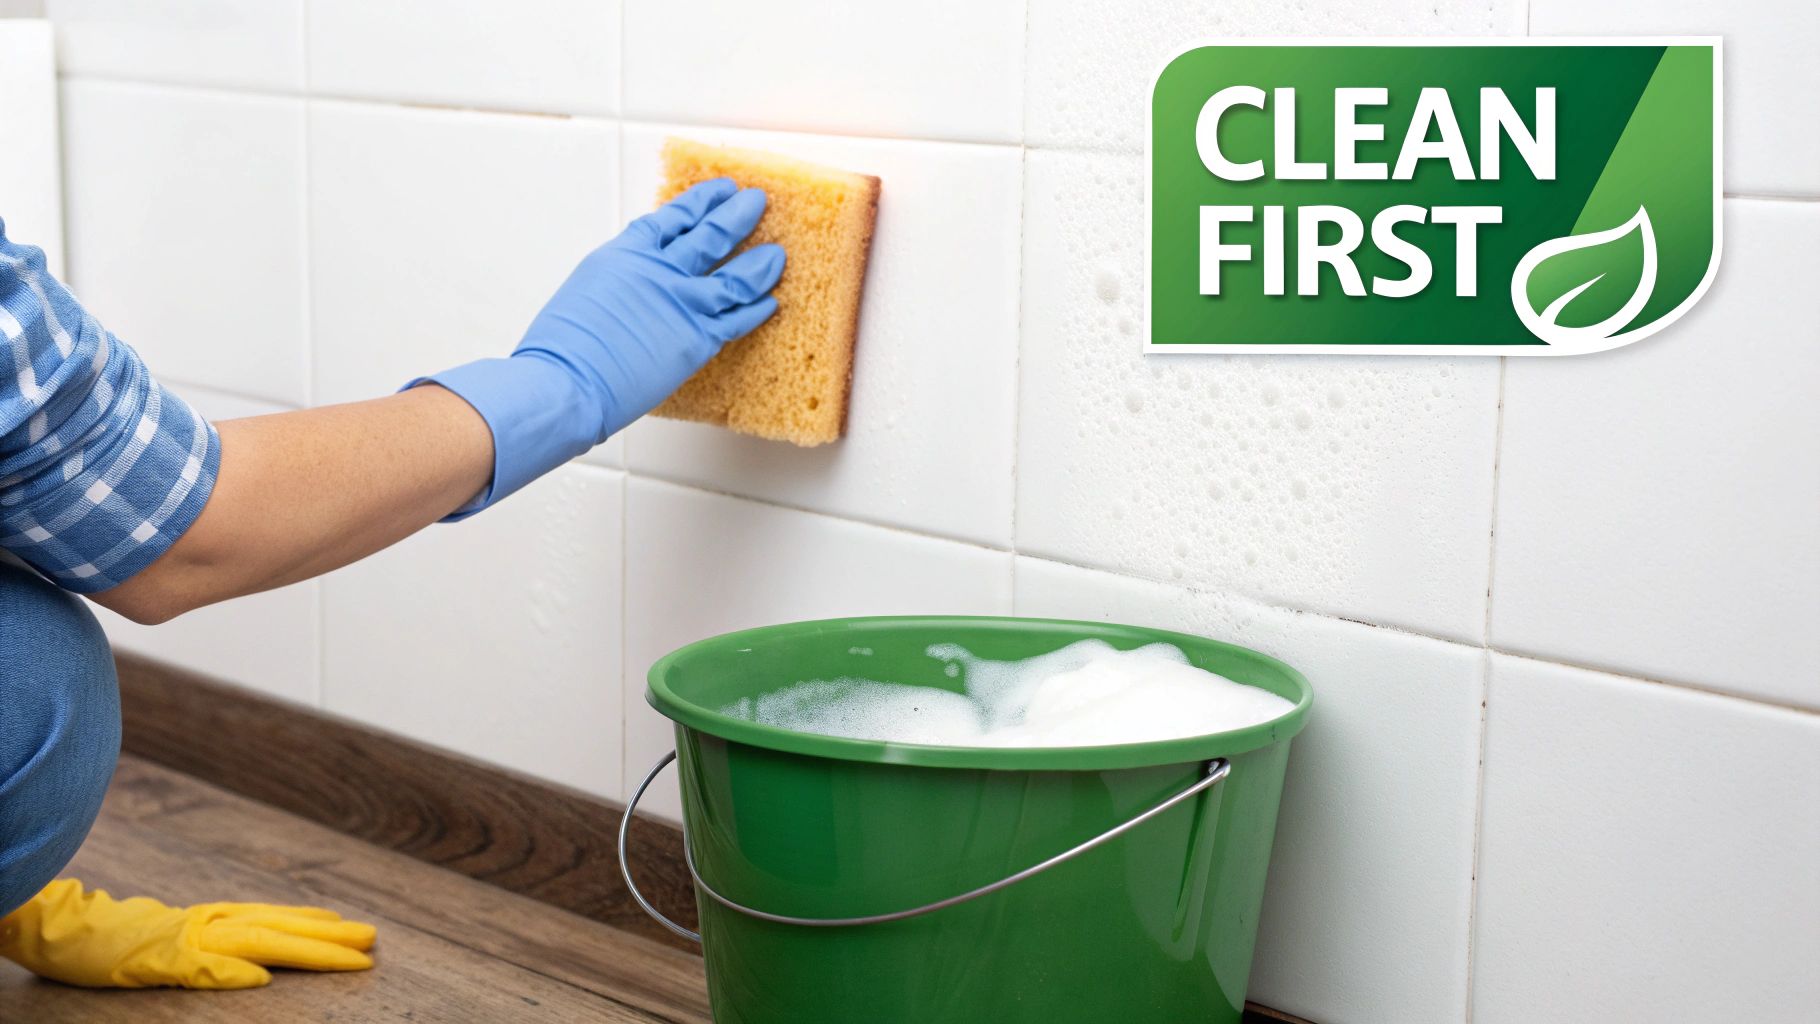
Once you know what you’re dealing with, you can choose your tools. For most general cleaning, a bucket of warm water and a good sugar soap solution is a decorator's secret weapon. It’s fantastic for cutting through everyday grime and is all you'll need for most living rooms and bedrooms.
Pro Tip: When you're washing the walls, start from the bottom and work your way up. Then, rinse from the top down. It sounds a bit backwards, but it stops you from getting those clean streaks, or 'runs', down the dirty wall below. It's a simple trick for a much better clean.
If you’ve found mould, you’ll need to step it up a gear with a proper fungicidal wash. Don't just paint over it – the mould will grow right through your lovely new paint. Treat it properly with the wash, following the instructions, to kill the spores for good.
A Clean Workspace is a Safe Workspace
A perfectly clean surface is the foundation of a lasting paint job. We see it all the time with local builders and DIYers – taking the time to wash walls with a sugar soap solution prevents up to 40% of common paint adhesion failures. It’s also vital to keep the air moving. Poor ventilation during prep is linked to 15% of decorating VOC-related complaints in city areas. This is a big deal in the UK, where our damp climate can make getting walls properly dry a real challenge.
So, get the windows and doors open. It’s not just for your own health; it helps the walls dry out completely. And trust me, a bone-dry wall is just as crucial as a clean one before you even think about picking up a filler knife or a primer roller.
Repairing Imperfections for a Smooth Canvas
You can have the best paint money can buy, but it won’t hide a bumpy, cracked, or uneven wall. In fact, a fresh coat of paint—especially one with a bit of a sheen—will only make those flaws stand out more. This is where your prep work really shines, transforming a tired surface into a perfect canvas for your new colour.
Getting these repairs right is what separates an amateur job from a truly professional finish. It all starts with knowing what you're up against and choosing the right tool for the task.
Choosing the Right Filler for the Job
Not all fillers are created equal. Grabbing the wrong one can lead to cracks reappearing or repairs that just don’t last. Think of it like this: you wouldn't use a screwdriver to hammer a nail. Each type of filler is designed for a specific job, from tiny blemishes to more serious damage.
Here's a quick rundown of what you'll find on the shelf:
- All-Purpose Filler: This is your everyday hero for common interior fixes. It’s ideal for filling small screw holes, minor dings, and those tiny hairline cracks that aren't going anywhere. It dries hard and is a dream to sand smooth.
- Flexible Filler: If you're tackling cracks around door frames, along skirting boards, or where walls meet the ceiling, you need something with a bit of give. These areas naturally move with temperature shifts, and a flexible filler will move right along with them, stopping that crack from coming back to haunt you.
- Deep Gap Filler: For bigger holes or deeper gouges, a standard filler will often shrink and crack as it dries, leaving you to do it all over again. A deep gap filler is lightweight and specially formulated to fill larger voids in one go, without any sagging or shrinking.
For something more substantial, like a hole left by a doorknob, you'll need a more robust approach. We've got you covered with a detailed guide on how to properly fix a hole in the wall.
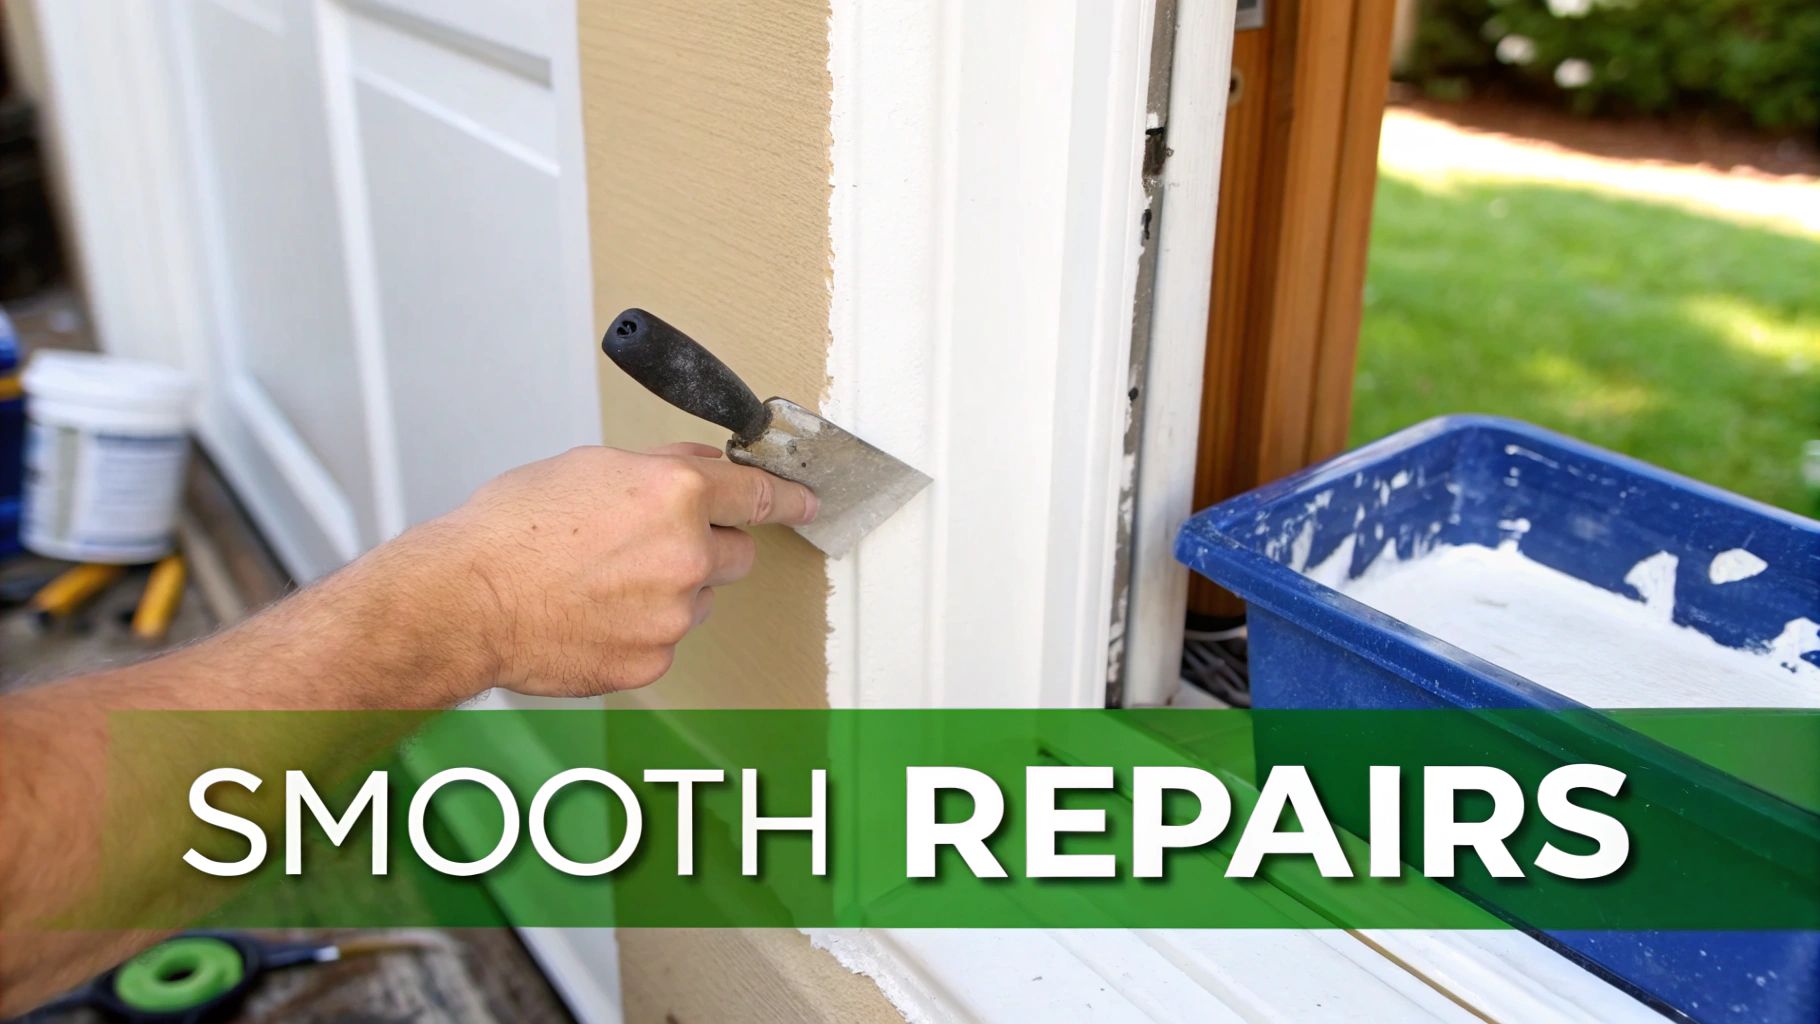
Applying Filler Like a Professional
The secret to a great repair isn't just the filler, it's the technique. A common mistake is piling on way too much, which just creates a mountain of sanding work for you later. The goal is to apply the filler so it sits just slightly proud of the wall surface. Use a flexible filling knife and apply firm, even pressure to really work the product into the imperfection.
Once it's in, glide a clean, wet filling knife over the top to whisk away most of the excess. This one simple move makes sanding a breeze and helps feather the edges, blending the repair seamlessly into the wall.
A great repair is one you can't see or feel after painting. Take your time with the filler and sanding stages—it’s the difference between a good finish and a great one. And whatever you do, don't rush the drying process. Letting the filler cure completely is non-negotiable.
Sanding for a Flawless Finish
Once your filler is fully cured (always check the manufacturer's instructions, but you're often looking at 4-6 hours), it's time to sand. This is the final step that makes the transition between the repair and the wall totally invisible.
Grab a fine-grit sandpaper—something around 120-grit is usually perfect. For the best results, wrap it around a sanding block. This keeps the sanding surface flat and stops you from accidentally creating new dips in the wall.
Use light, circular motions, paying special attention to feathering the edges of the repair. Your goal is simple: make the filled area completely level with the rest of the wall. Run your hand over it. You shouldn't be able to feel where the patch begins or ends. This meticulous touch is what prevents those ugly ridges that can catch your roller and show through the final paint coat.
Of course, some surfaces are beyond what a bit of filler and sanding can fix. If you're dealing with extensive damage or very uneven walls, calling in professional plastering services might be the best way to guarantee a perfectly uniform base to work from.
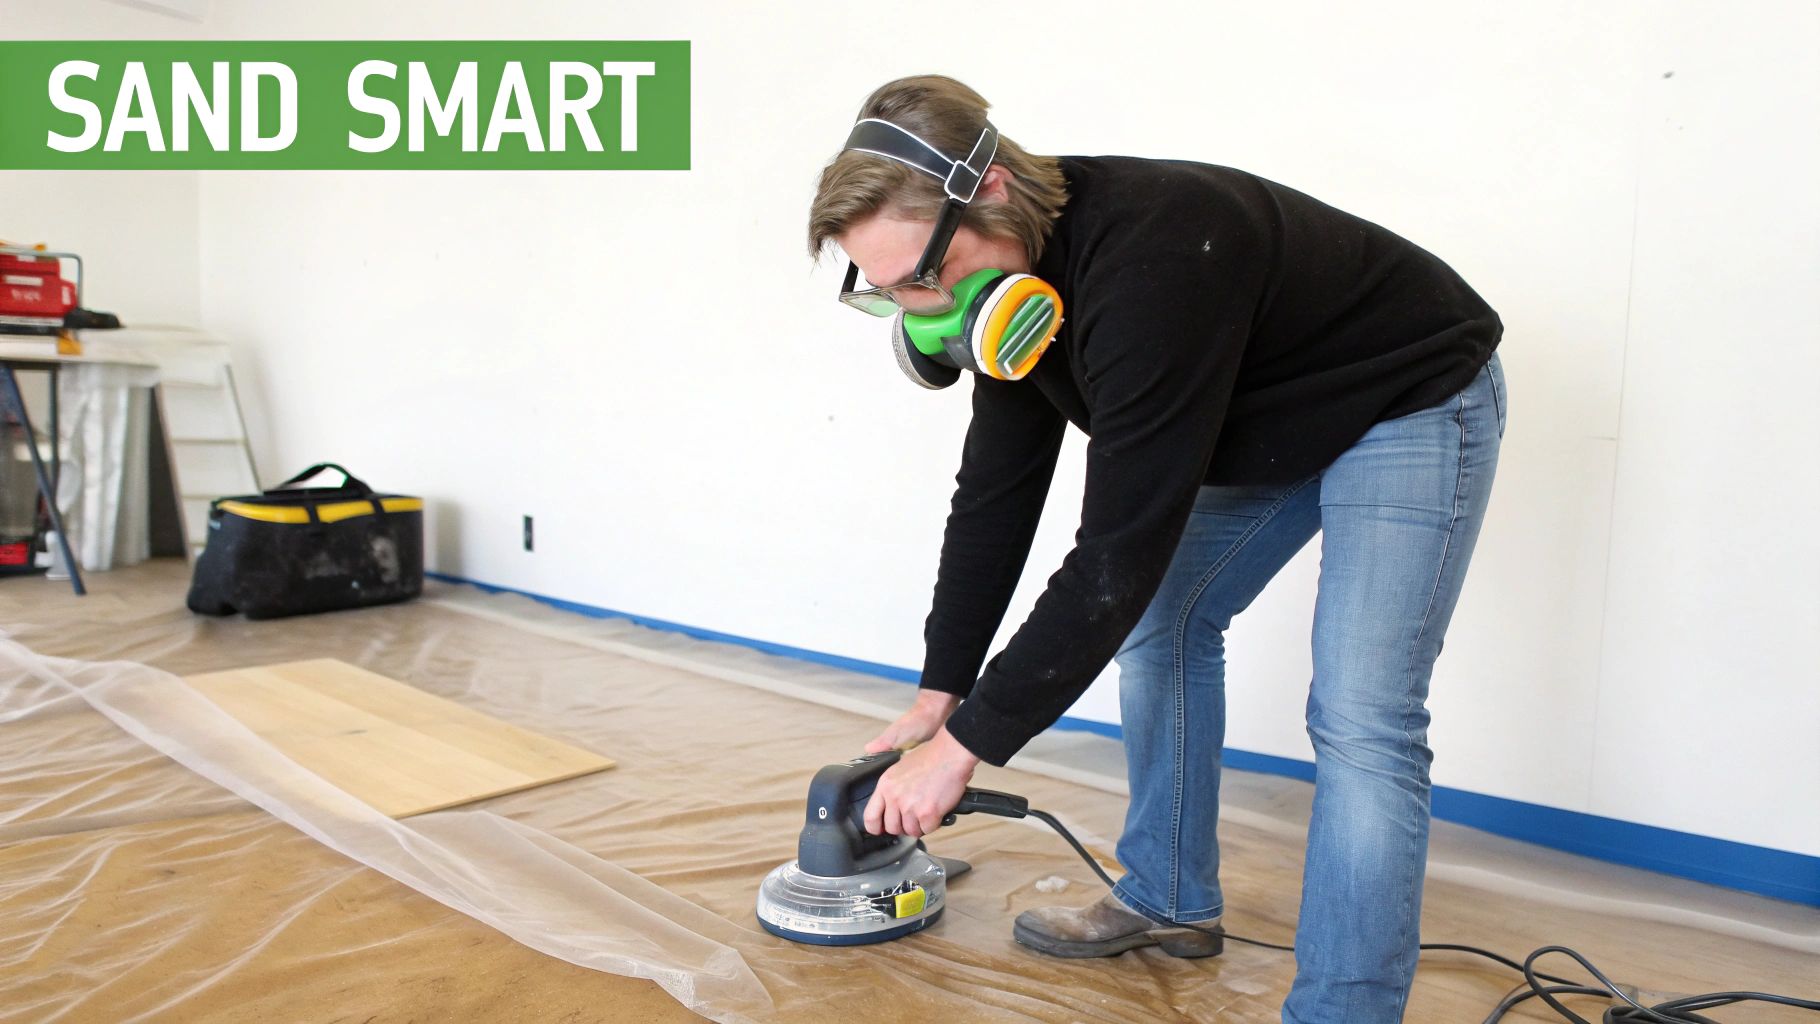
Sanding Down and Keeping Dust at Bay
Once your filler is dry, it's time to sand. This is probably the least glamorous part of any decorating job, but it’s absolutely essential for getting that smooth, professional finish. Let's be honest, it's also the messiest. The goal here is to flatten your repairs and create a perfectly uniform surface, all while stopping dust from taking over your entire home.
Sanding does two key things. First, it feathers the edges of your filled areas, making those repairs totally invisible under a coat of paint. Second, it creates a "key" for the new paint to grab onto. This is especially important if you're painting over old gloss or silk finishes, as their smooth, slightly shiny surfaces can make it tricky for new paint to stick properly. A quick scuff-up makes all the difference.
Picking the Right Sanding Tools for the Job
The tool you choose really depends on the size of the task at hand. If you're just dealing with a few filled nail holes or small scuffs, a simple sanding block or a folded sheet of sandpaper will do the trick. It gives you great control for those small, detailed spots.
However, if you're sanding down larger patches or prepping entire walls, an electric orbital sander is a real game-changer. It gets the job done much faster and gives you a far more consistent finish than you could ever achieve by hand. Many of the newer models come with built-in dust collection bags that can catch up to 90% of the dust, which dramatically cuts down on cleaning time. It's a fantastic investment if you do a fair bit of decorating.
Getting the Sandpaper Grit Right
Using the right grade of sandpaper is the key to a great finish. Go too coarse, and you'll scratch the wall; too fine, and you'll be there all day getting nowhere. The "grit" number tells you how abrasive the paper is – the lower the number, the coarser the paper.
Here's a quick guide to what you'll need:
- 120-grit (Medium): This is your workhorse for most wall prep. It’s ideal for smoothing out standard filler and for scuffing up old silk or gloss paint to give your new paint something to grip.
- 180-grit (Fine): If you’ve used a very fine finishing filler or you're aiming for an incredibly smooth surface, a final once-over with 180-grit paper will get it feeling like glass.
- 80-grit (Coarse): Only break this out for the tough stuff, like sanding down stubborn lumps of old plaster or levelling out a really uneven patch. Be careful with it, as it can gouge the wall if you're not paying attention.
Practical Tips for Controlling the Dust
Yes, sanding is messy, but you don't have to surrender your home to a cloud of fine white powder. A few smart moves can keep the dust contained and make clean-up a breeze.
First things first: seal the room. Cover everything—furniture, floors, you name it—with dust sheets. It's also a good idea to tape along the bottom of the door to stop dust from drifting into the rest of the house. While opening a window helps with ventilation, be aware it can also create a draught that blows dust everywhere.
A brilliant trick for a nearly dust-free job is wet sanding. Just dip a sanding sponge into a bucket of water, wring it out so it’s damp but not dripping, and sand away. The water traps the dust, turning it into a sludge that you can simply wipe off with a clean, damp cloth. No dust clouds.
Another pro tip is to hook your electric sander up to a vacuum cleaner. Most sanders have a port for this, and it provides active dust extraction right where it's being created. It’s the cleanest method by far. Once you're done sanding, use the brush attachment on your vacuum to go over the walls, skirting boards, and window sills one last time. This gets rid of any lingering dust before you even think about opening a tin of primer.
The Critical Role of Priming and Sealing
You’ve done all the hard graft—the cleaning, the filling, the sanding—and now you’re itching to get that new colour on the walls. I get it. It’s tempting to jump right in, but hold on. Skipping the primer at this stage is probably the single biggest mistake you can make.
Think of priming as the handshake between your wall and your final coat of paint. It’s the unsung hero that ensures a professional, long-lasting finish.
Primer isn't just watered-down paint; it’s a specialist product engineered to solve problems. Its main job is to seal the surface, stopping your expensive topcoat from just soaking into porous areas like fresh filler or new plaster. Get this right, and you'll use less paint and end up with a much richer, more consistent colour.
Why You Should Never Skip Primer
A quality primer is your secret weapon for a paint job that looks fantastic and stands the test of time. It does several crucial things that a standard emulsion simply can’t.
First off, it guarantees uniform absorption. Those patches you’ve filled are far thirstier than the surrounding wall. Paint straight over them and they’ll suck the life out of the emulsion, leaving dull, flat spots. This effect, known as ‘flashing’, is the tell-tale sign of a rushed job. A quick coat of primer seals everything, creating a perfectly even canvas for your final colour.
Expert Tip: Primer is your ultimate problem-solver. It blocks stubborn stains, seals porous patches, and gives your topcoat the perfect foundation to grip onto, ensuring true colour and a finish that won't fail.
Primer is also essential if you’re planning a dramatic colour change. Trying to cover a deep burgundy with a pale cream without a primer is a nightmare. You’ll be there for days, applying coat after coat. A good primer blocks out the old colour, so you can achieve your new look with far less paint, saving you time, money, and a whole lot of frustration.
The All-Important Mist Coat for New Plaster
Painting on brand-new, bone-dry plaster? Then a mist coat isn't just a good idea—it's absolutely essential. Fresh plaster is like a sponge; it will pull the moisture from your paint so fast that it can crack, bubble, and even peel off in sheets later on.
A mist coat is just a thinned-down coat of contract matt emulsion (never use a vinyl silk or eggshell for this). Adding water allows the paint to soak into the plaster and bond with it, rather than just sitting on top.
- The ideal ratio is around 70% paint to 30% water.
- You’re aiming for a thin, milky consistency that will seal the surface perfectly.
This simple step is the bedrock of a durable finish on any new wall.
Choosing the Right Primer for Your Walls
Not all primers are created equal. They are formulated for specific jobs, and picking the right one is key to dealing with your wall's unique character. With the UK's paint and wallcoverings market now valued at an estimated £925 million, professionals and DIYers alike are realising that proper preparation is what separates an average job from a great one.
Picking the right primer from the start avoids costly fixes down the line. To help you choose, here's a look at the main types you'll find at Burnt Oak Builders Merchants.
A good primer is designed to tackle specific issues, from covering stains to helping paint stick to tricky surfaces. Understanding the differences will set you up for success.
Choosing the Right Primer for Your Walls
| Primer Type | Best For | Key Benefit | Example Product Type |
|---|---|---|---|
| All-Purpose Primer | General use on wood, metal, and previously painted walls in good condition. | A versatile, reliable choice for straightforward projects without major issues. | Water-based Acrylic Primer-Sealer |
| Stain-Blocking Primer | Covering stubborn stains like water marks, nicotine, ink, or smoke damage. | Prevents stains from bleeding through and discolouring your new paint. | Shellac-based or Oil-based Primer |
| Adhesion-Promoting Primer | Painting over glossy, slick surfaces like old gloss paint, vinyl, or tiles. | Creates a powerfully grippy surface for the topcoat to bond to, preventing peeling. | High-Adhesion or 'Gripper' Primer |
| Plaster Primer/Sealer | Sealing new, bare plaster or plasterboard before applying the topcoat. | Penetrates and seals the porous surface to ensure even paint absorption. | A dedicated plaster sealer or a mist coat of matt emulsion. |
By matching the primer to the job, you’re not just adding a layer of paint; you're building the foundation for a flawless, long-lasting result. This final bit of prep is what truly makes all the difference.
Your Essential Wall Preparation Toolkit
Having the right gear on hand is what turns a potentially frustrating job into a smooth, satisfying project. Think of this as your definitive shopping list, broken down by task, so you can walk into the job fully equipped for a trade-quality finish. Getting this right from the start saves you annoying mid-project trips to the shop and stops you from having to compromise on quality.
This isn’t just about having a tool; it’s about having the right one. A cheap, flimsy filling knife, for instance, will bend and make it impossible to get that perfectly flat finish, creating a load more sanding work for you later. A quality tool just feels better in your hand and performs how it’s supposed to.
Cleaning and Protection Gear
First things first: you need to prep the room and the wall itself. Protecting your floors and furniture isn't optional, and starting with a genuinely clean wall is the absolute foundation of a lasting paint job.
- Dust Sheets: Get yourself some good-quality, thick cotton dust sheets for the floors. They actually absorb spills, unlike those cheap plastic ones where paint just puddles and gets tracked all over the house.
- Sugar Soap: This is a decorator's best friend, and for good reason. It’s a powerful degreaser that cuts straight through the kind of grime and grease that stops paint from sticking properly.
- Sponges and Buckets: You'll want two buckets on hand—one for your sugar soap solution and another with clean water for rinsing off the residue. Large decorator's sponges make the job much quicker.
- Masking Tape: Absolutely essential for protecting skirting boards, window frames, and light switches. A low-tack, quality painter's tape is worth the extra quid; it gives you sharp, clean lines and won't peel off the existing paint when you remove it.
Repair and Sanding Essentials
This is the stage where you create that perfectly smooth canvas for your paint. The final quality of your paint job is directly tied to how much care you take here, so don't be tempted to cut corners with your materials. For a deeper dive into what every homeowner should have, check out our guide on the essential tools for homeowners.
Having a dedicated set of preparation tools ensures consistency and makes the whole process far more efficient. Investing in quality gear now pays off with a superior finish that will look great for years.
- Filler: It's smart to have both a ready-mixed all-purpose filler for small nail holes and a powder filler (that you mix yourself) for any larger, deeper repairs.
- Filling Knives: A flexible, stainless steel filling knife, about 2 inches wide, is perfect for most common household repairs. You’ll get a much better feel for the wall with it.
- Sandpaper: Keep a selection of grits handy. 120-grit is your go-to for smoothing down filler and scuffing up glossy surfaces, while a finer 180-grit is brilliant for a final, ultra-smooth polish.
- Sanding Block: Always wrap your sandpaper around a sanding block. It ensures you apply even pressure across the surface, which stops you from accidentally creating little dips and grooves in your wall.
Got a Question About Wall Prep?
Even the most detailed guide can't cover every scenario you'll run into on a job. It's only when you're actually faced with the wall that the real questions pop up. Here are some of the most common queries we hear from decorators, along with some straight-talking advice to get you through those tricky spots.
How Long Should I Let New Plaster Dry Before Painting?
This is a big one, and getting it wrong is a costly mistake. With fresh plaster, patience is everything. The rule of thumb I’ve always followed is to give it at least one week to dry for every 5mm of thickness. But remember, that’s just a guideline – a cold, damp room in winter will take a lot longer than a well-ventilated one in summer.
If you jump the gun and paint onto damp plaster, you’re just trapping moisture behind the paint. Sooner or later, that'll cause blistering, peeling, and a whole lot of extra work. Once it’s fully cured and feels dry to the touch, you absolutely have to seal it with a mist coat. Just thin down some standard matt emulsion (a 70% paint to 30% water mix is a good starting point) to give the new plaster its first drink before you lay on your topcoats.
Can I Get Away With Painting Over Old Wallpaper?
Look, I get the temptation. Stripping wallpaper is a chore, and painting over it seems like a brilliant shortcut. But trust me, it’s a shortcut you’ll almost always regret.
The moisture in your new paint can reactivate the old wallpaper paste underneath, leading to bubbles and lifting seams. You'll end up with a finish that looks lumpy and unprofessional. Do it right the first time: get the wallpaper off. A good steamer or a quality stripping solution makes the job bearable. Once it's off, wash the walls down to get rid of any sticky residue, fill any gouges, give it a sand, and then prime.
What's the Best Way to Tackle an Old Gloss or Silk Finish?
You can’t just slap a new coat of emulsion over a shiny surface. The new paint will have nothing to grab onto and will likely scratch or peel off with the slightest knock. You have to kill the sheen first.
The trick is to give the surface a "key". You don't need to sand all the old paint off, just scuff it up enough to take the shine away. A light but thorough going-over with medium-grit sandpaper, something around 120-grit, is perfect for this.
After sanding, the most important step is to wipe away every last bit of dust with a damp cloth. Then, for a belt-and-braces approach, I'd always use an adhesion-promoting primer to make absolutely sure the new paint bonds properly.
Do I Really Need to Prime if I’m Using a ‘Paint and Primer in One’?
Those two-in-one paints have their place. If you're just freshening up a wall that's already in good nick and you're not changing the colour dramatically, they can work just fine.
However, they are no substitute for a dedicated primer when you're dealing with a real challenge. For thirsty new plaster, stubborn water or nicotine stains, or a massive colour shift (like going from a deep red to a clean white), a specialist primer is non-negotiable. Using the right tool for the job ensures your colour comes out true and the finish lasts for years.
For all the top-notch fillers, primers, sandpapers, and tools you’ll need to prep your walls like a pro, pop into Burnt Oak Builders Merchants. We've got everything to help you get the job done properly. Find all your supplies on our website.