
Before you can really get to grips with choosing the right plywood for your job, it helps to understand what makes this stuff so incredibly strong and versatile. Plywood isn't just one solid piece of wood; it's a clever bit of engineering. It's made from thin layers of wood veneer, or 'plies', which are glued together under some serious heat and pressure. The real magic, though, is in its cross-grained construction, which gives it fantastic stability and stops it from splitting.
What Is Plywood and How Is It Made?
Plywood is more than just a stack of wood slices; it's a panel that's been carefully designed for strength. A good analogy is weaving fabric. The whole process kicks off by peeling logs into very thin sheets of veneer. These are then dried out and graded for quality.
Next, these veneers are layered one on top of the other, but here's the clever part: the grain direction of each layer is rotated 90 degrees from the layer below it. This alternating grain pattern is the secret sauce behind plywood's structural strength. If you think about a single plank of timber, it's strong along its grain but can split quite easily across it. By alternating the grain, plywood spreads that strength out in all directions. This makes the finished board far more stable and much less likely to warp, crack, or shrink compared to a solid piece of wood of the same size.
The Bonding Process
Once the veneers are all stacked up, they’re bonded together with powerful adhesives. The type of glue used is what really defines the plywood's purpose – it's what makes a sheet suitable for a dry indoor project versus one that can stand up to the British weather outside.
The whole stack then goes into a hot press, where immense heat and pressure work their magic. This cures the adhesive, fusing all the separate veneers into a single, solid, and incredibly tough sheet.
You can see these distinct layers, or 'plies', clearly in the cross-section below.
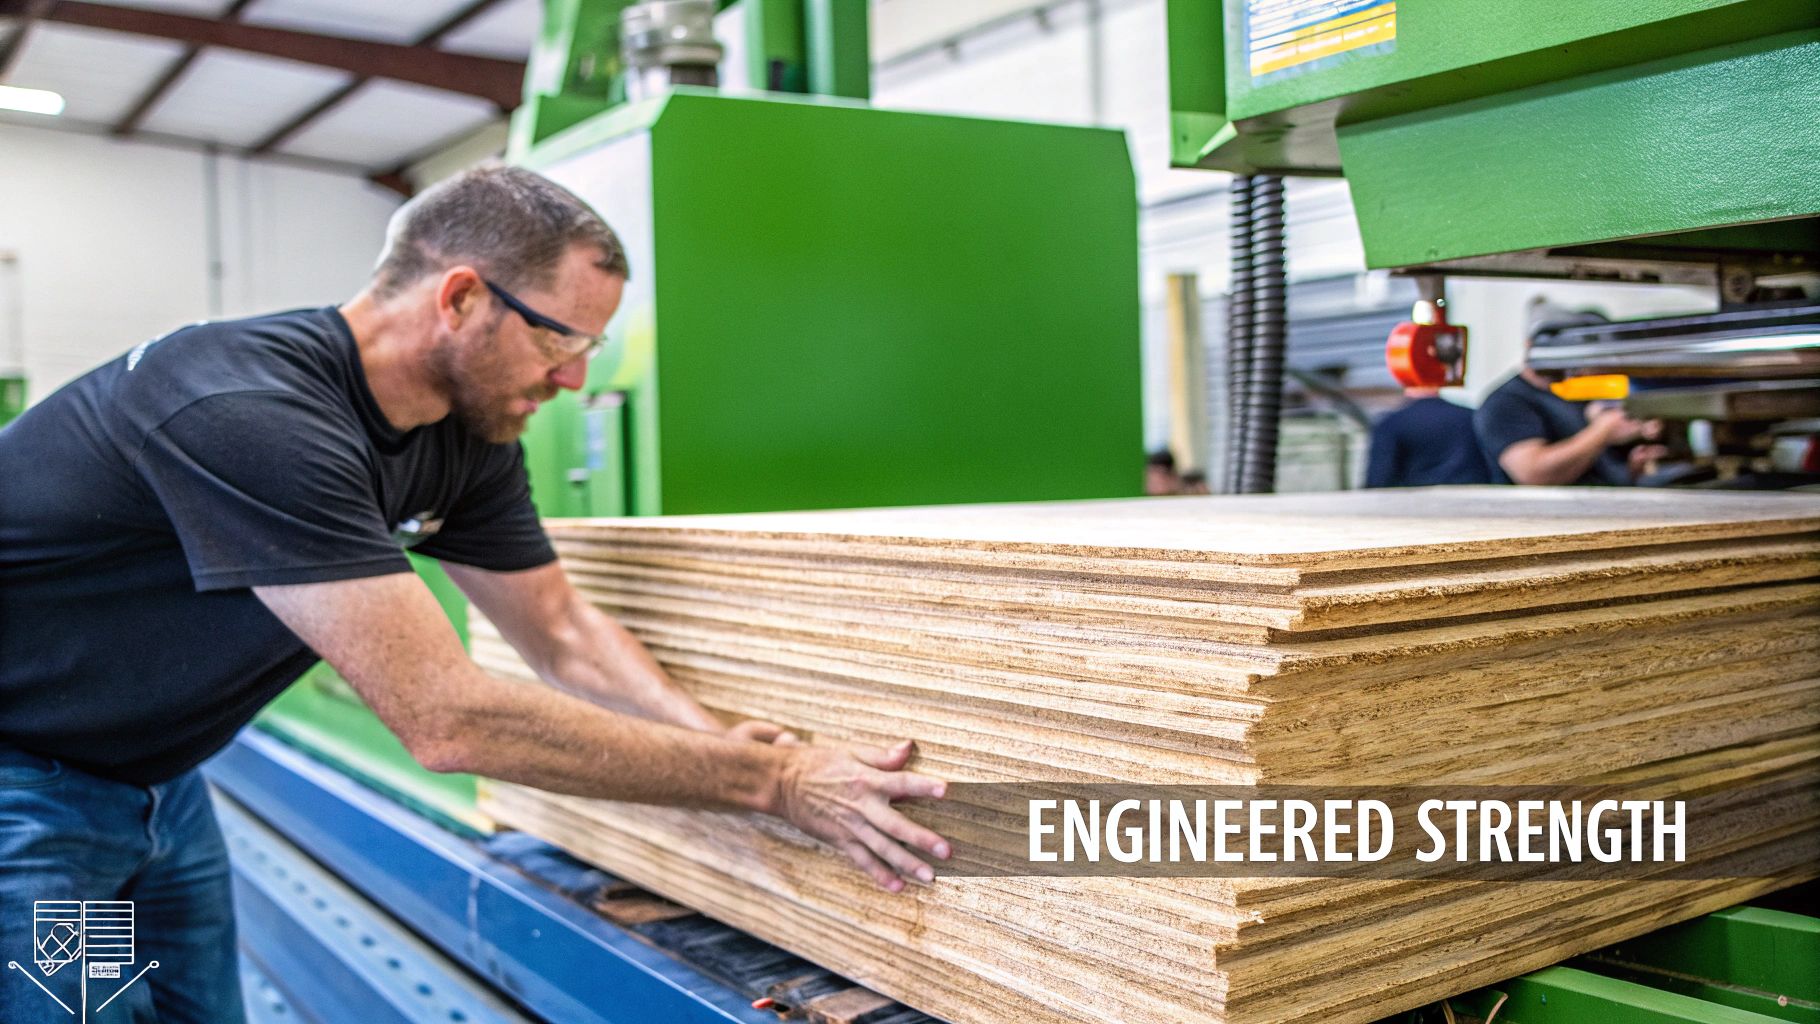
It’s this structure that gives plywood its signature stability, fighting against the natural expansion and contraction you'd get with solid timber.
From Log to Board: A Simple Overview
The journey from a tree in a forest to a finished sheet of plywood involves a few key steps. Knowing a bit about the process helps you appreciate the quality differences between the various types of plywood you'll find at the merchants.
- Log Selection: It all starts with choosing the right logs. They're debarked and then cut to a manageable length.
- Veneer Peeling: The logs are spun against a long, sharp blade, which peels off a continuous sheet of wood veneer. It’s a bit like unrolling a massive kitchen roll.
- Drying and Grading: These fresh veneers are then dried to just the right moisture level and sorted by quality.
- Assembly and Gluing: Next, the veneers are coated with adhesive and layered up, making sure to alternate the grain direction with each ply.
- Pressing and Finishing: The stack is hot-pressed to set the glue, then trimmed to standard sizes (like the familiar 2440 x 1220mm sheets) and often sanded for a clean finish.
The core principle is beautifully simple but incredibly effective. By layering veneers with alternating grains, any tendency for one layer to warp or bend is cancelled out by the layer next to it. This structural teamwork is what makes plywood such a reliable and essential material for everything from roofing and flooring to fine joinery.
Softwood vs. Hardwood Plywood: Choosing the Right Structural Panel
When you walk into a builders’ merchant, you'll see stacks of plywood, but they mainly fall into two camps: softwood and hardwood. These are the workhorses of the construction world, and knowing the difference is crucial for getting your project right, both in terms of performance and budget.
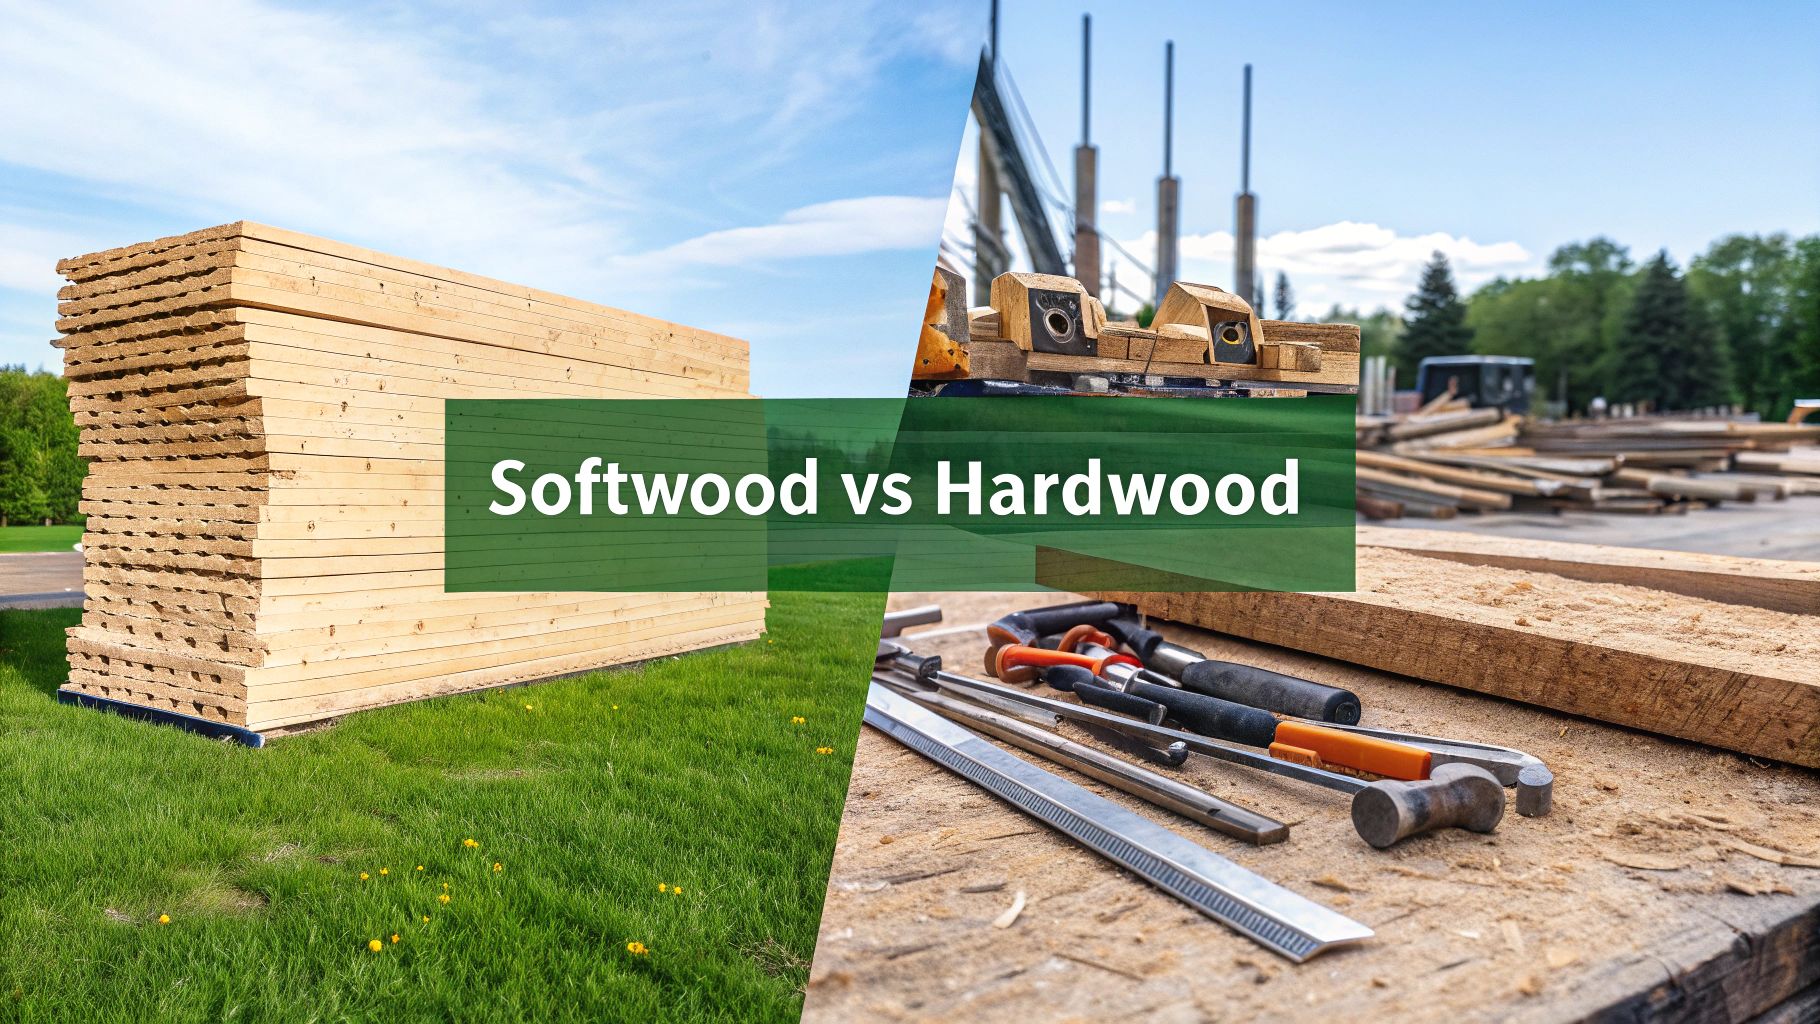
Think of it like choosing between a sledgehammer and a finishing hammer. One is for raw strength and general-purpose work, the other is for jobs that need a bit more finesse and durability. They’re both useful, but you wouldn’t swap them around. It's the same with softwood and hardwood ply.
The Everyday Essential: Softwood Plywood
Softwood plywood is the go-to panel for most general construction jobs you'll see across the UK. It’s usually made from fast-growing coniferous trees like pine or spruce, which keeps the cost down. This makes it the perfect, budget-friendly choice when you need solid structural performance but aren't too concerned about a pristine finish.
Its brilliant strength-to-weight ratio makes it indispensable for tasks like:
- Roof Sheathing: Creating the solid deck before the tiles or felt go on.
- Wall Sheathing: Bracing the timber frame of a new build or extension.
- Flooring Underlayment: Giving you a flat, stable base for whatever flooring you're putting down.
- Site Hoarding: A cost-effective way to secure a building site.
For temporary jobs like concrete formwork, a basic softwood panel is exactly what you need. Our own shuttering ply is designed precisely for this kind of work.
The trade-off is the finish. Softwood ply tends to have a more rustic look, often with knots and a visible grain. That’s absolutely fine for structural work that gets covered up, but you wouldn't use it for a high-end cabinet.
The Premium Performer: Hardwood Plywood
When a job demands something extra, that's where hardwood plywood comes in. Made from slower-growing trees like birch, oak, or meranti, these panels are stronger, more durable, and have a much cleaner, smoother surface. Naturally, this quality comes at a higher price, so you save it for projects where looks and long-term performance are paramount.
A huge advantage of hardwood ply, especially birch, is its void-free core. The veneers are so tightly layered that there are no internal gaps. This gives it incredible stability and means you get a clean, solid edge when you cut it – no splintering or voids showing.
This makes hardwood plywood the first choice for more demanding work:
- High-Quality Joinery: Perfect for building cabinets, wardrobes, and bespoke furniture that needs to last.
- Decorative Wall Panelling: When you want a feature wall with a real wood finish.
- Heavy-Duty Shelving: It can take a serious amount of weight without sagging.
- Van Fit-Outs: Provides a tough, hard-wearing lining that can handle daily abuse.
What About the Glue? The WBP Factor
The type of wood is only half the story; the glue holding the layers together is just as important. You’ll often hear the term WBP, which stands for 'Weather and Boil Proof'. While that's technically an older term now replaced by official British Standards (BS EN 314), everyone in the trade still uses it to mean a highly water-resistant glue.
The glue bond dictates where you can safely use the plywood:
- Class 1 (Interior): For dry indoor use only. The glue will fail if it gets wet.
- Class 2 (Humid): Can handle a bit of moisture, like in a kitchen, bathroom, or a draughty shed.
- Class 3 (Exterior): This is the WBP-equivalent. It’s made for outdoor use where it will get rained on.
But here’s a critical point: even with a Class 3 glue line, the wood itself isn't waterproof. If you're using any plywood outside, you must seal the faces and all the cut edges with good quality paint, varnish, or a proper sealant. If you don't, water will get into the veneers and the panel will delaminate over time, regardless of the glue.
Getting this right is a big part of why the engineered wood sector is booming. In the UK, the market is forecast to grow from around £11.5 billion to over £24.5 billion by 2035. Choosing the right panel and protecting it properly is key to building structures that last.
Choosing Specialist Plywood for Demanding Jobs
Standard structural plywood is a fantastic all-rounder, but let's be honest, some jobs demand more. When you're dealing with constant moisture, need a finish that’s absolutely pristine, or require brute strength, it's time to look at the specialist options. These panels are specifically engineered for those tough applications where a standard board just won't cut it.
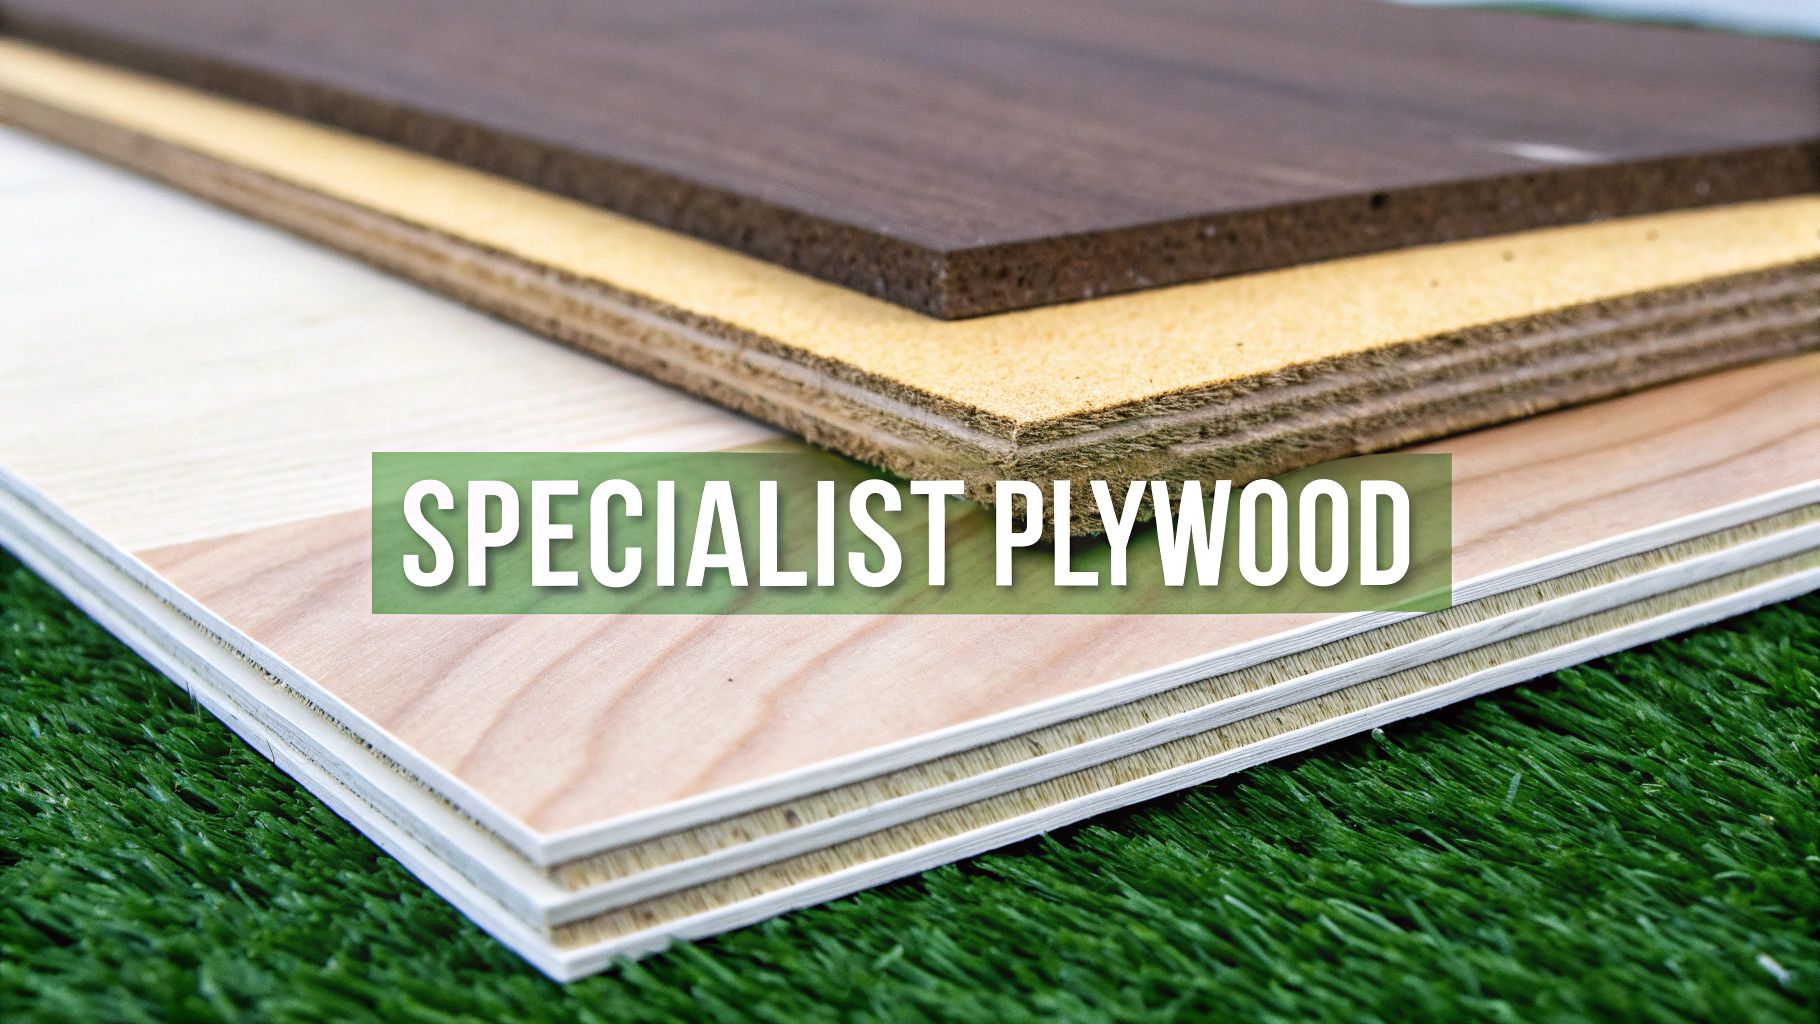
Knowing the difference between these high-performance boards is what separates a good job from a great one. Picking the right material ensures your work not only looks the part but will also stand the test of time, no matter what you throw at it.
Marine Plywood: The Ultimate in Water Resistance
First, let's clear up a common myth: Marine Plywood isn't 100% waterproof. Nothing is. Its real superpower lies in how it’s built to resist falling apart (delaminating) in constantly wet environments. Unlike standard exterior ply, genuine Marine Plywood must be made to the rigorous BS 1088 standard.
This standard isn't just a sticker; it guarantees a few key things:
- Top-Notch Veneers: It's built from durable hardwood veneers, often from tropical species, which have a natural resistance to rot.
- Zero Core Voids: This is the big one. The inner layers are completely solid, with no gaps or knots. Voids are where water gets trapped, leading to rot from the inside out. Marine ply eliminates this risk.
- Proper Waterproof Glue: The layers are bonded with a high-performance WBP (Weather and Boil Proof) adhesive, so they won't peel apart, even after years of being wet.
Because of this bulletproof construction, Marine Plywood is the only real choice for boat building, sure, but also for things like bathroom subfloors, shower enclosures, and any other job where things are going to get damp and stay damp.
Film-Faced Plywood: For a Smooth and Tough Finish
Next up is Film-Faced Plywood, which you might know as phenolic ply. You can spot it a mile off – it’s the stuff with the smooth, glossy, dark brown or black resin surface. At its core, it's a high-quality plywood panel (often birch) that’s had a tough, waterproof phenolic film pressed onto both sides.
This film gives the board a unique set of skills. The smooth, non-stick surface is absolutely perfect for concrete formwork. It creates a clean, sharp finish on the concrete, and the shutters can be removed easily and used again and again. That reusability makes it a seriously cost-effective material on big construction sites.
But it's not just for concrete. That hard-wearing, water-resistant surface makes it brilliant for other demanding jobs too:
- Van and Trailer Linings: It gives you a durable, wipe-clean surface that can take all sorts of knocks and scrapes.
- Exhibition Stands and Staging: It provides a smart, tough platform that can be put up and taken down repeatedly without looking tired.
- Industrial Shelving: It’s ideal for heavy-duty shelving that won't get chewed up by heavy boxes or abrasive items.
Birch Plywood: Where Strength Meets Beauty
When your project needs to be both structurally sound and look fantastic, Birch Plywood is in a league of its own. Made entirely from thin veneers of birch timber, it’s famous for its incredible strength, stability, and clean, flawless appearance.
The secret to Birch Plywood is its void-free core. The sheer number of thin plies creates an incredibly dense and stable panel with no internal gaps. This gives it that clean, decorative edge that so many joiners and designers now leave exposed as a design feature.
The face veneer has a beautiful, subtle grain that’s perfect for high-end furniture, bespoke cabinetry, and architectural joinery. But it's also a workhorse. Its strength makes it a favourite for creating jigs in the workshop, as it holds screws like a vice and can be machined to tight tolerances without splintering. From premium kitchen cabinets to sturdy children’s toys, Birch Plywood delivers a combination of performance and aesthetics that other panels just can't touch.
How to Read Plywood Grades and Sizes
https://www.youtube.com/embed/_YEFJf0DDoo
Walking into a builders' merchant and looking at a stack of plywood can feel like trying to read a foreign language. The sheets are often stamped with a series of letters and numbers that dictate their quality, intended use, and ultimately, their price.
Getting to grips with these codes is the key to avoiding costly mistakes. You don't want to pay a premium for a beautifully finished board that’s just going to be hidden behind plasterboard, nor do you want a rough, knotty panel for a fine piece of furniture. These grades give you a clear, standardised way to assess the visual quality of a sheet's face and back veneers, helping you match the right board to the right job.
Decoding Plywood Veneer Grades
In the UK and Europe, the most common system uses letters to describe the appearance of the outer veneers. A typical grade you'll see stamped on a board is B/BB or BB/CP. It's quite simple once you know the code: the first letter refers to the "face" veneer (the better-looking side), and the second letter refers to the "back" veneer.
So, what do those letters actually mean for the finish?
When you're choosing a board, the grade tells you what to expect in terms of knots, repairs, and overall smoothness. Here’s a quick guide to help you pick the perfect sheet for your project.
Decoding Common Plywood Grades
| Grade | Face Veneer Quality | Back Veneer Quality | Ideal For |
|---|---|---|---|
| B | Smooth, sanded, and uniform in colour. Only tiny, natural defects like pin knots. | Varies; often paired with BB. | High-end joinery, furniture, and surfaces requiring a clear varnish or light stain. |
| S | Very similar to Grade B, but allows for more natural colour variations. | Varies; often paired with BB. | High-quality painted finishes where a perfect grain match isn't essential. |
| BB | Solid, sanded surface that allows for some sound knots and neat, professional repairs (plugs). | Often paired with BB or CP. | An excellent all-rounder. Perfect for painting, general construction, and cabinet carcasses. |
| CP | Allows for more numerous and larger knots, splits, and repairs compared to BB. Less uniform surface. | Typically paired with C. | General construction, hoarding, and situations where the board's appearance is not important. |
| C | A purely structural grade. Can have open knots, splits, and unrepaired defects. | Typically paired with C. | Packaging, temporary structures, and any application where the board will be completely covered. |
Think of it this way: a sheet graded as B/BB has one premium, clear face (B) that's perfect for visible surfaces like tabletops, and one good-quality, paintable back (BB). This makes it ideal for cabinetry where the inside doesn't need to be as flawless as the outside.
Choosing the Right Plywood Thickness
Just as important as the grade is the thickness. Choosing the right one ensures your project has the strength and rigidity it needs without adding unnecessary weight or cost. A board that’s too thin can lead to sagging shelves or bouncy floors, while going too thick is often just a waste of money.
It’s all about matching the panel's inherent strength to the demands of the job.
Common UK Project Recommendations:
- 18mm Plywood: This is the undisputed workhorse for heavy-duty applications. It's the go-to thickness for structural flooring, robust shelving in workshops, and building sturdy cabinet carcasses. Its rigidity means it can span wider gaps and support serious weight without flexing.
- 12mm Plywood: A hugely versatile mid-range option. 12mm is perfect for wall sheathing, bath panelling, and general joinery. It provides excellent structural integrity for walls and is a reliable choice for cabinet sides and less demanding shelving units.
- 9mm Plywood: This thickness is often used for soffits, fascias, and certain types of wall panelling, offering a great balance between strength and a lower weight. For a deeper look into its applications, you can explore our guide on 9mm plywood sheets.
- 6mm Plywood: Ideal for lightweight jobs where structural strength isn't the main concern. Think cabinet backs, drawer bottoms, and decorative panelling. It provides a solid barrier without adding unnecessary bulk.
Buying and Storing Plywood Like a Pro
A few minutes spent inspecting plywood at the merchant's yard can save you a world of time and money later on. It’s amazing what a quick once-over can reveal, from warping and delamination to other defects that could become a real headache on site.
Before you even think about loading up, make sure you're getting the standard 2440 x 1220 mm sheet size that's the norm here in the UK.
Here's a quick checklist to run through to avoid any nasty surprises:
- Run your eye along the edges. Are any plies loose or starting to separate?
- Scan the flat faces for any bubbles under the surface or signs of resin bleed.
- Look for the FSC® or PEFC™ certification stamps.
Why Certified Plywood Matters
Choosing plywood with those sustainability stamps isn't just about ticking a box; it's about responsible forestry. When you see the FSC® and PEFC™ logos on a sheet, you know you're getting timber from well-managed sources.
These marks are your assurance that ecosystems are protected and the entire supply chain is transparent.
The benefits are real:
- You have guaranteed legal timber, which removes any risk of using illicitly sourced materials.
- You’re directly supporting sustainable forest management practices.
- It adds value to your project, especially for clients who care about the environment.
Getting Hands-On: Inspecting Sheets for Quality
A proper inspection means getting your hands on the sheets. Don't be shy—lift a few boards from the stack to see what's hiding underneath. This is the best way to spot any hidden gaps between the veneers.
Rotate the sheets under good light. This simple trick makes it much easier to spot any core voids that a quick glance might miss.
"A few extra minutes checking sheets at the yard can save hours fixing panels later."
– Site Manager at Burnt Oak Builders Merchants
Double-Check the Grade and Thickness
Always check the stamped grade on the sheet. This tells you the quality of the face and back veneers, which is crucial. You don't want to pay for a high-quality finish if the panel is just being used for structural sheathing where appearance doesn't matter.
Confirm the thickness is right for your job—whether it's sturdy 18 mm for flooring or standard 12 mm for wall sheathing. A quick check ensures you’re not overpaying for something you don’t need.
Storing Plywood Correctly on Site
Once you get the plywood back to site, how you store it is critical. You need to keep the sheets perfectly flat on level bearers, or 'dunnage', to prevent them from bowing.
Use at least three bearers, spaced out evenly, to properly support the weight of the stack. Never, ever store plywood directly on the ground. Moisture will wick straight up from the soil and cause serious warping.
Cover the stack with a waterproof tarpaulin, but make sure you leave a bit of room for air to circulate. This stops condensation from building up underneath. It's also a good habit to keep different grades in separate stacks to avoid mix-ups when you're in a hurry.
This simple table shows the difference good storage makes:
| Storage Method | Risk Level | Resulting Damage |
|---|---|---|
| Direct on Soil | High | Warping and rot |
| Flat on Bearers | Low | Maintains flatness |
| Vertical Leaning | Medium | Edge deformation |
Just before you're ready to install it, let the plywood acclimatise to its final environment for at least 48 hours. This step is vital because it allows the moisture content of the wood to match the room, preventing the boards from expanding or shrinking after they've been fixed in place.
The UK plywood market can be a bit of a rollercoaster, with valuations ranging from £1.3 billion one year to a 3.5% drop to £490 million the next. It’s part of a wider UK wood-based panel market that hit £2.9 billion, with particleboard taking a 34.82% share. You can dig into these market trends over at Imarc Group (Discover market volatility).
Expert Tips for Moisture Control
Follow these simple rules to keep your boards in top condition:
- Label and rotate your stock every week to ensure even exposure.
- Use a moisture meter to make sure the moisture content stays within the ideal 8–12% range.
- Apply edge sealant to any cut edges immediately after you make the cut. This stops moisture from getting in.
Ready to find the right sheet for your next job? Take a look at our extensive ply collections at Burnt Oak Builders Merchants.
By taking the time to inspect, store, and acclimatise your plywood properly, you’re setting your project up for success and ensuring your panels perform exactly as you need them to.
Making the Right Choice for Your Project
With so many different types of plywood on the shelf, how do you know which one is right for your job? It can feel a bit overwhelming, but narrowing it down is simpler than you think. It really just comes down to asking a few key questions about what you need the panel to do.
Getting this right from the start saves you time and money. There’s no point paying a premium for a high-spec board when a basic one will do, but you also don't want to find out your project failed because the panel wasn’t up to scratch. A quick mental checklist is all it takes to match the right board to your project's demands.
Your Final Plywood Checklist
Before you head down to the merchants, take a moment to run through these questions. The answers will point you straight to the perfect sheet of ply.
- Interior or Exterior Use? This is the big one. If your board is going to see any weather or moisture, you absolutely need a panel with a Class 3 glue line (what we used to call WBP). Think exterior or marine plywood. For anything staying warm and dry indoors, a Class 1 or 2 bond is perfectly fine.
- What Strength Is Required? Is this for something structural that needs to take a serious load, like roofing or a subfloor? You'll be looking at a sturdy softwood or hardwood structural ply, usually 18mm or thicker. If you're building furniture or cabinets, a stable hardwood like birch ply offers that extra rigidity and a premium feel.
- How Important Is the Finish? If the surface is going to be on show and needs a lovely smooth finish for paint or varnish, you'll want a board with a better face grade, like B/BB. For structural work that's getting covered up, a more economical BB/CP or CP/C grade is the smart choice.
- What Is the Budget? Let's be practical. Softwood plywood gives you fantastic bang for your buck on general construction jobs. On the other hand, specialist panels like marine or birch ply carry a higher price tag that reflects their superior performance and appearance.
This handy decision tree gives you a quick visual guide for what to look for when you're inspecting, choosing, and storing your plywood.
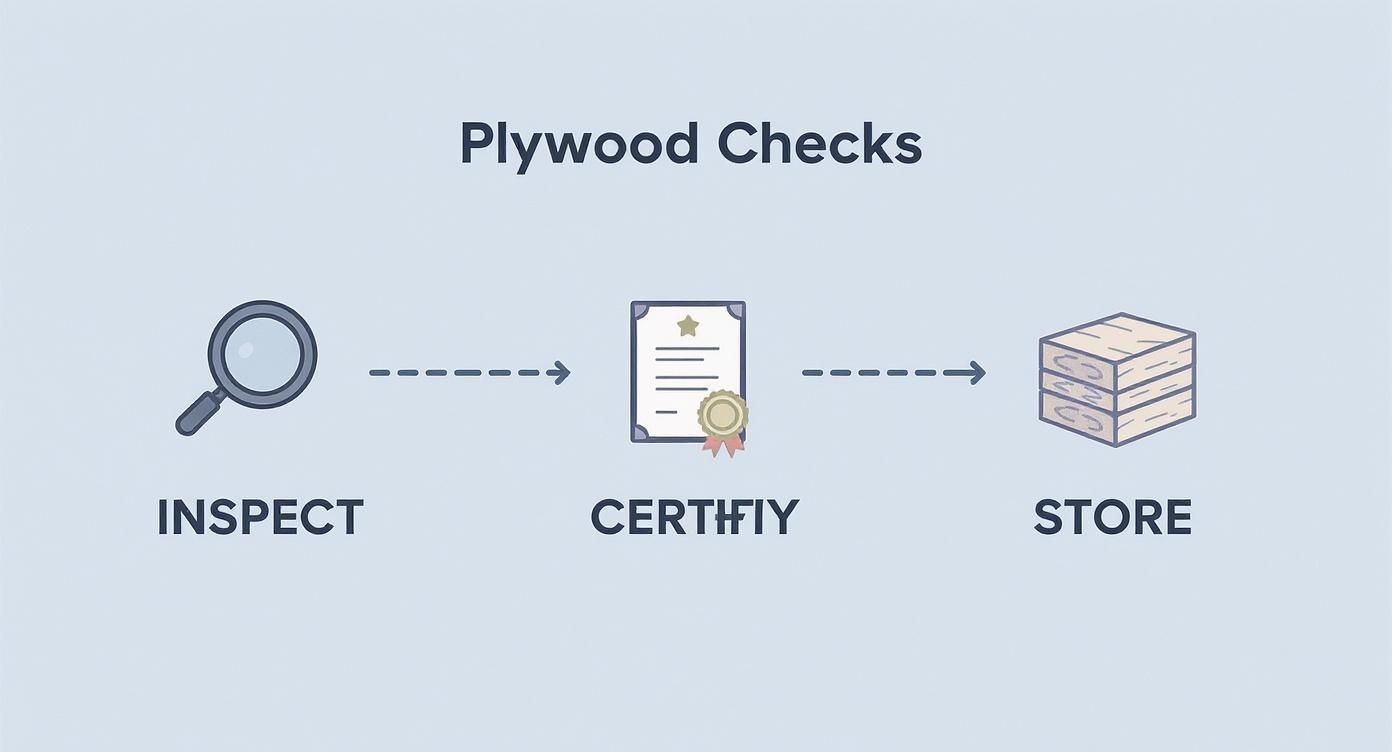
As the graphic shows, taking a systematic approach is key. It helps ensure the material you're buying is certified for the job and that you store it properly to keep it in top condition.
Plywood vs Other Sheet Materials
It's also worth asking if plywood is definitely the best material for your particular task. Sometimes, an alternative like OSB or MDF might be a better fit. OSB, for instance, is a great, cost-effective option for sheathing walls and roofs. Plywood, however, offers better impact resistance and a nicer surface for certain finishes.
MDF gives you that perfectly smooth face for painting, which is brilliant for decorative panels or furniture, but it just doesn't have the structural integrity or moisture resistance of plywood. When it comes to things like joinery, it’s worth weighing up the pros and cons of materials like solid wood vs plywood cabinets to make an informed choice.
Plywood's unique cross-laminated structure is what really sets it apart, giving it that fantastic blend of strength, stability, and versatility. It holds screws incredibly well and resists splitting, giving it a real edge over particle-based boards in both construction and joinery.
Your Plywood Questions Answered
We’ve covered a lot of ground on the different types of plywood, from the tough structural stuff to the more specialised panels. Now, let’s get into some of the practical, real-world questions we hear all the time here at the Burnt Oak counter.
What Does WBP Mean on Plywood?
You’ll see WBP a lot – it stands for 'Weather and Boil Proof'. It's not about the wood itself, but the type of powerful, waterproof glue used to bond the layers of veneer together. A WBP glue line is what stops the plywood from coming apart, or 'delaminating', when it gets wet.
Technically, the term is a bit old-school now and has been officially replaced by British Standards like BS EN 314. But in the trade, everyone still knows what WBP means. It's shorthand for a durable glue that's up to the job for exterior use. Just remember, while the glue is waterproof, the wood veneers still need sealing properly if the panel is going to be permanently exposed to the elements.
Can I Use Structural Plywood for Furniture?
You absolutely can, but it all boils down to the look you're going for. Your standard softwood structural ply is built for strength, not for showing off. It’s likely to have knots and a rougher surface, which makes it perfect for things like workshop benches, heavy-duty shelving, or cabinet carcasses that will be hidden away or painted over.
If, on the other hand, you want a beautiful, smooth finish where the grain is the star of the show, you'll want to reach for a hardwood ply. Something like Birch Plywood is a far better choice, with its clean face and solid core giving you that premium look needed for proper furniture making and high-end cabinetry.
What Is the Difference Between Marine and Exterior Plywood?
This is a common point of confusion. While both use a fully waterproof WBP adhesive, the real difference lies in the quality of the wood veneers and the strict standard they're built to.
- Marine Plywood: This is the best of the best. To earn the BS 1088 standard, it must be made from specific durable hardwood species. Crucially, its core must be solid, with absolutely zero gaps or voids between the layers. This is vital because it stops water from getting trapped inside the panel, which is what leads to rot.
- Exterior Plywood: This will also have a WBP glue line, but it’s often made with a softwood core and is allowed to have small, non-structural gaps in the inner veneers.
So, what does that mean for your project? For a shed roof that sees a bit of rain, a good quality exterior ply is perfectly fine. But for building a boat, lining a bathroom, or any situation involving constant damp and moisture, Marine Plywood is the only sensible choice for real peace of mind and long-term performance.
Do I Need to Sand Plywood Before Painting?
For a professional-looking finish, the answer is always yes. It's well worth taking a few minutes to give the sheet a light sanding before you get the primer out.
Even the smoother, higher-grade panels benefit from a quick once-over with a fine-grit sandpaper (around 120-180 grit). This simple step knocks down any tiny surface imperfections and gives the primer a much better key to grip onto.
If you’re working with a rougher structural sheet, you might need to start with a coarser grit and then move up to a finer one. And always remember to sand in the direction of the wood grain to avoid leaving visible scratches on that top veneer. Of course, the right materials are only half the battle; project success also depends on skill, so it can be useful to look into guides on finding quality carpentry services.
At Burnt Oak Builders Merchants, we keep a massive range of plywood in stock for any job you can throw at us, big or small. From structural panels to specialist sheets, you'll find exactly what you need with fast delivery across London.