
When you hear "tongue and groove," think of it like fitting together perfectly machined puzzle pieces. It's a classic woodworking joint, and for good reason. Each plank of timber has a protruding 'tongue' along one edge and a matching 'groove' cut into the opposite edge. This allows them to slot together flawlessly.
The result is a seamless, strong, and incredibly weatherproof barrier. It gives a clean, uniform finish that suits everything from traditional cottages to sleek, contemporary British homes.
Understanding Tongue and Groove Cladding
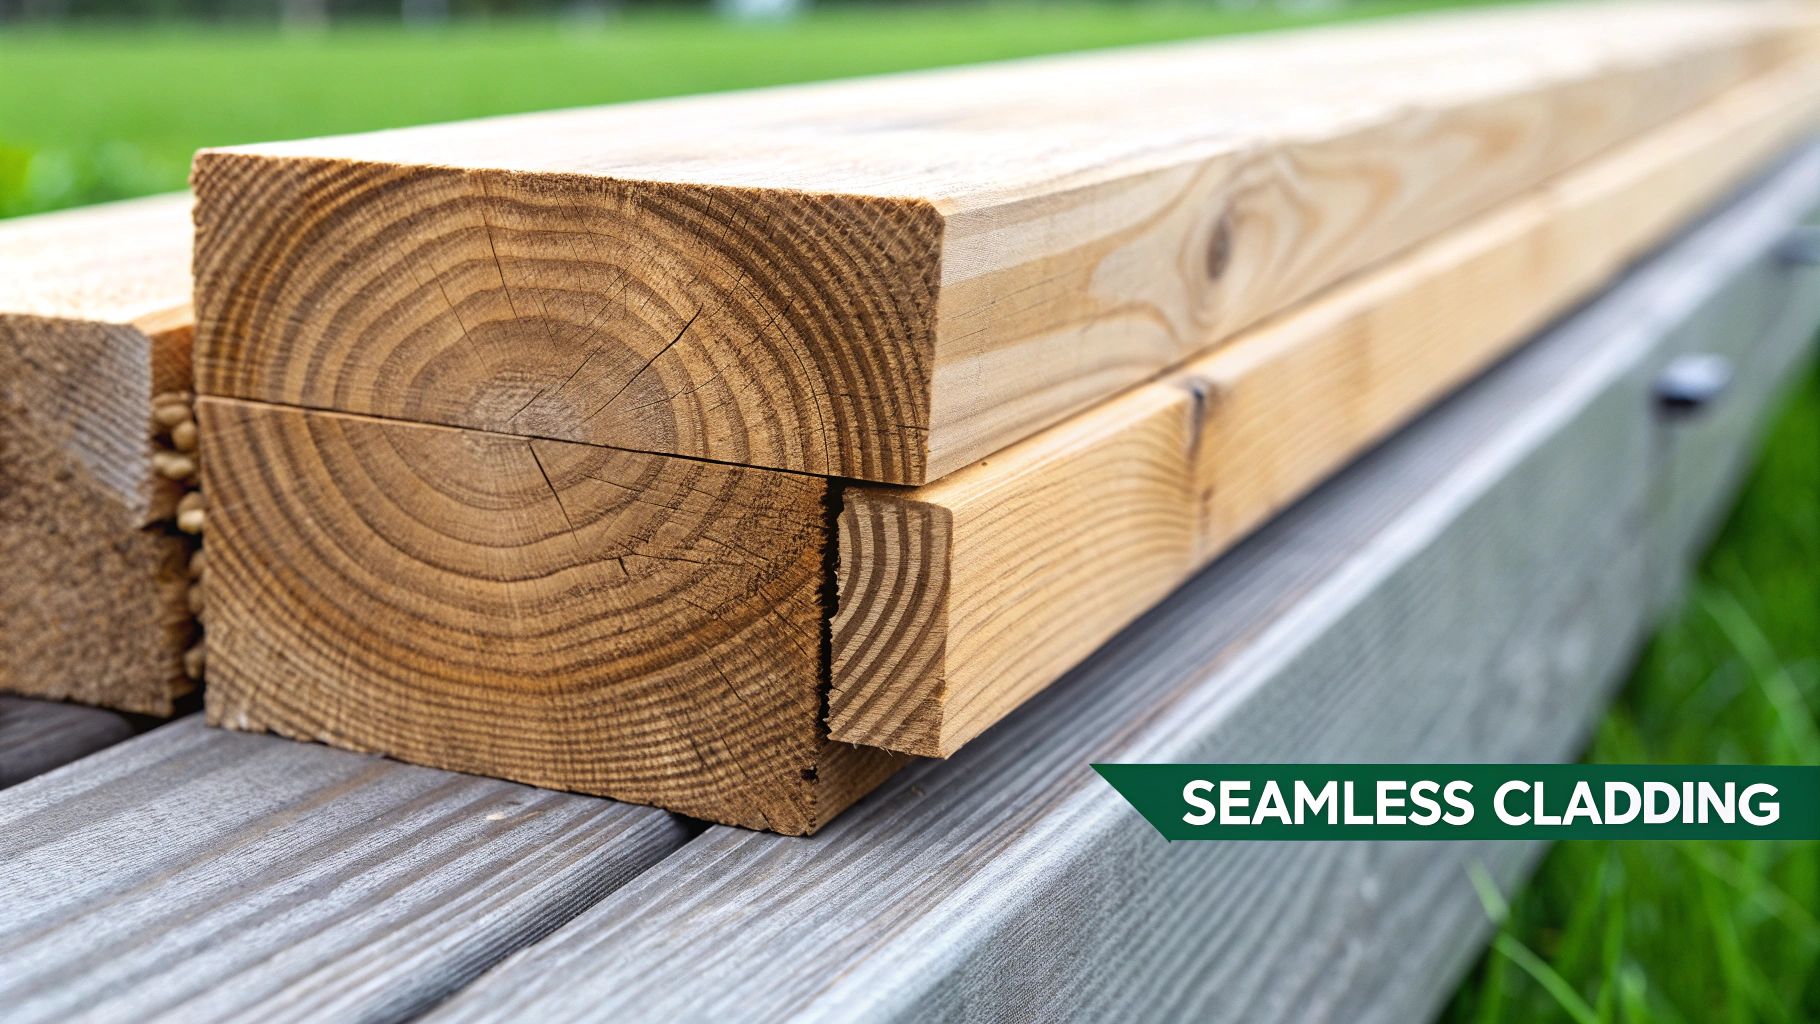
The interlocking system is the real genius behind tongue and groove cladding. It's not just a clever way to join two bits of wood; it creates a unified surface that stands up brilliantly to the famously unpredictable UK weather.
When you install it, the tongue of one board slides snugly into the groove of its neighbour. This simple but effective mechanism gives it a real edge over other cladding profiles. The tight fit is fantastic at keeping wind and rain out, preventing water from getting behind the boards far more reliably than simpler designs.
One of the best things about this method is how it hides the fixings. By nailing or screwing through the tongue just before the next board is slotted into place—a technique often called 'secret nailing'—you get a completely clean finish. No ugly nail heads in sight. This doesn't just look better; it also protects the fixings from the elements, stopping rust stains and potential weak spots from developing.
The Key Benefits of This System
The appeal of tongue and groove cladding is about much more than just its good looks. The practical advantages make it a go-to choice for all sorts of projects, whether you're building a garden office or cladding an entire house.
Here are the main benefits:
- Exceptional Weather Resistance: That interlocking joint is a formidable defence against driving rain, keeping the building's structure dry and sound.
- Structural Stability: Each board reinforces the next, spreading any stress across the entire surface and adding rigidity to the wall. This helps stop individual boards from twisting or warping over time.
- Aesthetic Versatility: The clean, continuous lines are what many people are after. You can install it horizontally for a classic, traditional feel or run it vertically to make a building seem taller and more modern.
- Improved Insulation: Because the joints are so tight, there are fewer air gaps. This naturally improves both the thermal and sound insulation of the building.
This time-tested joining method ensures the cladding acts as a single, cohesive shield for your property, rather than just a collection of individual planks. It’s this unity that gives it both its strength and its refined character.
If you want to dive deeper into the world of exterior timber, you can read a comprehensive homeowner's guide to timber external cladding for more insights. It backs up why choosing the right profile is so crucial for long-term performance and appearance, which is exactly what we'll explore next.
Choosing the Right Timber for Your Project
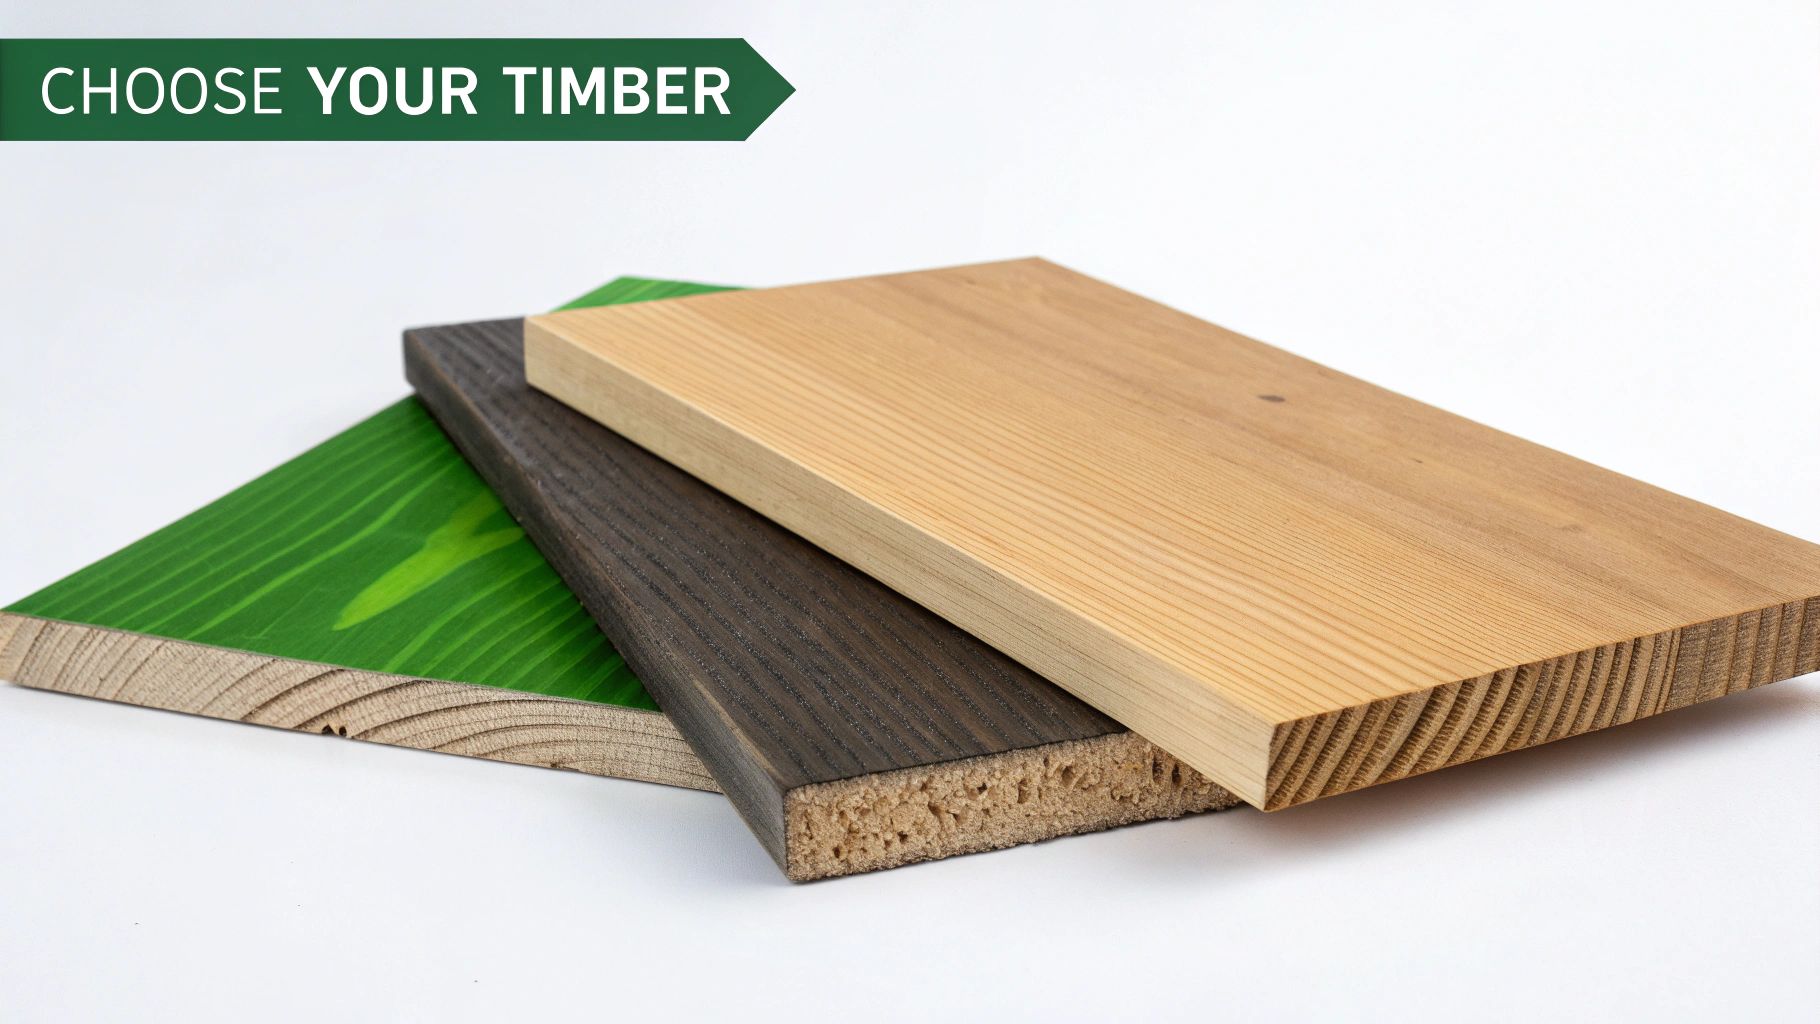
Picking the right wood for your tongue and groove timber cladding is without a doubt the most critical decision you’ll make. This single choice affects everything: the final look of your building, how long it will last, the maintenance it will need, and of course, the total cost.
The UK market is full of fantastic timber options, each with its own unique character and performance. You’ve got the rich, warm tones of Western Red Cedar, the tough resilience of Siberian Larch, and the budget-friendly reliability of treated softwoods. Getting to know the differences is the key to making a smart choice that fits your design, your budget, and the unpredictable British weather.
Popular Timber Species for Cladding
Every type of wood brings a different personality to a building’s exterior. Some are naturals when it comes to resisting decay, while others are chosen purely for their beautiful grain or how well they take a coat of paint. Let’s look at some of the go-to choices for external cladding here in the UK.
-
Western Red Cedar: Often seen as the top-tier choice, Cedar is famous for its stunning colour variations, from soft ambers to deep reddish-browns. It’s naturally very durable because it’s packed with preservative oils, making it a fortress against rot and insects. If you leave it untreated, it weathers beautifully into a distinguished silver-grey.
-
Siberian Larch: This is a seriously dense and durable softwood that offers incredible toughness for its price. Its high resin content acts as a natural shield against decay. It starts life as a pale yellow-brown and, just like Cedar, will turn a silvery colour over time if left to its own devices.
-
Treated Softwoods (e.g., Pine, Spruce): If you’re working to a tighter budget, treated softwoods are a brilliant, cost-effective solution. These timbers are pressure-treated with preservatives, giving them a big boost in durability and resistance to damp and pests. You can learn more in our guide to understanding pressure-treated timber.
-
Douglas Fir: Known for its impressive strength-to-weight ratio and a striking grain pattern, Douglas Fir is another solid, durable option. Its warm, pinkish-brown colour gives any property a classic, welcoming vibe.
With government investment in housing reaching around £9.6 billion in 2021/22, new builds are on the rise, and timber is often the cladding of choice for its good looks and insulating properties. This is why the market is set for steady growth of about 4-4.5% each year through to 2033.
Comparison of Popular Timber Cladding Species
To help you weigh up your options, this table gives you a side-by-side look at the most common timber species used for cladding in the UK. It breaks down the key factors to help you find the perfect match for your project's needs.
| Timber Species | Typical Cost per m² | Natural Durability | Maintenance Needs | Best For |
|---|---|---|---|---|
| Western Red Cedar | £70 - £120+ | Very High | Low (if left to silver) | Premium, contemporary projects where appearance is paramount. |
| Siberian Larch | £45 - £80 | High | Low (if left to silver) | Durable, cost-effective alternative to cedar with a modern aesthetic. |
| Treated Softwood | £25 - £50 | Moderate to High | Medium (requires recoating) | Budget-conscious projects, or where a painted finish is desired. |
| Douglas Fir | £50 - £90 | High | Low to Medium | Projects needing structural strength and a warm, traditional look. |
Ultimately, the "best" timber is the one that ticks the right boxes for your specific balance of aesthetics, budget, and long-term performance goals.
Demystifying Timber Grading
When you start shopping for timber, you’ll come across terms like 'unsorted', 'firsts', or 'grade A'. This is the grading system, and it’s all about classifying wood based on its visual appearance—things like the number and size of knots, the straightness of the grain, and other natural quirks.
Getting your head around timber grades is crucial because it directly affects the final look of your cladding. A higher grade means a cleaner, more uniform appearance with fewer knots. A lower grade gives you a more rustic, character-heavy finish.
Here’s a simple way to think about it:
-
Premium/Clear Grades (e.g., Grade A, No. 2 Clear & Better): This is the top-shelf stuff. You’ll find very few, if any, small, tight knots. The result is a clean, consistent look that’s perfect for sleek, contemporary designs.
-
Mid-Range Grades (e.g., Unsorted, Select): This is a really popular and practical choice, hitting that sweet spot between quality and cost. It allows for more sound knots and a few minor imperfections, giving you a classic, natural wood look that’s full of personality. 'Unsorted' is a common Scandinavian grade that actually mixes the best four grades, so you get great all-round quality.
-
Character/Knotty Grades (e.g., Sawfalling, Merchantable): This grade celebrates the wood’s natural features, with plenty of larger knots. It’s the perfect choice for creating a rustic, traditional, or barn-style feel where character is the name of the game.
Choosing the right grade is just as vital as choosing the right species. It’s what ensures the final look of your tongue and groove timber cladding perfectly matches your vision, whether that’s flawlessly modern or charmingly rustic.
Choosing Your Cladding's Profile and Finish
Once you've landed on the right species of timber, the real design work begins. It’s time to think about the profile and finish – the two elements that truly define the character of your building’s exterior. This is where you move from a broad concept to the fine details, influencing everything from the play of light and shadow across the walls to how much maintenance you’ll be doing in the years ahead.
The 'profile' of tongue and groove timber cladding is simply the shape of the board's face and how each one connects to its neighbour. While they all use the same clever interlocking system, small variations in the design can create dramatically different visual effects. Think of it as choosing the texture and style you want to achieve, whether that's clean and modern or something a bit more traditional.
Common Tongue and Groove Profiles
Every profile plays with sunlight in its own way, creating distinct shadow lines that give the surface its texture and depth. Getting your head around these differences is the key to achieving the look you're after.
Here are a few of the most popular profiles you'll see in the UK:
- V-Groove: This is probably the most common and versatile profile out there. Where two boards meet, a small 'V' shape is formed, creating a subtle shadow line. It adds just enough definition without being overpowering, making it a classic choice that works just as well on a sharp, contemporary extension as it does on a traditional garden room.
- Shiplap: While old-school shiplap was a simple overlap, modern tongue and groove shiplap borrows that aesthetic. It has a gentle, sweeping curve at the top of the board that covers the one below. This creates a clean, weatherproof channel that's perfect if you want a crisp, linear look.
- Bead and Butt: If you're going for a more decorative, period style, the bead and butt profile is a great option. It features a small, rounded 'bead' running along one edge. This adds a subtle, elegant detail that breaks up an otherwise flat surface, often used to create a more traditional or even coastal feel.
The profile is the architectural signature of your cladding. A simple V-groove offers understated elegance, while a more defined shiplap profile can create a bold, contemporary statement through strong horizontal or vertical lines.
Getting the Board Dimensions Right
It’s not just the profile shape that matters; the dimensions of the timber boards—their width and thickness—also play a huge part in the final look.
Wider boards tend to create a more expansive, modern feel with fewer joint lines, which can make them a great choice for larger walls. On the other hand, narrower boards produce a busier, more textured appearance that can feel more traditional or rustic. They're often a bit easier to handle during installation too, especially for DIY projects. The board's thickness, usually somewhere between 16mm and 25mm, also impacts its durability and stability, with thicker boards obviously offering more robustness.
A Look at Cladding Finishes
The finish is the final touch – it’s what gives your tongue and groove timber cladding its colour and its primary layer of protection. Your choice here will dictate not just the final shade and how much natural grain shows through, but also your future maintenance schedule.
| Finish Type | Appearance | Protection Level | Maintenance Frequency | Best For |
|---|---|---|---|---|
| Penetrating Oils | Brings out the natural grain and colour with a matt or satin finish. | Good UV and moisture protection that soaks right into the wood. | Re-apply every 2-5 years. | Showing off the natural beauty of timbers like Cedar or Larch. |
| Protective Stains | Adds translucent or semi-opaque colour but still lets some grain show. | Excellent UV and weather protection. | Re-apply every 3-7 years. | Getting a specific colour while keeping that natural wood feel. |
| Durable Paints | A solid, opaque colour that completely hides the wood grain. | The highest level of protection against weather and UV damage. | Re-apply every 5-10 years. | A bold, uniform colour finish or for use on treated softwoods. |
| No Finish (Natural) | Lets the timber weather naturally to a beautiful silver-grey patina. | None; you're relying on the timber's own natural durability. | Minimal; just the occasional clean. | Naturally durable species like Larch, Cedar, or Oak in low-pollution areas. |
Ultimately, picking the right profile and finish is a balancing act. You have to weigh up the look you want, your budget, and how much time you're willing to spend on upkeep down the line. By thinking carefully about how these elements work together, you can make sure your cladding doesn't just look fantastic on day one, but continues to protect and enhance your property for many years to come.
Best Practices for Cladding Installation
Let's be honest, a flawless installation is what separates a professional, long-lasting exterior from a project that’s just asking for trouble down the line. You can have the best tongue and groove timber cladding in the world, but if it’s not fitted correctly, it’s bound to fail. This is the practical, hands-on knowledge you need to get a durable, weather-tight, and stunning result.
The very first, and most important, step is prepping the substrate—that’s the wall you’re fixing the cladding to. Get this right, and you give your cladding a stable foundation and, crucially, the ventilation it needs to breathe. A well-ventilated cavity behind the boards isn't just a nice-to-have; it's essential for stopping moisture from getting trapped, which is the number one cause of rot and warping.
Setting Up the Substrate
Before you even think about putting up a single cladding board, you need to get the breathable membrane and support battens in place. This structure is what creates that all-important air gap.
-
Install a Breathable Membrane: This sheet gets fixed directly onto the building's sheathing. Think of it as a one-way gate for moisture. It lets water vapour from inside the wall structure escape, but stops any rain that might sneak behind the cladding from getting any further.
-
Fix Vertical Counter-Battens: If you’re installing your cladding boards horizontally, you first need to fix battens vertically to the wall. This is a critical step that ensures there’s a clear, unbroken channel for air to flow all the way from the bottom of the wall to the top.
-
Fix Horizontal Support Battens: These are the battens your cladding will actually be fixed to. For horizontal cladding, these battens run vertically. If you're fitting vertical cladding, they run horizontally. It’s absolutely vital they are perfectly level and spaced correctly—usually at 400mm to 600mm centres. Always use good quality, pressure-treated timber, like these 25mm x 50mm treated timber battens, to build a framework that will last.
This infographic shows the fundamental journey from a raw board to a finished cladding profile, highlighting the key stages of transformation.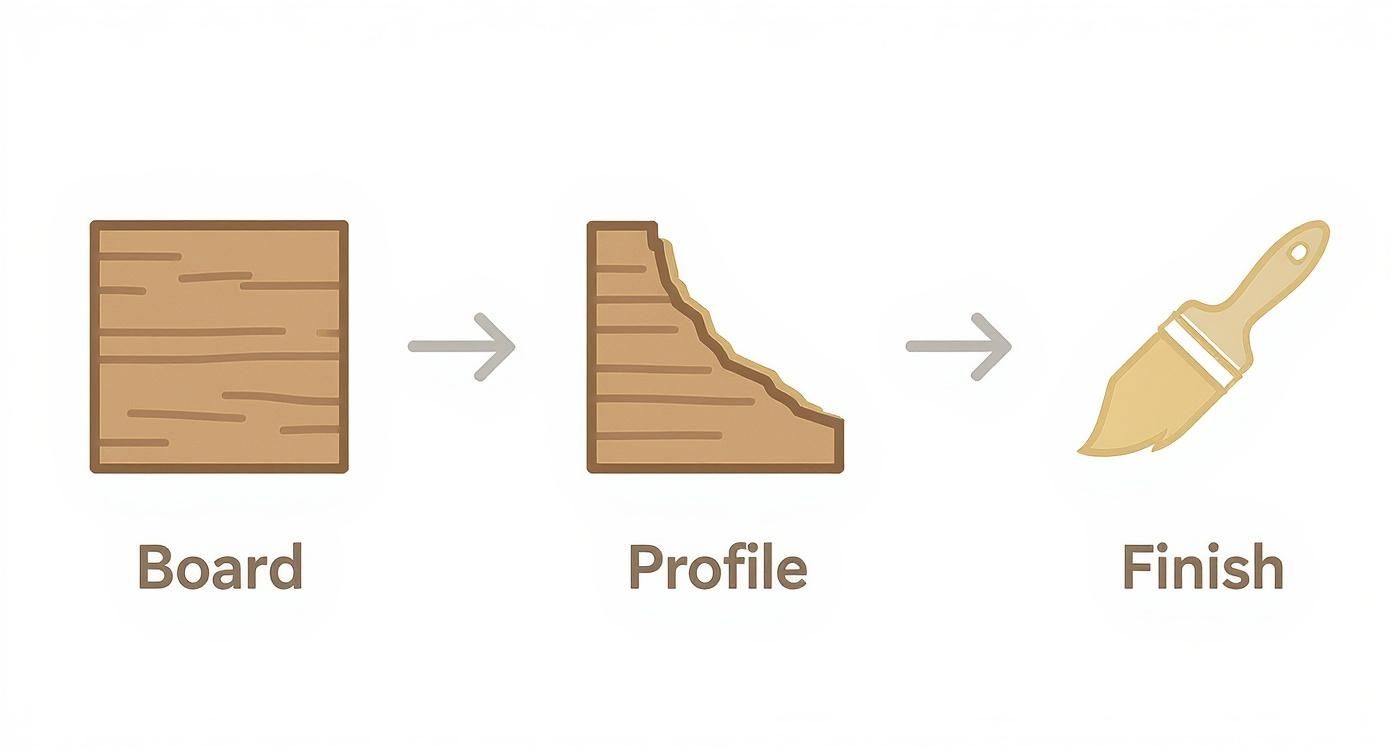
It really helps to visualise how a simple piece of timber is precisely machined to create that interlocking profile before it gets its final protective finish.
Face Fixing vs Secret Nailing
With your battens securely in place, it’s decision time. The two main ways to fix the boards are face fixing and secret nailing, and your choice here affects both the final look and the cladding’s stability.
-
Face Fixing: This is the traditional method, where you drive nails or screws straight through the face of the board into the batten behind. The fixings are visible, of course, but it gives the strongest possible hold. This makes it the go-to choice for wider boards (anything over 120mm) which have a greater tendency to move.
-
Secret Nailing (or Secret Fixing): For this technique, a single fixing is driven at an angle through the tongue of the board and into the batten. The groove of the next board then slides over, completely hiding the nail head. It gives you a beautifully clean, fixing-free finish and works best with narrower, more stable boards.
Choosing the right fixing method is a classic trade-off between looks and engineering. For that flawless, modern appearance on stable, narrow boards, secret nailing is fantastic. But for a more robust, rustic finish, or for any wider boards, face fixing is the reliable and structurally sound choice every time.
Key Installation Details
To sidestep the most common issues, you have to sweat the small stuff. Getting these details right ensures your cladding can handle the natural expansion and contraction that all timber goes through with changes in the weather.
Managing Expansion Gaps: Timber is a living material; it moves. You must leave a small expansion gap of 1-2mm between boards. This tiny space gives them room to swell slightly without buckling or warping. Don't forget to leave larger gaps at corners, around windows, and where the cladding meets the ground.
Using Corrosion-Resistant Fixings: The good old British climate is not kind to cheap metal. Always, always use stainless steel or hot-dipped galvanised nails or screws. If you use standard fixings, they will rust, leaving ugly stains running down your lovely timber and, eventually, they will fail completely.
Starting Level and Staying Level: The very first board is the most important one you'll fit. Get your spirit level out and make sure it is perfectly horizontal (or vertical). Every other board will follow its lead, so a small mistake here will become a massive, glaring one by the time you reach the top of the wall. Keep checking for level every few courses to keep things spot on.
Looking After Your Timber Cladding for the Long Haul
You've chosen a beautiful, high-quality tongue and groove timber cladding, and that’s a brilliant start. But the secret to keeping it looking fantastic for decades to come is all in the maintenance. Think of it as protecting your investment – a little care goes a long way in ensuring your cladding stands up to the famously unpredictable British weather.
How much you'll need to do really boils down to two things: the type of timber you picked and the finish you've gone for. Some woods are happy to be left to their own devices, while others need a bit more TLC to stay in top condition.
The Basics: A Good Clean and a Keen Eye
The absolute cornerstone of cladding care is regular cleaning and inspection. Honestly, a gentle wash once a year is often all it takes to shift the surface dirt, algae, and grime that can hold damp against the wood.
Grab a soft-bristled brush and some mild, soapy water, give it a light scrub, and rinse it down properly. One word of warning: steer clear of high-pressure jet washers. They can be far too aggressive, forcing water deep into the wood grain and behind the boards, which is the last thing you want.
While you're cleaning, it's the perfect time to give everything a quick once-over. Keep an eye out for:
- Cracks or Splits: Any significant cracks that look like they could let water penetrate?
- Loose Fixings: Are all the nails or screws still sitting tight and secure?
- Worn Finish: Check for any patches where paint, stain, or oil is starting to peel, flake, or look a bit thin.
- Blocked Gaps: Clear out any soggy leaves or debris from the bottom of the cladding. You need to keep that ventilation gap clear to let everything breathe.
Keeping the Colour: Re-coating and Protection
If you've opted for a finish to preserve the timber's original warm tones, you'll need to re-coat it every now and then. It's the sun's UV rays that do the most damage, causing colours to fade and protective finishes to break down over time.
As a rough guide, here's what you can expect:
- Oils: Usually need a fresh coat every 2-5 years.
- Stains: Can last anywhere from 3-7 years.
- Paints: Give you the longest window, often lasting 5-10 years before a top-up is needed.
Of course, these are just ballpark figures. A sun-blasted, south-facing wall will need attention much sooner than a sheltered, north-facing one. For softer timbers, it's also smart to use a good preservative to fend off pests and rot. A product like Ronseal Total Wood Preserver, applied before your final finish, gives you a solid defence against insects and decay.
The Easy Life: Embracing the Silver Patina
Then again, you could choose the path of least resistance. Naturally tough timbers like Western Red Cedar or Siberian Larch are renowned for their ability to look after themselves, with no finish required at all.
Left to the elements, these timbers will slowly and beautifully weather to a distinguished silver-grey patina. It's a look that’s hugely popular in modern design and means your maintenance schedule is pretty much just that annual wash-down.
This hands-off approach speaks to the incredible resilience of choosing the right timber from the start. It’s part of a bigger shift towards sustainable, low-maintenance building materials, which is really making waves in the construction world. The UK cladding market is projected to grow from £5.8 billion in 2024 to an estimated £10.7 billion by 2033, and timber's green credentials are a big reason for its growing popularity. If you're interested in the numbers, you can read the full UK cladding market research.
Budgeting Your Project and Navigating UK Regulations
Before you even think about cutting the first board of tongue and groove timber cladding, you need to get your head around two things: the costs and the rules. Getting your budget right and understanding your legal duties are the bedrock of any successful project. It's what separates a smooth, stress-free build from one that spirals into a mess of surprise costs and compliance headaches.
Creating a realistic budget means looking at the bigger picture. The timber itself is obviously the main ticket item, but it’s the supporting cast of materials, and potentially labour, that really brings the whole thing together.
Breaking Down the Costs
To get a proper handle on what you'll be spending, it helps to break it down into three main areas. This way, you’re far less likely to miss anything important.
-
Material Costs: This is where the bulk of your money will go. As we’ve covered, the price per square metre can swing wildly depending on the timber. Treated softwood, for instance, might set you back £25-£50 per m², but if you’re looking at something more premium like Western Red Cedar, you could be in the region of £70-£120+ per m².
-
Labour and Installation: If you aren’t tackling this yourself, you’ll need a pro. Hiring a good joiner or a cladding specialist is money well spent. In the UK, you can expect their day rates to be anywhere from £150 to £300, which will vary based on where you are and how complex the job is.
-
Essential Extras: It’s easy to forget the smaller bits, but they add up fast. We’re talking about treated timber battens for the framework, a good quality breathable membrane, fixings that won't rust (like stainless steel screws), and any oils, stains, or paints for the final finish. These extras can easily tack on another 15-20% to your total material cost.
Getting these costs down on paper is vital. The demand for sustainable building materials has made timber cladding incredibly popular. In fact, the UK timber cladding market was valued at around £860 million in 2024 and is expected to more than double by 2032. You can discover more insights about the UK timber cladding market on Verified Market Research.
Navigating UK Building Regulations
Once you've got the numbers sorted, it's time to think about the law. UK Building Regulations aren't just red tape; they're there to make sure buildings are safe and perform properly. For cladding projects, there are a few key regulations you absolutely cannot ignore.
Understanding your legal obligations is just as important as choosing the right timber. Ignorance of Building Regulations isn't a valid defence, and failing to comply can lead to costly remedial work ordered by your local authority.
Here are the main ones to get familiar with:
-
Fire Safety (Approved Document B): This is the big one. The rules around the fire performance of external walls are extremely strict, especially for buildings over 18 metres high or those close to a boundary line. Your choice of timber, and whether it needs a fire-retardant treatment, will be dictated by these regulations.
-
Thermal Performance (Approved Document L): Adding a layer of cladding is a great opportunity to boost your property's insulation. The regulations set out minimum standards for thermal efficiency, so this will influence the type and thickness of insulation you fit behind the boards.
-
Planning Permission: Many people assume cladding falls under "permitted development," but that’s not always a safe bet. It’s crucial to check with your local council. This is especially true if your home is a listed building, sits in a Conservation Area, or is in an Area of Outstanding Natural Beauty, as these designations carry very specific rules about what you can and can't do to a building's exterior.
Frequently Asked Questions About Timber Cladding
Even the most detailed plans can't cover everything. It's natural for questions to pop up along the way. Here are the answers to some of the most common queries we get from homeowners, architects, and builders about tongue and groove timber cladding.
How Long Does Tongue and Groove Cladding Last?
This is a great question, and the honest answer is: it depends. The lifespan of your cladding really comes down to the timber species you choose, the quality of the finish, and how well you look after it.
A naturally tough hardwood or a species like Western Red Cedar can easily last for 50 years or more with the right care. On the other hand, treated softwoods generally offer a service life of around 20-30 years. Ultimately, regular, simple maintenance is the secret to getting the most out of any timber cladding.
Can I Install Timber Cladding Myself?
If you're a skilled and confident DIYer, then yes, installing timber cladding is certainly achievable. The key is precision. It’s a job where getting the details right—like proper ventilation gaps and weatherproofing—is absolutely essential for a finish that lasts.
For larger projects or if you want that perfect, professional look, we usually suggest bringing in an experienced joiner. Their expertise can save you from common pitfalls that might not be obvious at first but can be costly down the line.
A professional installation ensures every detail, from the breathable membrane to the final fixing, is handled correctly. This not only guarantees a beautiful finish but also maximises the cladding's protective qualities and lifespan.
Does Timber Cladding Need Lots of Maintenance?
It really depends on the look you're going for. Many people are drawn to durable timbers like Siberian Larch or cedar because they want them to weather naturally. Left to their own devices, these woods will slowly turn a beautiful silver-grey, needing little more than an occasional wash down.
If you’d rather keep the timber’s original warm colour, you'll need to re-apply a UV-protective oil or stain. How often you do this depends on the product and how exposed the wall is, but you're typically looking at a weekend job every few years. For more tips and industry insights into timber care, the TimberCloud blog is a great resource.
Is Timber Cladding a Sustainable Choice?
Absolutely, as long as it’s sourced responsibly. This is non-negotiable. When you’re buying materials, always look for timber that is certified by organisations like the FSC® (Forest Stewardship Council®) or PEFC (Programme for the Endorsement of Forest Certification).
These certifications are your guarantee that the wood comes from forests managed in a way that protects them for future generations. It makes tongue and groove timber cladding a fantastic renewable, low-carbon, and environmentally sound choice for any building.
Ready to get your project started with top-quality, sustainably sourced timber? Burnt Oak Builders Merchants has everything you need, from a huge range of cladding profiles to all the essential fixings and finishes. Explore our selection and get expert advice at https://www.burntoaktimber.com.