Tackling a bathroom tiling project yourself is incredibly satisfying, but the secret to a great finish isn't just about sticking tiles on a wall. It all boils down to a few key stages: getting the right gear together, prepping your walls properly, planning the layout, applying the adhesive, and finally, grouting. Honestly, getting the preparation right is half the battle won before you even mix your first batch of adhesive.
Your Essential Tiling Toolkit and Materials
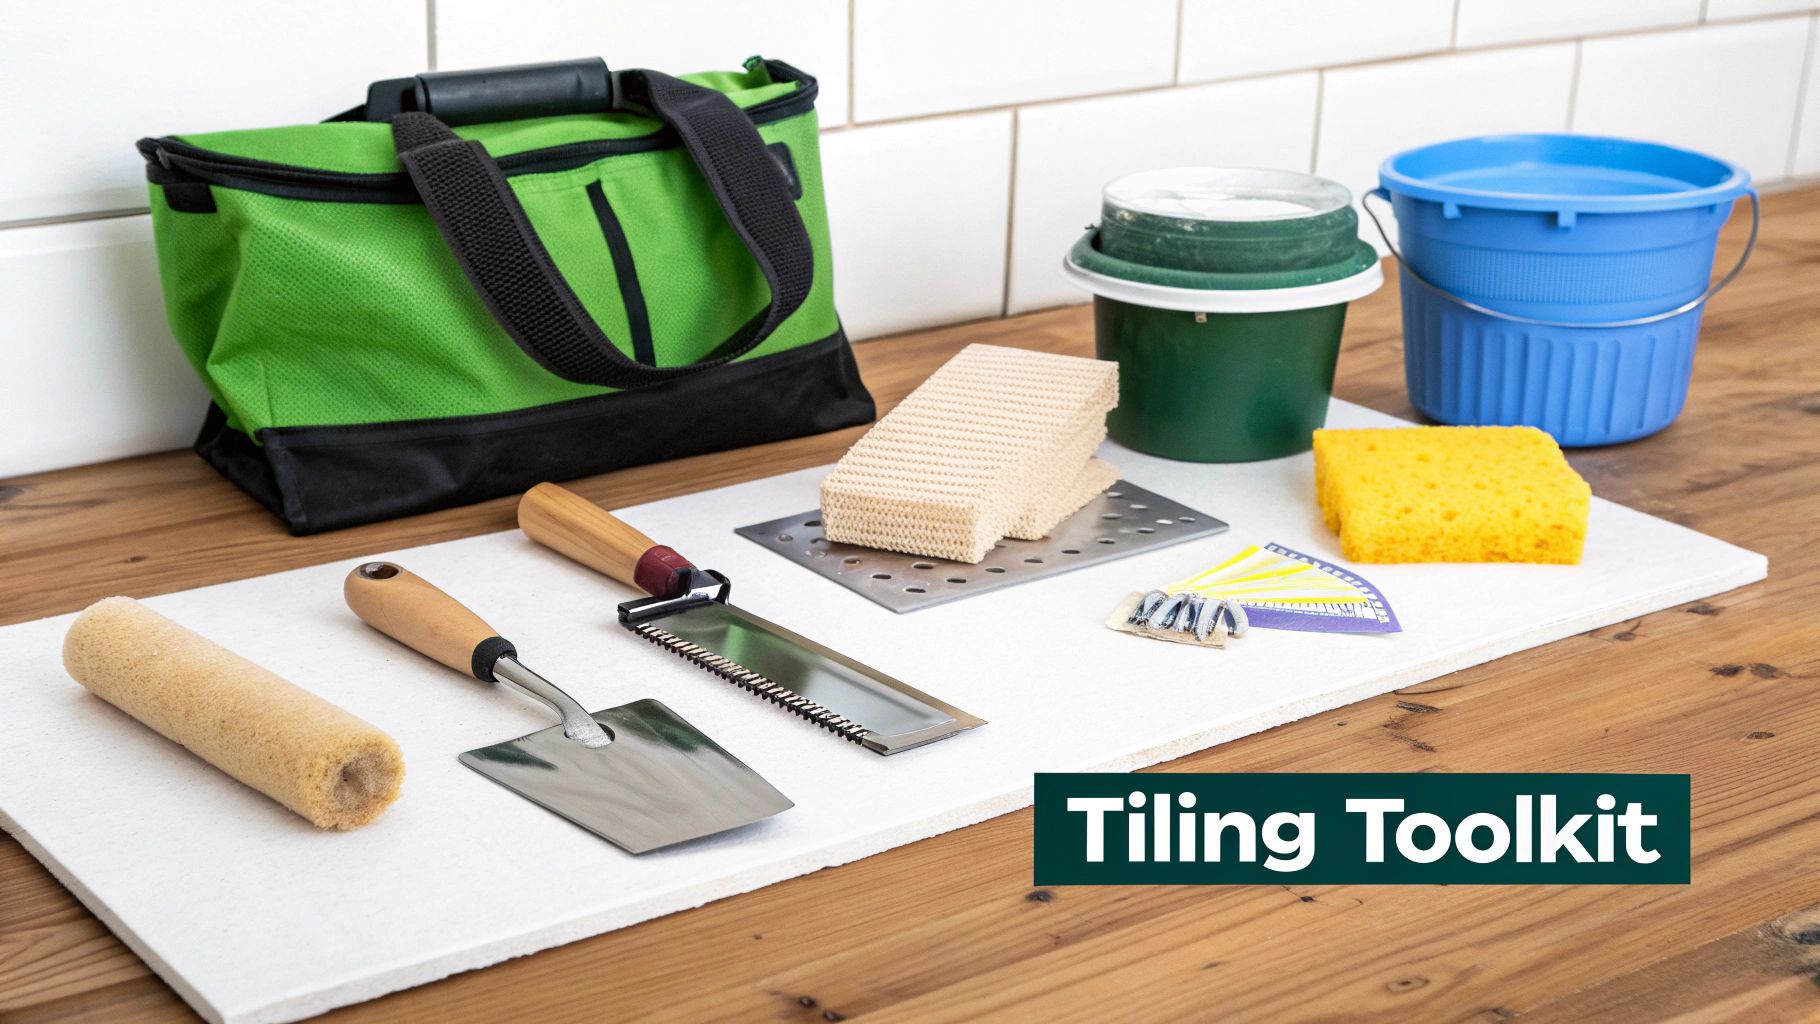
Before a single tile goes on the wall, let's talk about your kit. Having everything you need from the get-go is the difference between a professional-looking job and a frustrating weekend of endless trips to the hardware shop.
When you've got the correct tools and high-quality materials, the whole process feels less like a chore and more like a craft. Your work will not only be easier, but the finished product will be durable enough to handle years of splashes and steam. If you're building up your general DIY arsenal, we've got a great list of https://www.burntoaktimber.com/blogs/news/essential-tools-for-homeowners you might find handy.
Choosing Your Core Materials
First up, adhesive. You'll see big tubs of ready-mixed adhesive, and they look tempting, I get it. But for a bathroom, you really want to go with a powdered adhesive. When you mix it with water yourself, it sets off a chemical reaction that creates a much stronger, more water-resistant bond. This is crucial in a damp environment to stop tiles from working loose down the line.
Now for the fun part: the tiles. There's a huge variety out there, but in the UK, porcelain tiles are king, making up 38.5% of the market. There's a good reason for this – they absorb next to no water and are incredibly tough, which is exactly what you need for a wet area.
When thinking about materials for a bathroom, it's worth considering the floor as well as the walls. This ultimate guide to bathroom flooring has some great insights that can help you choose a cohesive look.
To help you budget, here's a quick look at the main materials you'll be buying.
Essential Tiling Materials Breakdown
| Material | Primary Use in Bathrooms | Typical Cost per m² (£) |
|---|---|---|
| Porcelain Tiles | Wall and floor coverings in wet areas due to low water absorption and high durability. | £25 - £60+ |
| Ceramic Tiles | A cost-effective option for walls, often in a wider variety of designs. | £15 - £45 |
| Powdered Tile Adhesive | Provides a strong, water-resistant bond essential for bathroom humidity. | £2 - £5 |
| Grout | Fills the gaps between tiles, providing a waterproof seal and finished look. | £1 - £3 |
| Silicone Sealant | Creates a flexible, waterproof seal in corners and around fixtures. | N/A (sold per tube) |
These prices are just a ballpark figure, of course. Designer tiles or specialist adhesives will cost more, but this gives you a solid starting point for planning your project's finances.
Must-Have Tools for the Job
A few tools are simply non-negotiable. You absolutely need a notched trowel, and the size of the notches (the teeth) needs to match the size of your tiles. Bigger tiles mean you need a trowel with deeper notches to lay down a nice, thick bed of adhesive. Simple as that.
Another bit of kit that will save you a world of pain is a good tile cutter. Whether you choose a simple manual scorer for standard ceramic tiles or a wet saw for cutting tough porcelain, it’s an investment you won’t regret. Clean, precise cuts are the hallmark of a job well done.
I see it all the time – people focus on the big-ticket items and forget the small stuff. Make a list and check it twice. Having tile spacers, a spirit level, a couple of buckets, sponges, and a grout float on hand before you start will make the entire process flow so much better.
Preparing Your Bathroom Walls For Tiling
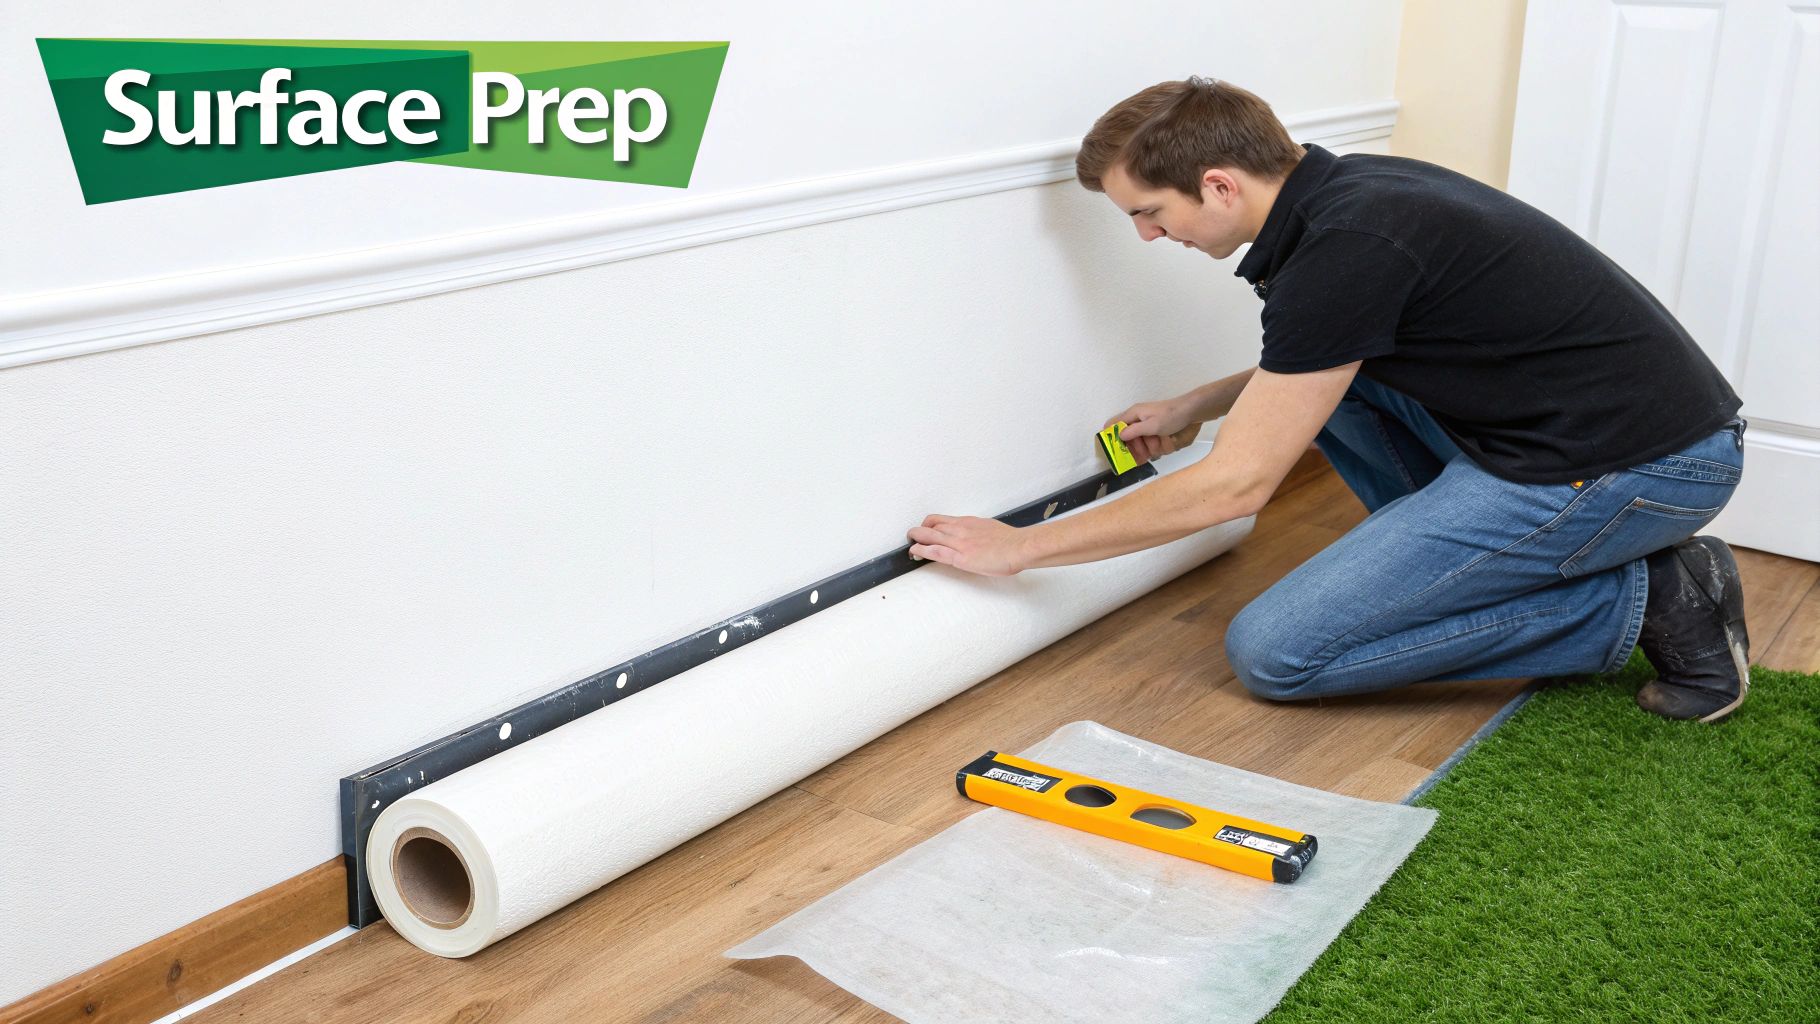
Honestly, the success of your whole tiling project is decided long before you even lay the first tile. Proper, solid preparation is the bedrock of a professional finish that will last for years, so whatever you do, don't be tempted to rush this stage.
Cutting corners here is a false economy. It almost always comes back to bite you later in the form of cracked grout, loose tiles, and damp problems. The goal is simple: get the wall surface completely clean, perfectly dry, and structurally sound before you even think about mixing your adhesive.
Assessing Your Wall Surface
First things first, you need to understand exactly what you're working with. Before you start pulling things down, have a thorough inspection of your bathroom walls for any underlying issues. Learning to spot the critical signs of water damage now can save you from a world of hurt down the line.
Your game plan will shift a bit depending on what you find:
- Fresh Plasterboard: This is a great starting point. Your main job is to ensure the joints are properly taped and filled. After that, seal the entire surface with a suitable plasterboard primer—never tile directly onto the unsealed paper face.
- Skimmed Plaster: Brand new plaster needs to be bone dry, and that can take several weeks, so be patient. Once it's fully cured, it absolutely needs sealing with a good primer. This stops the thirsty plaster from sucking all the moisture out of your tile adhesive too quickly, which weakens the bond.
- Painted Walls: Give the surface a light sanding to scuff up any gloss finish. This creates a "key" that helps the adhesive grip. Then, wash the walls down with sugar soap to get rid of any grime, rinse it off, and let it dry completely.
- Old Wallpaper: This is non-negotiable—it has to come off. Tiling over wallpaper is a recipe for disaster. The moisture in the adhesive will just cause the paper to peel away from the wall, taking your lovely new tiles with it. You can learn about the https://www.burntoaktimber.com/blogs/news/best-way-to-strip-wallpaper to make sure you get a clean surface.
Creating a Flat and Stable Surface
With the wall clean and stripped back, it's time to check how flat it is. Grab a long spirit level or even just a straight piece of timber and run it across the surface in every direction—horizontally, vertically, and diagonally.
You're hunting for any dips or bumps. Any variations greater than 3-4mm over the length of your level need fixing. You can fill small hollows with a bit of tile adhesive or a suitable filler, and carefully sand down any high spots.
A common mistake is just assuming a wall is flat when it isn't. Tiling onto an uneven surface will result in a poor finish with "lippage"—where one tile edge sits higher than its neighbour—and can also create a weak bond. Taking an extra hour to get the wall perfectly flat at this stage is time very well spent.
The Importance of Waterproofing
Finally, let's talk about waterproofing, often called "tanking." In wet areas like showers, around baths, and in dedicated wet rooms, this is an absolutely non-negotiable step in the UK. Remember, plasterboard and standard plaster are not waterproof. Moisture getting through the grout can cause serious, expensive structural damage.
A good tanking kit will come with a primer, a liquid-applied waterproof membrane, and special tape for sealing the corners and joints. You'll typically paint on two coats of the membrane, letting it dry fully between each one. This process creates a completely sealed, tank-like barrier that protects your walls and gives your tiles the perfect base to stick to.
Planning Your Layout and Making Clean Cuts
A professional-looking job is all in the planning. This is where you map everything out to avoid the classic DIY pitfall: finishing with awkward, sliver-thin tile cuts in the most visible spots, like right by the door or along the top of the wall. Honestly, a bit of forethought here makes all the difference.
Start by finding the true centre of your main wall. Grab your tape measure to find the horizontal midpoint and use your spirit level to draw a faint vertical line. Repeat the process to find the vertical centre and draw a horizontal line across. These two lines are your guides, your starting point for a balanced, symmetrical layout.
Choosing a Tile Pattern
The pattern you pick can completely change the vibe of your bathroom. While it often boils down to personal taste, it's interesting how regional trends can influence what's popular. For instance, the Midlands accounts for over 50% of the UK ceramic tiles market, and you can see how that shapes the styles available nationwide. It's worth a look into the UK ceramic tiles industry to understand what drives these trends.
So, what are your main options? Let's break down the most popular choices.
Comparing Common Tile Patterns
The layout you choose is more than just an aesthetic decision; it affects the installation process and how spacious the room feels. Here’s a quick comparison of the go-to patterns to help you decide which one is right for your project.
| Pattern | Visual Effect | Installation Difficulty | Best For |
|---|---|---|---|
| Grid (Stack Bond) | Creates a clean, modern, grid-like look. Simple and minimalist. | Easiest | Small bathrooms where you want an uncluttered, contemporary feel. |
| Brick (Running Bond) | Classic, traditional pattern where each row is offset by half a tile. | Easy | Hiding imperfections on slightly uneven walls and adding timeless character. |
| Herringbone | Dynamic and visually striking pattern using rectangular tiles. | Hardest | Feature walls behind a basin or in a shower enclosure to create a focal point. |
Each pattern brings its own character to a space. While a simple grid is straightforward and modern, something like herringbone requires more cuts and careful planning but delivers a huge visual impact.
Once you’ve settled on a pattern, do a “dry lay.” This is a crucial step. Just place a row of tiles along the bottom of the wall, using your spacers to get the gaps right. This quick test shows you exactly how the tiles will land at each end, letting you shift your starting point to get nice, balanced cuts on both sides.
Mastering Tile Cuts
With your layout locked in, it’s time to start cutting. The tool for the job really depends on the tiles you've chosen.
For most standard ceramic tiles, a manual tile scriber is your best friend. You just score a line across the tile's surface and snap it cleanly. It's surprisingly satisfying, not to mention quick, quiet, and virtually mess-free.
But if you're working with tougher stuff like porcelain or natural stone, you'll need to bring in the big guns: a wet saw. This machine uses a diamond-tipped blade and a stream of water to power through dense materials. The water is key—it keeps the blade cool and stops dust from flying everywhere, leaving you with a factory-perfect edge.
No matter what you're using, always live by the carpenter's motto: measure twice, cut once. It sounds simple, but taking that extra second to double-check your marks will save you a world of frustration (and a fair bit of cash).
And please, don't forget your safety gear. Goggles and gloves are non-negotiable. Tile edges are incredibly sharp, and small fragments can fly off during cutting. A few simple precautions will keep your project safe from start to finish.
Applying Adhesive and Setting Your Tiles
With all the prep work done and your layout meticulously planned, we're at the exciting part: actually getting tiles on the wall. Technique is what separates a decent job from a brilliant one, and how you handle the adhesive and place each tile will make all the difference to the final look and how long it lasts.
First things first, let's mix that powdered adhesive. You're aiming for a consistency a bit like thick custard or smooth peanut butter. A good test is to scoop some onto your trowel – it should hold its shape without slumping straight off. Always add the powder to the water, not the other way around. This little trick helps prevent lumpy, unmixed clumps from forming at the bottom of your bucket.
Spreading Adhesive The Right Way
Once your adhesive is perfectly mixed, it’s time to get it on the wall. Grab your notched trowel and use the flat side to skim a thin, even layer over a small area. I can't stress this enough: only work in sections of about one square metre at a time. This stops the adhesive from skinning over and drying out before you've had a chance to set the tiles into it.
With that initial layer on, flip the trowel over to the notched side. Hold it at a consistent 45-degree angle and comb through the adhesive. This creates those uniform ridges that are so vital for a good bond. When you press the tile into them, the ridges collapse and spread out, giving you an even bed and eliminating air pockets.
This infographic breaks down the workflow perfectly. You measure, find your centre, and get all your cuts sorted before you even think about mixing up.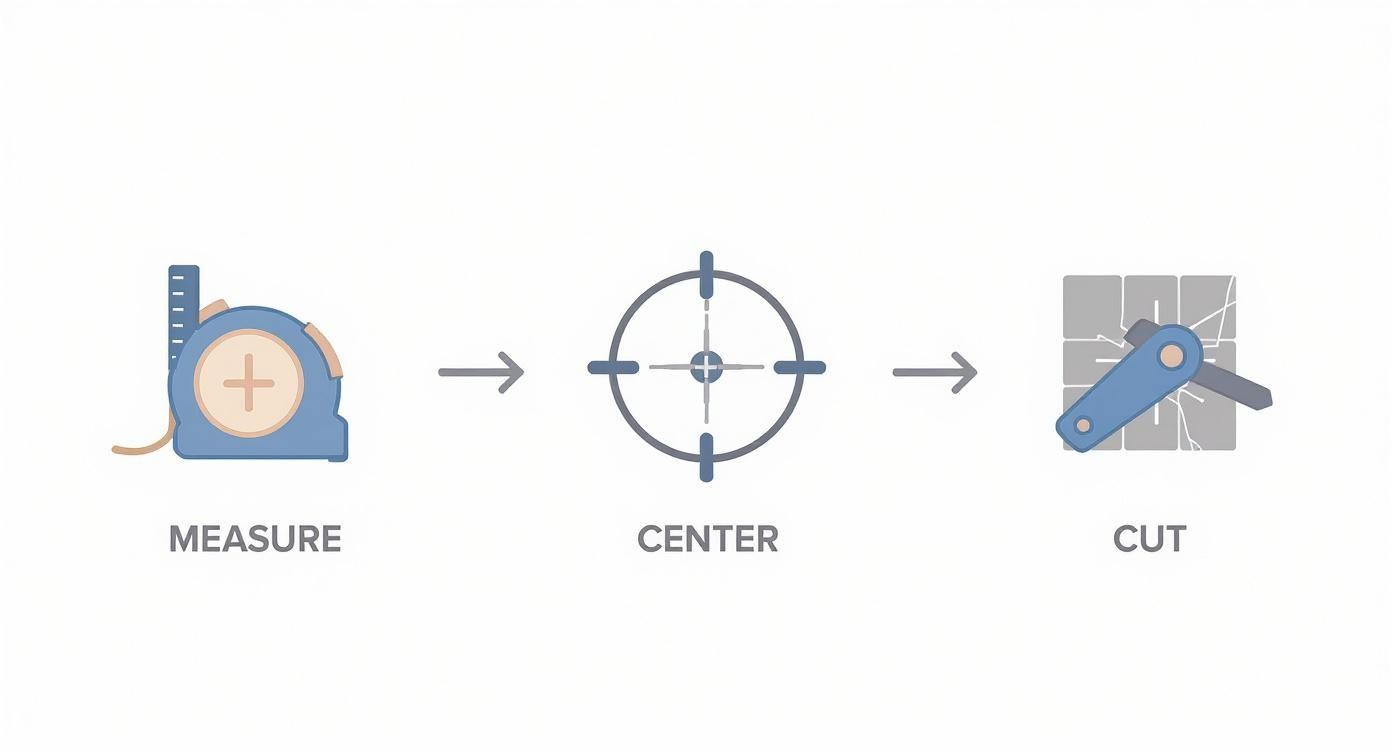
Following this sequence means that once the adhesive is on the wall, you can get into a smooth rhythm without stopping to measure or cut.
Setting Your Tiles With Precision
Now for the main event. Take your first tile and press it firmly into the adhesive with a slight twisting or wiggling motion. This little bit of movement is key to collapsing those ridges properly, ensuring full adhesive coverage and a rock-solid grip.
Place your next tile beside the first, and don't forget to pop tile spacers in between them. These little plastic crosses are your best friend for getting perfectly straight, even grout lines. They'll keep your whole layout from drifting out of alignment as you move along the wall.
Keep your spirit level within arm's reach. After setting every couple of tiles, and definitely at the end of each row, lay the level across the top. Is it perfectly flat and straight? It's a hundred times easier to nudge a wet tile into place than it is to live with a wonky row you only spotted once the adhesive had set.
As you go, keep a damp sponge handy and wipe off any adhesive that oozes out onto the face of the tiles. If you let it dry, you’ll have a real battle on your hands trying to chip it off later, and you risk scratching the glaze. This kind of 'clean as you go' approach is what every professional tiler does, and it's fundamental to achieving that clean, polished finish.
Grouting and Sealing for a Professional Finish
Now that your tiles are set and the adhesive has cured, it's time for the final touches that really make the project sing. Grouting and sealing aren't just for looks; they are absolutely crucial for protecting your walls from moisture and keeping mould at bay. This is what ensures your hard work stands the test of time.
First up, you need to pick a grout colour. This single choice has a massive impact on the final aesthetic. If you want a seamless, uniform look that can make a small bathroom feel more spacious, go for a grout that matches your tiles. On the other hand, a contrasting colour—like a dark grey against classic white tiles—creates a bold, graphic pattern that makes each tile pop. It's all about the style you're after.
Getting the Grout On
Once you've made your choice—a quality product like Mapei Ultracolour Plus Grout is always a good bet—it's time to get mixing. Follow the instructions on the packet to the letter, aiming for a smooth consistency, a bit like toothpaste. No lumps!
Take your grout float and start working the mixture into the joints. The key here is to hold the float at a 45-degree angle to the wall. Press firmly and sweep diagonally across the tiles. This diagonal movement is vital—it forces the grout deep into the gaps and stops you from accidentally scooping it back out as you go. It's best to work in small, manageable areas so the grout doesn't start drying before you're ready.
The Clean-Up and Haze Removal
The real art of grouting lies in the clean-up. You have to get the timing just right. Let the grout firm up in the joints for about 20-30 minutes. You'll know it's ready when it's firm to the touch but hasn't completely hardened.
Grab a grouting sponge and a bucket of clean water. Wring the sponge out so it's damp, not soaking wet. Gently wipe the excess grout off the face of the tiles, again using that diagonal motion. Remember to rinse your sponge out regularly to avoid just spreading grout around.
As the wall dries, you'll notice a light chalky film—a grout haze—forming on the tiles. Don't panic, this is normal! Just wait a few hours and then buff it off easily with a clean, dry microfibre cloth.
A word of caution: The most common mistake I see is people cleaning up too soon with a sponge that's far too wet. This pulls the fresh grout right out of the joints, leaving you with an uneven finish and creating weak spots where water can seep in. A little patience here makes all the difference.
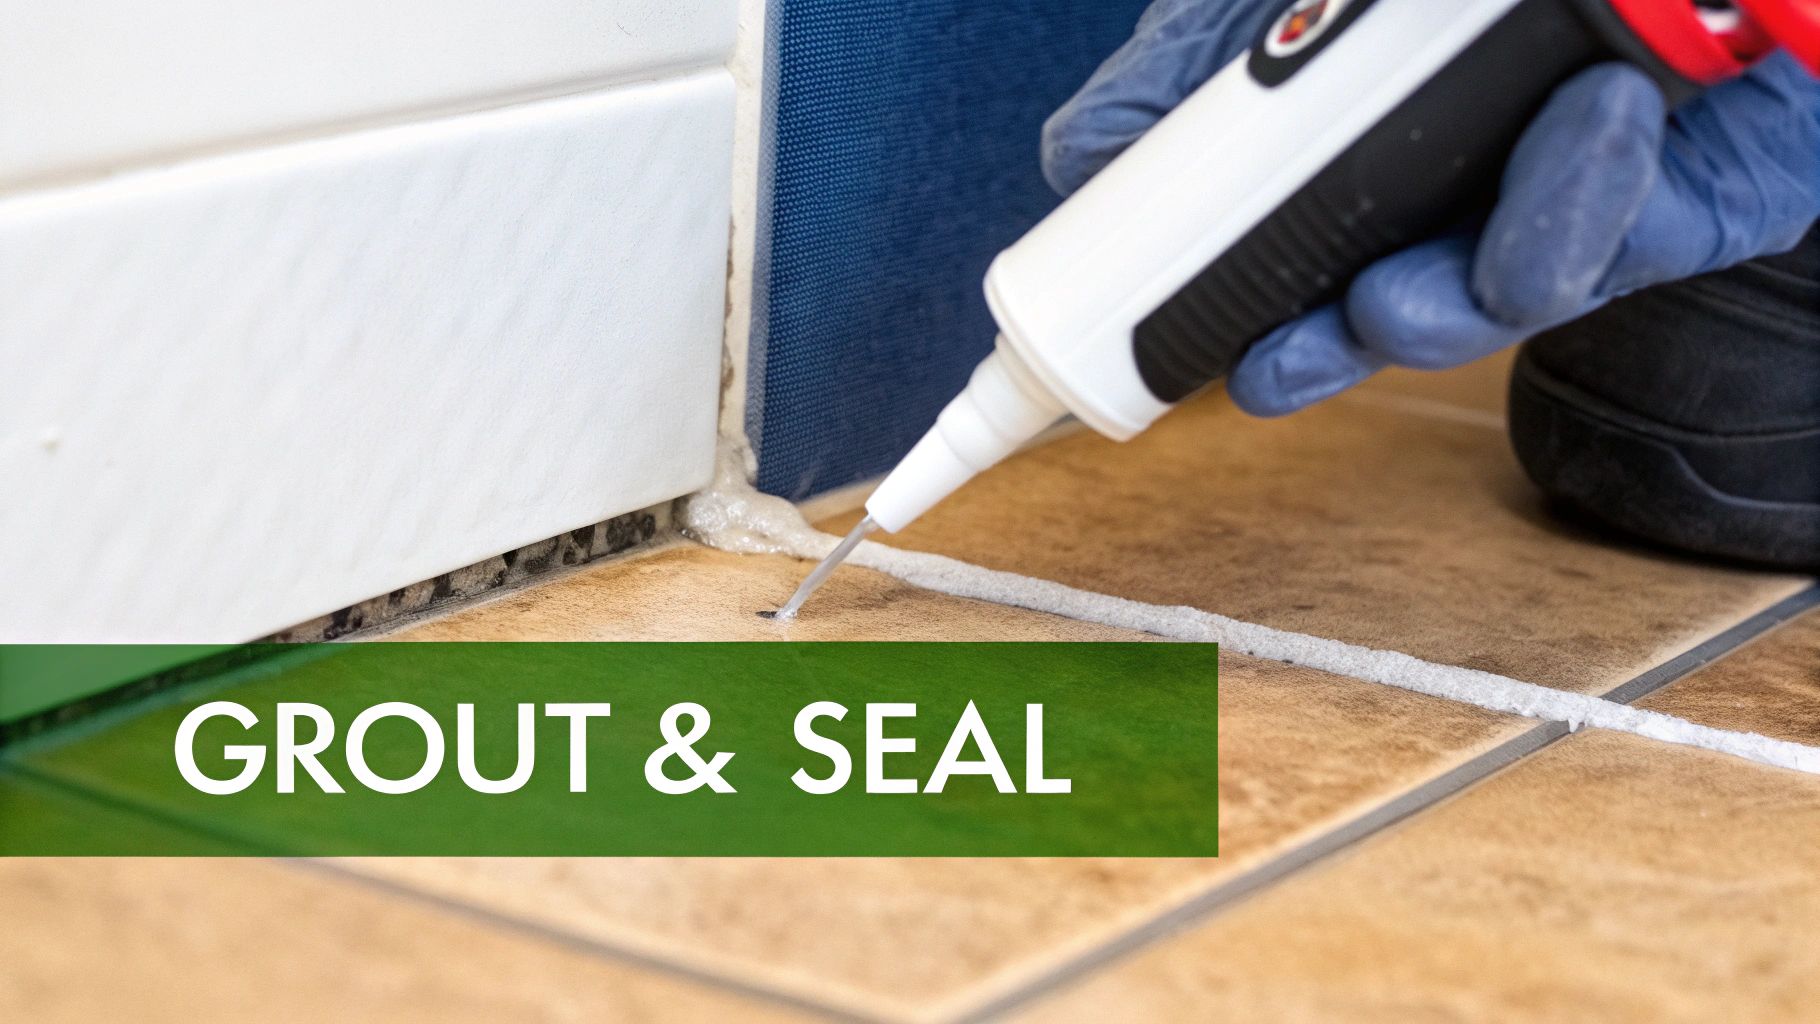
Sealing the Corners for a Watertight Finish
Your final job is to tackle the internal corners and any junctions where walls meet floors, baths, or shower trays. These areas are prone to slight movement, so rigid grout will eventually crack. For these, you need a flexible, waterproof silicone sealant.
Apply a steady, neat bead of silicone, then smooth it out with a sealant finishing tool (or even just a wet finger) to get that clean, professional line. This creates a durable, waterproof barrier that's essential in any bathroom.
Thinking about the budget for these materials is wise. It's worth remembering that rising production costs can influence material prices, and with the UK's ceramic tiles market projected to grow, planning for these expenses is key. Ensuring these final steps are done right protects your beautiful new wall from leaks and cracks for good.
Tackling Common Tiling Questions
Even the most seasoned DIYer runs into a few head-scratchers during a tiling project, so it’s only natural to have questions. To keep you moving forward with confidence, here are some answers to the queries we hear most often from people tiling bathroom walls for the first time.
Can I Just Tile Straight Over My Old Bathroom Tiles?
Look, the short answer is yes, you can, but it’s a big "if". For this to even be a possibility, the existing tiles have to be rock-solid—no movement, no hollow sounds when you tap them, and perfectly flat. You'd need to give them a serious clean to get rid of every last bit of soap scum and grease, then scuff them up and use a special primer to create a 'key' for the new adhesive to grab onto.
Honestly though, it’s rarely the best idea. You’re adding a huge amount of extra weight to the wall. Plasterboard can only handle so much, typically around 32kg per square metre (that’s tiles, adhesive, and grout combined), and doubling up on tiles can easily push you over that limit. For a job that will last and look truly professional, taking the old tiles off and starting with a fresh, clean surface is always the right move.
How Long Do I Need to Wait Before I Can Start Grouting?
This is one of those times where patience really pays off. How long you wait comes down to one thing: the adhesive you used. Always, always check the manufacturer’s instructions on the bag or tub—that’s your definitive guide.
But for a rough idea:
- Standard ready-mixed adhesives often need a good 24-48 hours to cure properly before you can think about grouting.
- Rapid-set powdered adhesives are much quicker, sometimes ready for grout in as little as 3-4 hours.
Jumping the gun and grouting too early is a classic mistake. It traps moisture behind the tiles, which stops the adhesive from setting properly and can lead to loose tiles down the road. Fight the urge to rush this bit; it's vital for a durable finish.
What’s the Best Tile to Use for a Shower Wall?
For a shower that gets used every day, you can’t go wrong with porcelain tiles. They are incredibly dense and barely absorb any water (less than 0.5%), which makes them practically waterproof and tough as nails.
Glazed ceramic tiles are another solid choice and are usually a bit friendlier on the wallet. The glaze on the surface acts as a protective barrier against water. Natural stones like marble or slate are stunning, no doubt, but they're porous and need sealing regularly to stop water from staining them. For a shower that’s low-maintenance and built to last, porcelain is the champion.
A quick tip from experience: People often fall for the intricate look of small mosaic tiles for a whole shower. They can look fantastic, but just remember that more tiles means a lot more grout lines. That translates to much more scrubbing to keep it all looking fresh and free from mildew.
How Do I Cut Tiles to Fit Around Pipes?
Ah, the dreaded pipe cut-out! This is a rite of passage for every tiler. A tile nipper is a great tool for this job. You simply mark out the curve you need and then "nibble" away small chunks of the tile until it fits snugly. A handheld tungsten-carbide rod saw also works well for these fiddly shapes.
If you need a perfectly clean, round hole, a diamond-tipped hole saw on the end of a drill is the best tool for the job. And for square cut-outs around things like shaver sockets or light switches, a small angle grinder with a diamond blade gives you the cleanest, most controlled cut.
At Burnt Oak Builders Merchants, we're here to help you get your project right the first time. From friendly, expert advice to a full stock of tiling supplies, we've got everything you need to transform your bathroom. Find all your building materials on our website.