
When we talk about tanking in construction, we’re essentially describing how to make a below-ground structure completely waterproof. The name says it all: you’re creating a sealed, watertight ‘tank’ out of a basement or cellar to stop water from the surrounding earth from getting in.
Understanding Tanking and Its Crucial Role
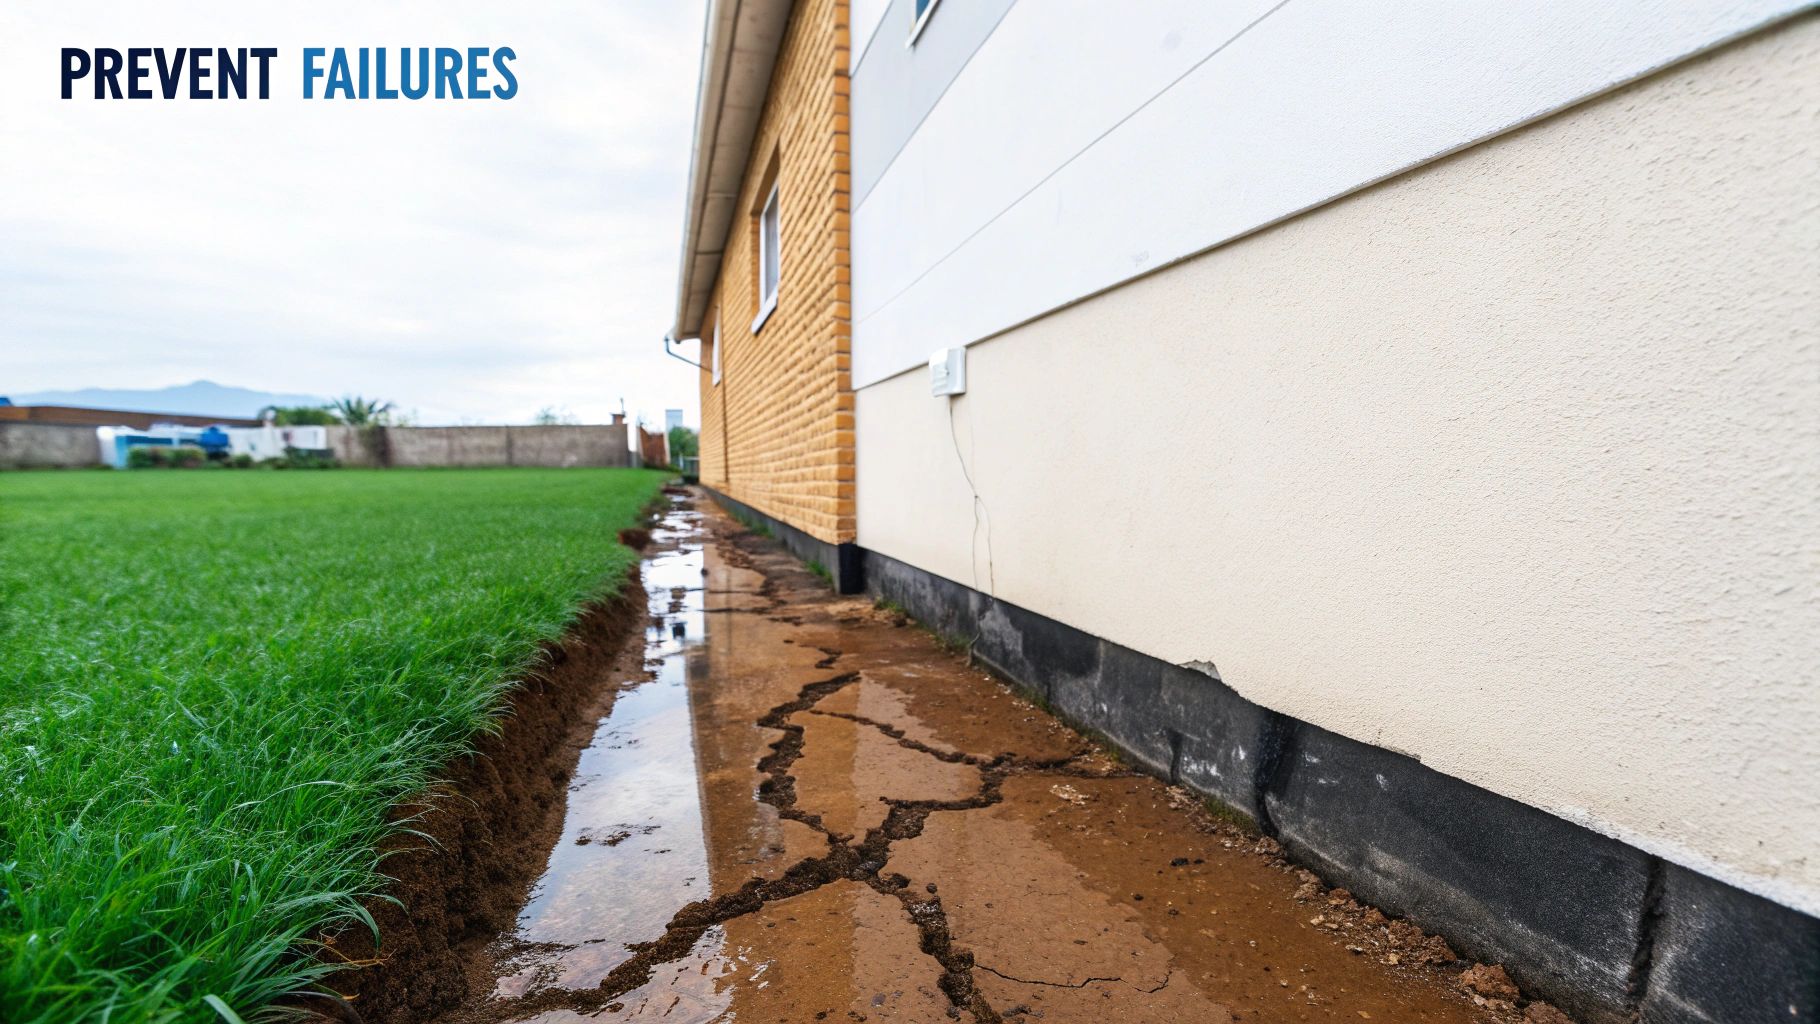
Tanking is the first line of defence for any part of a building that sits below ground level. Here in the UK, we're no strangers to a damp climate and high water tables. This means underground spaces are in a constant battle with hydrostatic pressure – the sheer force of groundwater pushing against the foundation walls.
Without a solid barrier in place, this pressure will eventually force moisture through porous materials like brick, block, and concrete. The results aren't just a bit of damp; they can lead to a whole raft of serious issues.
The Problems Tanking Prevents
Properly installed tanking is designed to head off several expensive and unhealthy problems before they even start. By forming an impermeable shield, it’s the go-to solution for preventing:
- Penetrating Damp: This is when groundwater soaks right through the walls, causing those tell-tale damp patches, peeling paintwork, and a persistent musty smell.
- Mould and Mildew Growth: Damp, dark cellars are a perfect breeding ground for mould. These spores don't just look unpleasant; they can trigger respiratory problems and ruin anything stored down there.
- Structural Damage: Over time, water ingress can weaken mortar, corrode reinforcing steel (rebar), and ultimately undermine the structural integrity of the foundations.
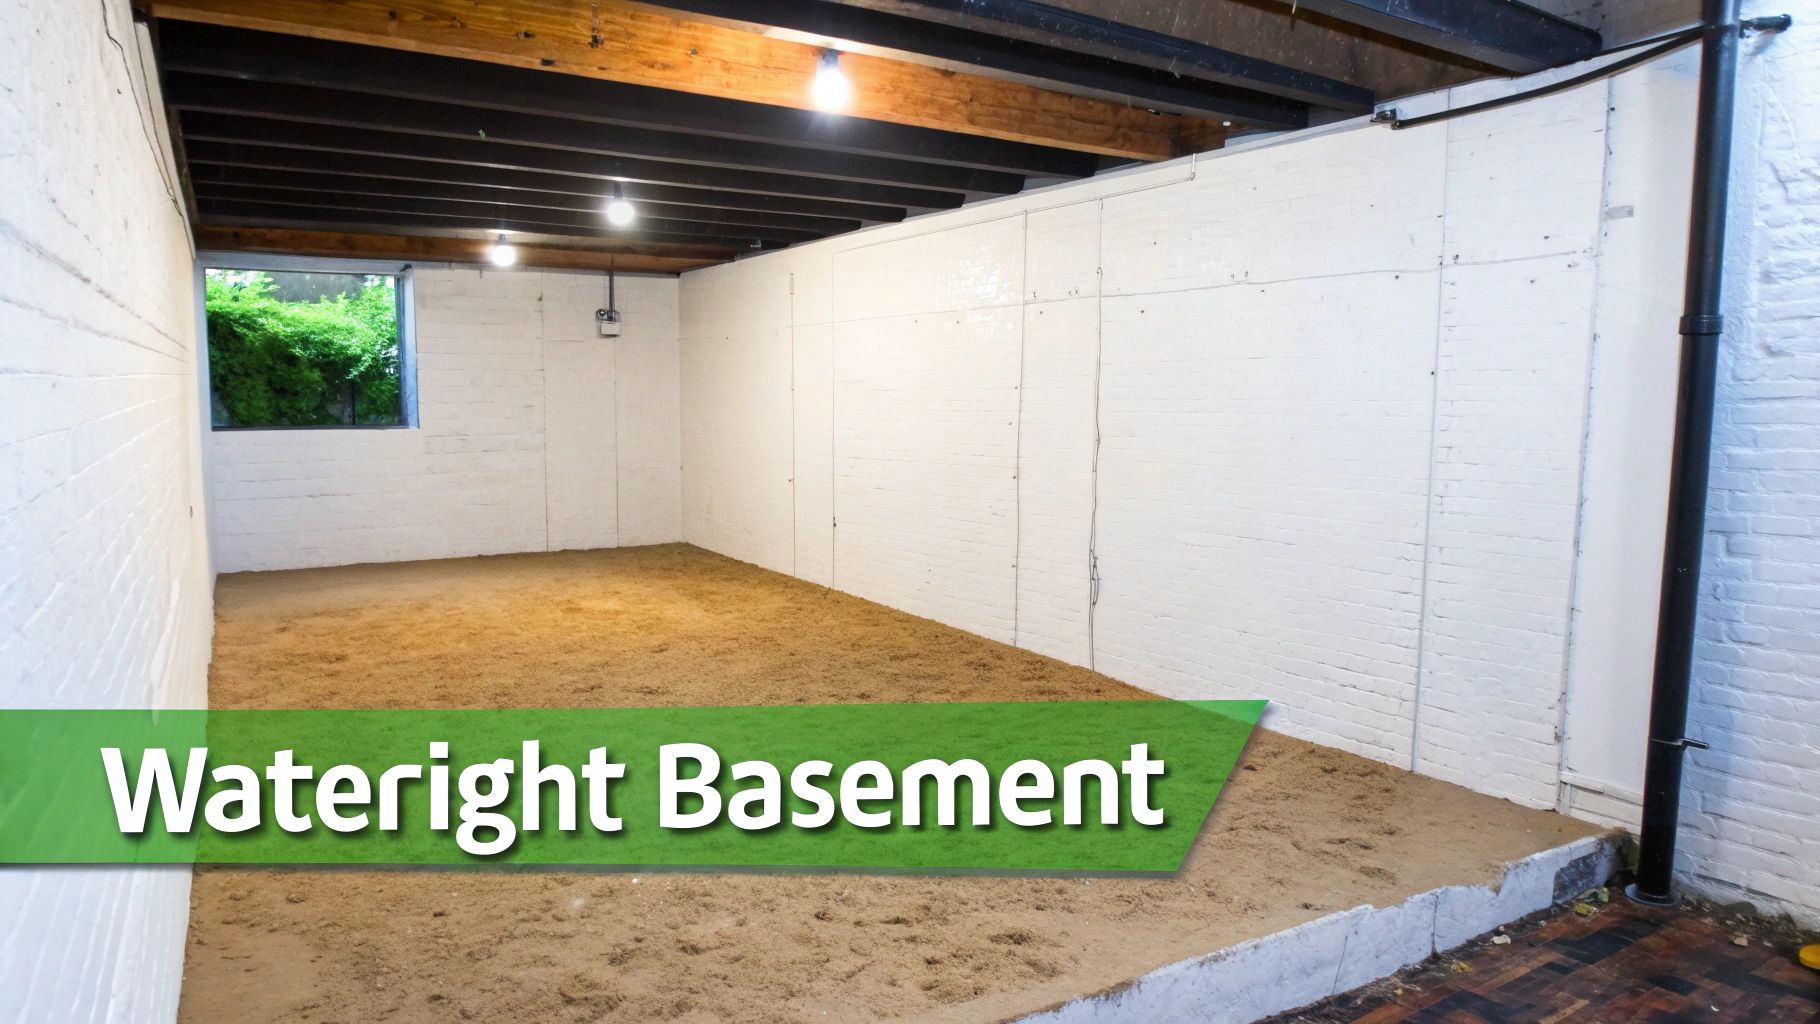
- Unusable Space: A damp, wet basement is wasted square footage. Good tanking is the first step in transforming it into a dry, warm, and habitable space fit for any purpose.
As more and more homeowners look to convert their cellars into valuable living space, the need for effective waterproofing has shot up. In fact, the British Waterproofing Association (BWA) estimates that around 70% of basement conversions in the UK will require some form of tanking system.
By stopping water at its source, tanking not only protects the building but also safeguards its value and the health of its occupants. It’s a proactive investment in the long-term health of your property.
To get a better handle on the financial side of tackling damp, you might find this a complete guide to damp proofing costs useful. While tanking is a specific type of waterproofing, you can see how it fits into the bigger picture by exploring our range of damp proofing solutions.
Why Basement Tanking Is a Non-Negotiable
If you have any part of your property below ground level here in the UK, you're in a constant fight against water. The main culprit is something called hydrostatic pressure—the relentless force of groundwater pushing against your foundation walls and floor slab. Imagine a submarine deep underwater; that same kind of pressure is trying to find a way into your basement.
Without a proper defence, it will eventually succeed. Tanking is that defence. It’s a specialised waterproofing system designed to stand up to this pressure, stopping water from seeping through naturally porous materials like brick, concrete, and mortar. A bit of damp might not sound like a big deal, but it's often the first sign of much bigger problems.
Critical Scenarios for Tanking
In some situations, tanking goes from being a good idea to being absolutely essential. Knowing when you’ve crossed that line is crucial for protecting your property.
-
Basement or Cellar Conversions: Turning a damp, forgotten cellar into a usable living space like a bedroom, office, or gym? You'll need a full tanking system. It’s a mandatory requirement to meet UK Building Regulations for creating a safe and dry habitable room.
-
New Build Properties with Basements: When constructing a new home with a basement, modern standards demand a certified waterproofing system is installed from the very beginning. It's far cheaper and more effective to get it right from day one than to try and fix a leaking new-build later on.
-
Properties in High Water Table Areas: If your home is near a river, on low-lying land, or sits on heavy clay soil, you're in a high-risk zone. These locations experience much greater hydrostatic pressure, making tanking a vital line of defence against persistent damp and even flooding.
A waterproofing failure isn't just about mopping up a puddle. Over time, it can seriously compromise the structural integrity of your entire home. The expense of fixing rotten timbers, repairing foundation damage, and dealing with mould will always be far greater than the upfront cost of a proper tanking system.
Investing in a quality tanking installation isn't just an expense; it's a direct investment in your property's long-term health and value. It’s worth remembering that home inspectors frequently uncover common mold and moisture issues—the very problems that tanking is designed to prevent. By creating a sealed, dry, and usable space, you’re not just gaining a room; you’re protecting your biggest asset from serious, long-term damage.
Choosing the Right Tanking System
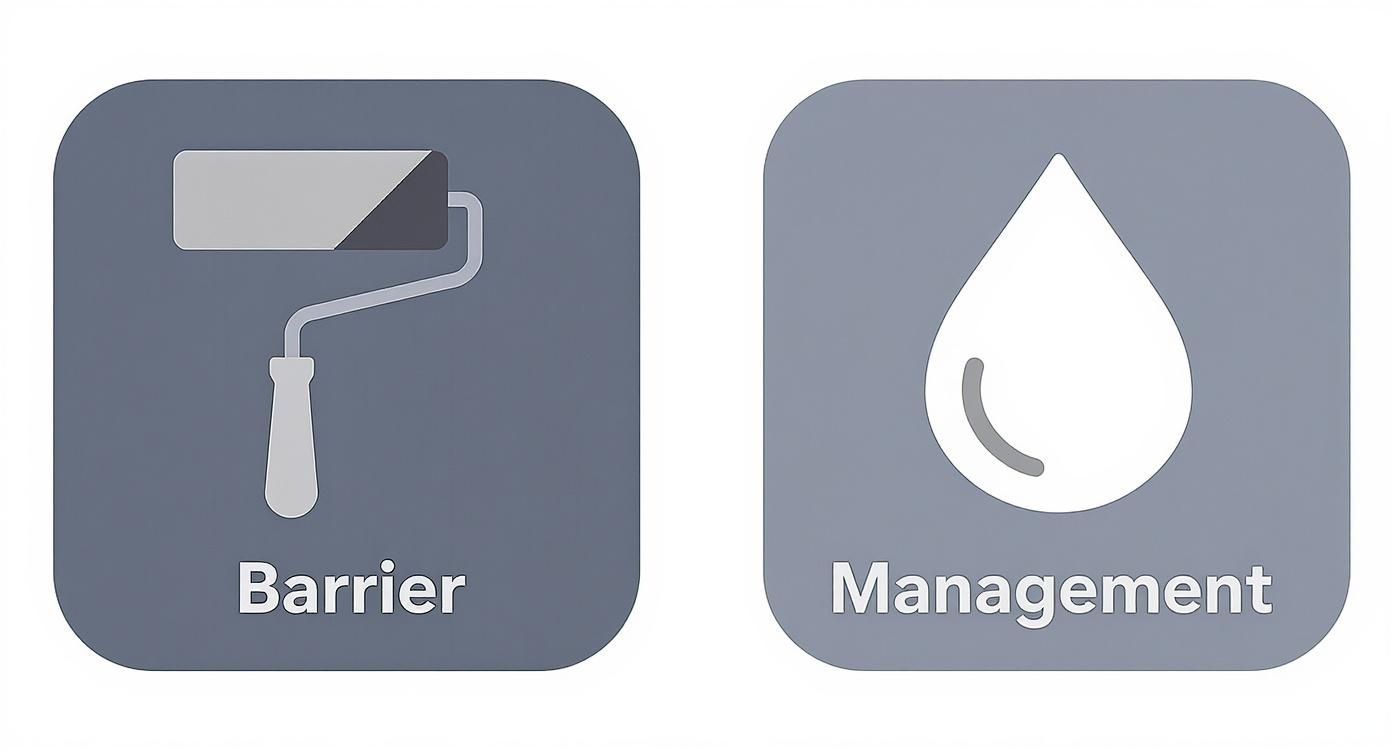
Picking the right tanking system isn't just a technical choice—it's the single most important decision you'll make for the success and lifespan of your waterproofing project. In the UK, we generally talk about two main approaches: Type A (Barrier) protection and Type C (Drained) protection. They work in completely different ways, and knowing which one to use where is key.
A Type A barrier system is probably what comes to mind when you hear the word "tanking." It’s all about creating a solid, watertight barrier applied directly to the structure's surface to physically block water from getting in. Think of it like putting a seamless, impenetrable raincoat on your basement walls and floor.
A Type C drained system, on the other hand, works on a totally different philosophy. It cleverly accepts that some water might get through the outer wall, which is often a reality in older, more porous buildings. Instead of fighting it, this system manages it. It uses a high-density, dimpled plastic membrane to create an air gap, or cavity. Any water that seeps through is channelled down this cavity into a hidden drainage system, usually leading to a sump pump that safely ejects it from the property.
A Practical Comparison of Tanking Systems
To really get to grips with which system is best for your situation, it helps to see them side-by-side. Each has its strengths and is designed for specific challenges.
| System Type | How It Works | Best Suited For | Pros | Cons |
|---|---|---|---|---|
| Type A: Cementitious Slurry | A cement-based coating is painted onto the prepared wall, bonding with the masonry to form a solid, waterproof layer. | New-build basements; sound, uniform concrete or blockwork walls with no movement. | Cost-effective; creates a very strong bond; excellent resistance to water pressure. | Requires perfect surface preparation; can crack if there's any structural movement; can be difficult to apply to uneven surfaces. |
| Type A: Liquid Membrane | A flexible, paint-on liquid is applied to form a seamless, elastic waterproof skin. | Wet rooms, podium decks, and areas with complex shapes or potential for minor movement. | Highly flexible and seamless; excellent adhesion to various substrates. | Can be more expensive; requires multiple coats and specific curing times. |
| Type A: Bituminous Sheet | A self-adhesive or torch-on sheet of bitumen-based material is applied to the external face of the structure. | External tanking for new constructions, providing a robust primary barrier. | Extremely durable and resistant to hydrostatic pressure. | Requires excavation; application is specialist work; difficult to locate and repair leaks. |
| Type C: Cavity Drain Membrane | A dimpled plastic sheet is fixed to the internal walls, creating a cavity that directs water to a drainage channel and sump pump. | Retrofitting existing basements; old properties with irregular walls; situations with high water tables or persistent damp. | Not reliant on substrate quality; deals with high volumes of water; easily accommodates building movement. | Requires a sump and pump system (which needs power and maintenance); reduces internal room dimensions slightly. |
Ultimately, the choice comes down to the building itself. A pristine, new-build concrete basement is a perfect candidate for a Type A system. But for a damp-riddled Victorian cellar, a Type C system is almost always the more reliable and practical solution.
Cementitious Slurries: The Classic Barrier
For Type A barrier protection, one of the most tried-and-tested materials is a cementitious tanking slurry. This isn't just a waterproof paint; it's a specialised blend of cements, graded aggregates, and chemical additives. You mix it with water to create a thick, slurry-like consistency, which is then painted or trowelled onto a properly prepared masonry wall. As it cures, it chemically bonds with the surface, effectively becoming one with the wall.
The real magic of a cementitious slurry is that powerful bond. It becomes an integral part of the structure itself, ready to actively resist the push of groundwater pressure. This is why it’s such a brilliant choice for solid, stable concrete or blockwork walls that give it a great foundation to stick to.
So, when does it make the most sense? A brand-new concrete basement is the ideal scenario. The walls are clean, uniform, and strong, allowing the slurry to form that perfect, unbroken bond. It's an incredibly effective method and often more budget-friendly than other systems. High-quality liquid membranes, like Mapei Mapelastic AquaDefense, offer a more flexible but equally robust Type A barrier, which is brilliant for wet rooms. You can explore liquid tanking membrane options available from builders’ merchants to see what's out there.
Now, let's flip the coin. Imagine you're trying to waterproof an old stone cellar with crumbly mortar joints and uneven surfaces. Trying to apply a rigid slurry here is a recipe for failure. It just won’t bond properly and will likely crack as the old building inevitably moves. This is where a Type C cavity drain membrane really shines. It neatly sidesteps the problem of a poor substrate, creating a dry, warm internal wall while managing any water ingress behind the scenes. It's a far more forgiving system and a much safer bet for older properties.
The Tanking Installation Process Demystified
Knowing what tanking is in theory is one thing, but seeing how it’s actually put on the wall is where it all clicks. A successful job isn’t just about slapping on the right product; it’s a meticulous process from start to finish. Whether you're creating a solid barrier or a water management system, the golden rules of careful preparation and precise application are non-negotiable.
The success of the entire project hinges on one crucial step: surface preparation. You simply can't expect a tanking product to work if you apply it to a dirty, crumbling, or dusty wall. It just won't stick.
This foundational stage means getting the substrate absolutely spotless. Hack off any old, failing plaster, get a wire brush on it to remove anything loose, and make sure it's free of any contaminants.
If you find any cracks or holes, they need to be chased out and properly repaired using a good quality waterproof mortar. The aim is to get a completely solid, stable, and clean surface for the tanking system to bond with or fix against. Honestly, cutting corners here is the number one reason these jobs fail.
Applying the Waterproofing System
With the wall prepped and ready, the next steps depend entirely on which system you’re using.
If you're going for a cementitious slurry (a Type A barrier), you'll mix the product to a thick, creamy consistency. It’s then applied in at least two coats. The first coat needs to be brushed hard into the damp wall to really work it into the surface. Once that's on, the second coat is applied at a right angle to the first. This cross-hatching technique is key to ensuring you get a seamless, pinhole-free finish.
For a cavity drain membrane (a Type C system), the approach is completely different. Here, you're not painting anything on. Instead, you cut the dimpled plastic sheets to size and fix them to the wall with special plugs that have a waterproof seal. You then overlap the joints between sheets and seal them with a specific tape. This creates a continuous waterproof lining that cleverly guides any water that gets through the wall down into a drainage channel at the bottom.
The real secret to a bulletproof tanking job is in the details. Pay close attention to the junctions, especially where the wall meets the floor and around any pipes coming through. These are the classic weak spots. You need to use fillets and special sealing compounds to make sure your waterproof barrier is totally uninterrupted.
The image below gives a great visual summary of these two core approaches.
This contrast really shows the difference between physically stopping water dead in its tracks and smartly managing its path away from your living space. Whichever route you take, the goal is always the same: a perfectly dry room.
Often, a heavy-duty damp proof membrane, or DPM, often form a key part of the total solution, linking the wall system to the floor. This methodical, step-by-step process is what separates a professional, long-lasting job from a quick fix that's guaranteed to cause headaches down the line.
Common Tanking Failures and How to Avoid Them
Even the best tanking products on the market are only as good as the person applying them. Get it right, and you've got decades of dry, usable space. Get it wrong, and you're facing a costly, disruptive nightmare to put things right. Understanding where things typically go wrong is the best defence against failure.
If you trace back almost every tanking failure, you’ll usually find one major culprit: poor surface preparation. Trying to apply a tanking slurry to a dusty, flaky, or dirty wall is like painting on sand. It simply won't stick. Without a tenacious, permanent bond to the substrate, it can't fight back against water pressure and will eventually peel away, letting damp in.
Another classic mistake is not creating a completely seamless, unbroken waterproof layer. Water is lazy; it will always find the easiest way in. Weak spots at the wall-to-floor joint, gaps around service pipes, or poorly detailed corners are like leaving the door wide open for moisture.
Key Causes of Failure
To get a belt-and-braces job, you need to know what you’re up against from the start. Tackle these common problems head-on, and you’ll massively stack the odds of a successful installation in your favour.
- Inadequate Preparation: The wall surface absolutely must be solid, clean, and free of any dust or loose bits. That means hacking off all old plaster, stripping back any paint, and getting rid of any contaminants.
- Structural Movement: Rigid tanking systems, particularly cement-based ones, don’t have much flex. If the building settles or moves—even slightly—they can crack. This is a real watch-out for older properties.
- Incorrect Application: Slapping it on too thinly, missing patches, or getting the mixing ratios wrong will create weak points in the barrier. Always follow the manufacturer's instructions to the letter.
- Punctures or Damage: A perfectly good tanking membrane can be ruined by other trades coming in afterwards. An accidental nick from an electrician's screwdriver or a plumber's drill can create a direct path for water.
The real difference between success and failure is attention to detail. A properly installed system is incredibly tough, but cutting corners on prep work or fiddly details is a false economy that almost guarantees problems down the line.
The numbers back this up. When installed correctly by professionals, the failure rate for tanking is incredibly low. But that figure shoots up when people rush the job or ignore the standards. You can learn more about waterproofing system lifespans and see the performance data for yourself. By sticking to the manufacturer’s guidelines and industry best practices, you can be confident your tanking system will do the job it was designed for.
Getting to Grips with UK Building Regulations and Standards
https://www.youtube.com/embed/NqaGZJr484s
When you're waterproofing a structure below ground level, you’re not just trying to keep things dry. You're also legally and technically required to meet certain standards. In the UK, the document that matters most here is BS 8102:2022, which is the official Code of Practice for protecting below-ground structures from groundwater.
Don't mistake this for a bit of light reading or a set of loose guidelines. This standard is the gold standard. It's what building control officers, architects, and even mortgage lenders will use to decide if your project is up to scratch. Sticking to BS 8102:2022 is non-negotiable if you want your work signed off, to secure a mortgage on the property, or to get an insurance-backed guarantee.
So, What Are the Waterproofing Grades?
To make things clearer, BS 8102:2022 breaks down waterproofing requirements into three simple ‘Grades’. Which grade you need to aim for comes down to one simple question: what are you going to use the space for? It’s a practical system that matches the level of protection to the planned use of the room.
-
Grade 1 Protection: This is your basic level of protection. Some seepage and damp patches are acceptable, so it's a good fit for places where a bit of moisture isn't a disaster. Think underground car parks, plant rooms, or workshops without sensitive electrical gear. Performance is the priority, not a bone-dry finish.
-
Grade 2 Protection: Here, we step things up. No water is allowed to penetrate the structure, but some moisture in the air (water vapour) is considered tolerable. This is the grade you’d typically see specified for retail stockrooms or workshops where a slightly damp atmosphere won’t cause any damage.
-
Grade 3 Protection: This is the highest level of protection and is an absolute must for any living space. It means creating a completely dry environment – no water penetration, no damp patches, and no condensation. If you're building a basement bedroom, a subterranean office, or a cosy snug, you have to achieve Grade 3.
To successfully create a Grade 3 living space, the waterproofing design and installation have to be perfect. More often than not, this means combining different systems, like a Type A barrier with a Type C cavity drain, to create a multi-layered, belt-and-braces defence against water.
Why You Can’t Afford to Cut Corners
Following BS 8102:2022 isn’t just about bureaucracy; it’s about protecting your property and making sure your project is a success for years to come. Imagine you’re converting a damp cellar into a new bedroom (which needs Grade 3 protection) but you install a system only suitable for a car park (Grade 1). You're simply storing up problems for the future.
Building control won't sign off on the project, which can make the property incredibly difficult to sell or remortgage. For any project that involves creating a habitable space below ground, it's vital to bring in a professional waterproofing designer right from the start. They’ll make sure the system is designed to meet these strict standards before a single bucket of cement is mixed.
Tanking FAQs: Your Questions Answered
Even when you've got your head around the basics of tanking, a few practical questions always pop up. Let's tackle some of the most common queries we hear, covering everything from costs and DIY jobs to how tanking fits in with general damp proofing.
How Much Does Basement Tanking Cost in the UK?
The price for tanking a basement can vary quite a bit, depending on the system you choose, the size of the space, and what state the walls are in. As a ballpark figure, you should probably budget for somewhere between £40 and £80 per square metre.
A simple cementitious slurry system, painted onto a well-prepared wall, is usually the most wallet-friendly route. At the other end of the scale, a full cavity drain membrane system—complete with drainage channels and a sump pump—is a bigger investment but offers a far more reliable solution, especially in places with serious water issues. Your best bet is always to get a few detailed quotes from trusted specialists.
Can I Tank a Cellar Myself?
For smaller, straightforward jobs, a capable DIYer can definitely have a go. Applying a tanking slurry to a solid cellar wall isn't rocket science, provided you prepare the surface properly and follow the product instructions to the letter.
However, when you're dealing with significant water pressure or looking at more complex setups like cavity drain membranes, it's really a job for the pros. A specialist not only guarantees the work will be effective but also ensures it meets BS 8102:2022. This is the British Standard you’ll often need to satisfy building control, mortgage lenders, and to get an insurance-backed guarantee.
Tanking is a specific form of waterproofing designed to hold back water under hydrostatic pressure, typically below ground level. It creates a complete, impermeable barrier to stop water from getting in.
What’s the Difference Between Tanking and Damp Proofing?
This is a really common question, and it's easy to get them mixed up. The simplest way to think about it is that tanking is the heavy-duty solution for below-ground areas where you're fighting against actual water pressure.
Damp proofing, on the other hand, usually deals with problems like rising damp (where moisture soaks up from the ground into the walls) or penetrating damp above ground. A damp-proof course (DPC) in your brickwork is a perfect example of damp proofing. Tanking is a much more robust, all-encompassing barrier built specifically for basements, cellars, and retaining walls.
At Burnt Oak Builders Merchants, we stock a wide range of professional-grade tanking and damp proofing materials to make sure your project gets done right. Whether you're a seasoned contractor or a determined DIYer, you can find all the supplies you need on our website.