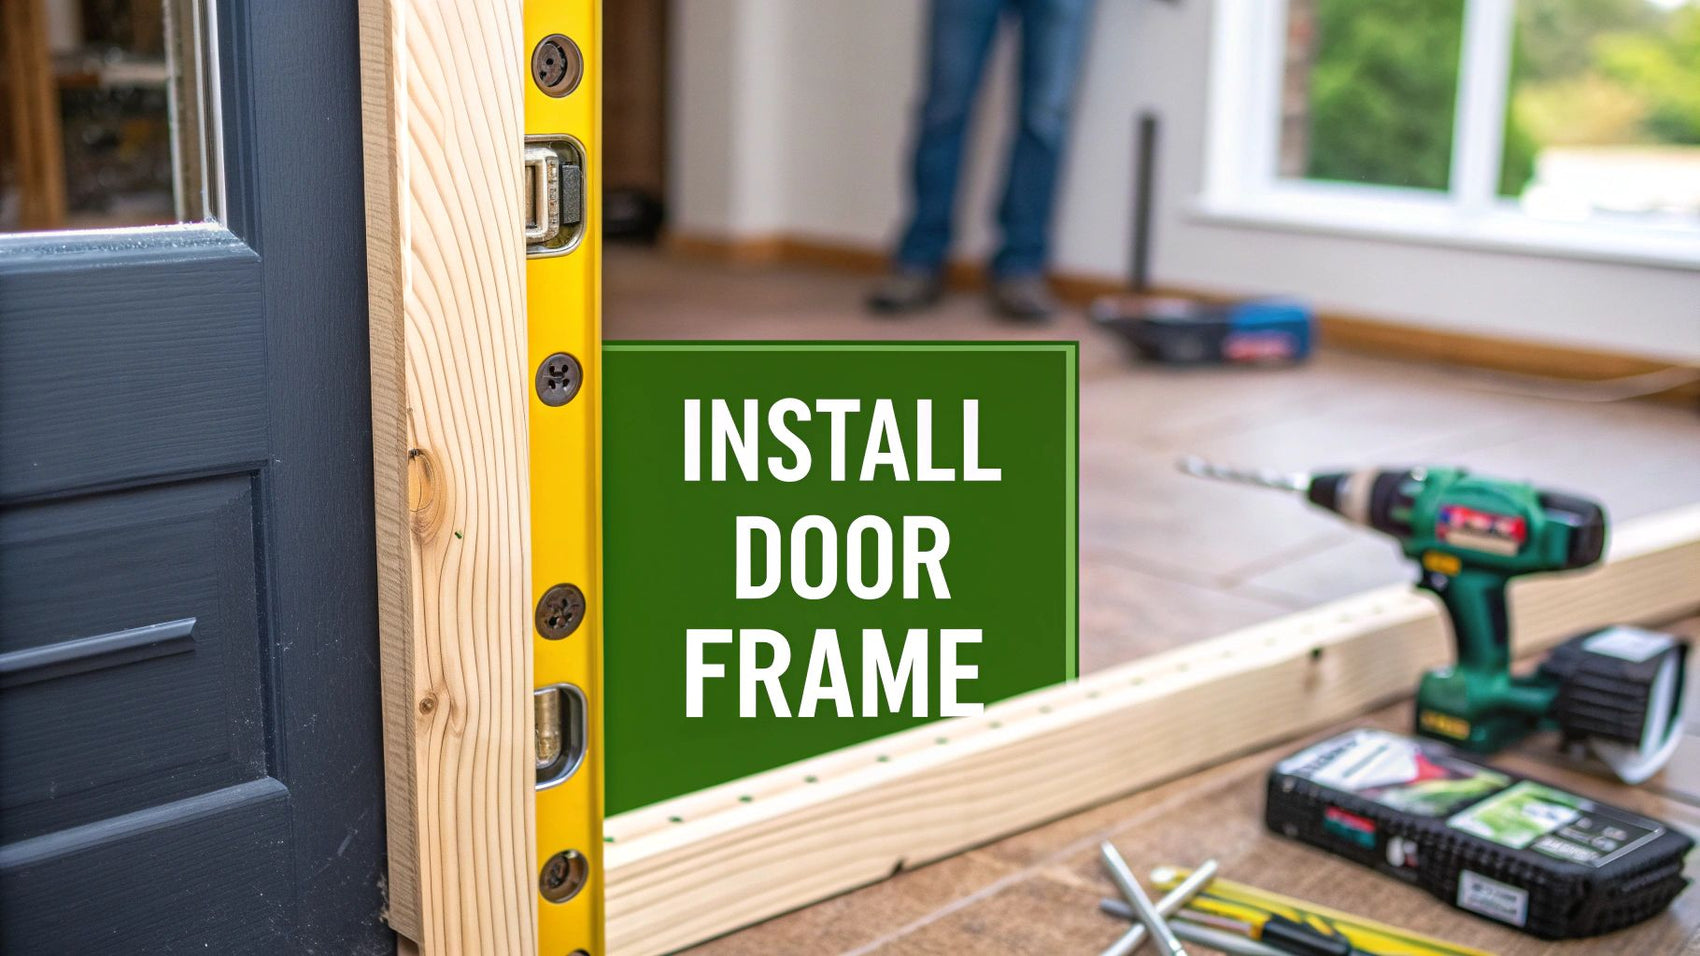
Before you even think about reaching for your tools, a little bit of prep work will save you a world of pain later. The secret to learning how to install door frames properly is getting the groundwork right. This means having a solid plan, the right tools for the job, and dead-on measurements of your rough opening. Get this bit right, and you're already halfway to a pro-level finish.
Your Pre-Installation Checklist
Any good project starts long before the sawdust flies. This isn’t just about the physical work; it's about setting yourself up for success so the actual installation goes off without a hitch.
First things first, you need to choose the right door frame, which you'll often hear called a 'door lining' or 'casing' by people in the trade. The wall itself dictates your choice. If you're working with an internal stud wall, a standard timber frame will do the job nicely. But for a solid brick or blockwork external wall, you'll need something more substantial, often a wider frame to match the wall's thickness.
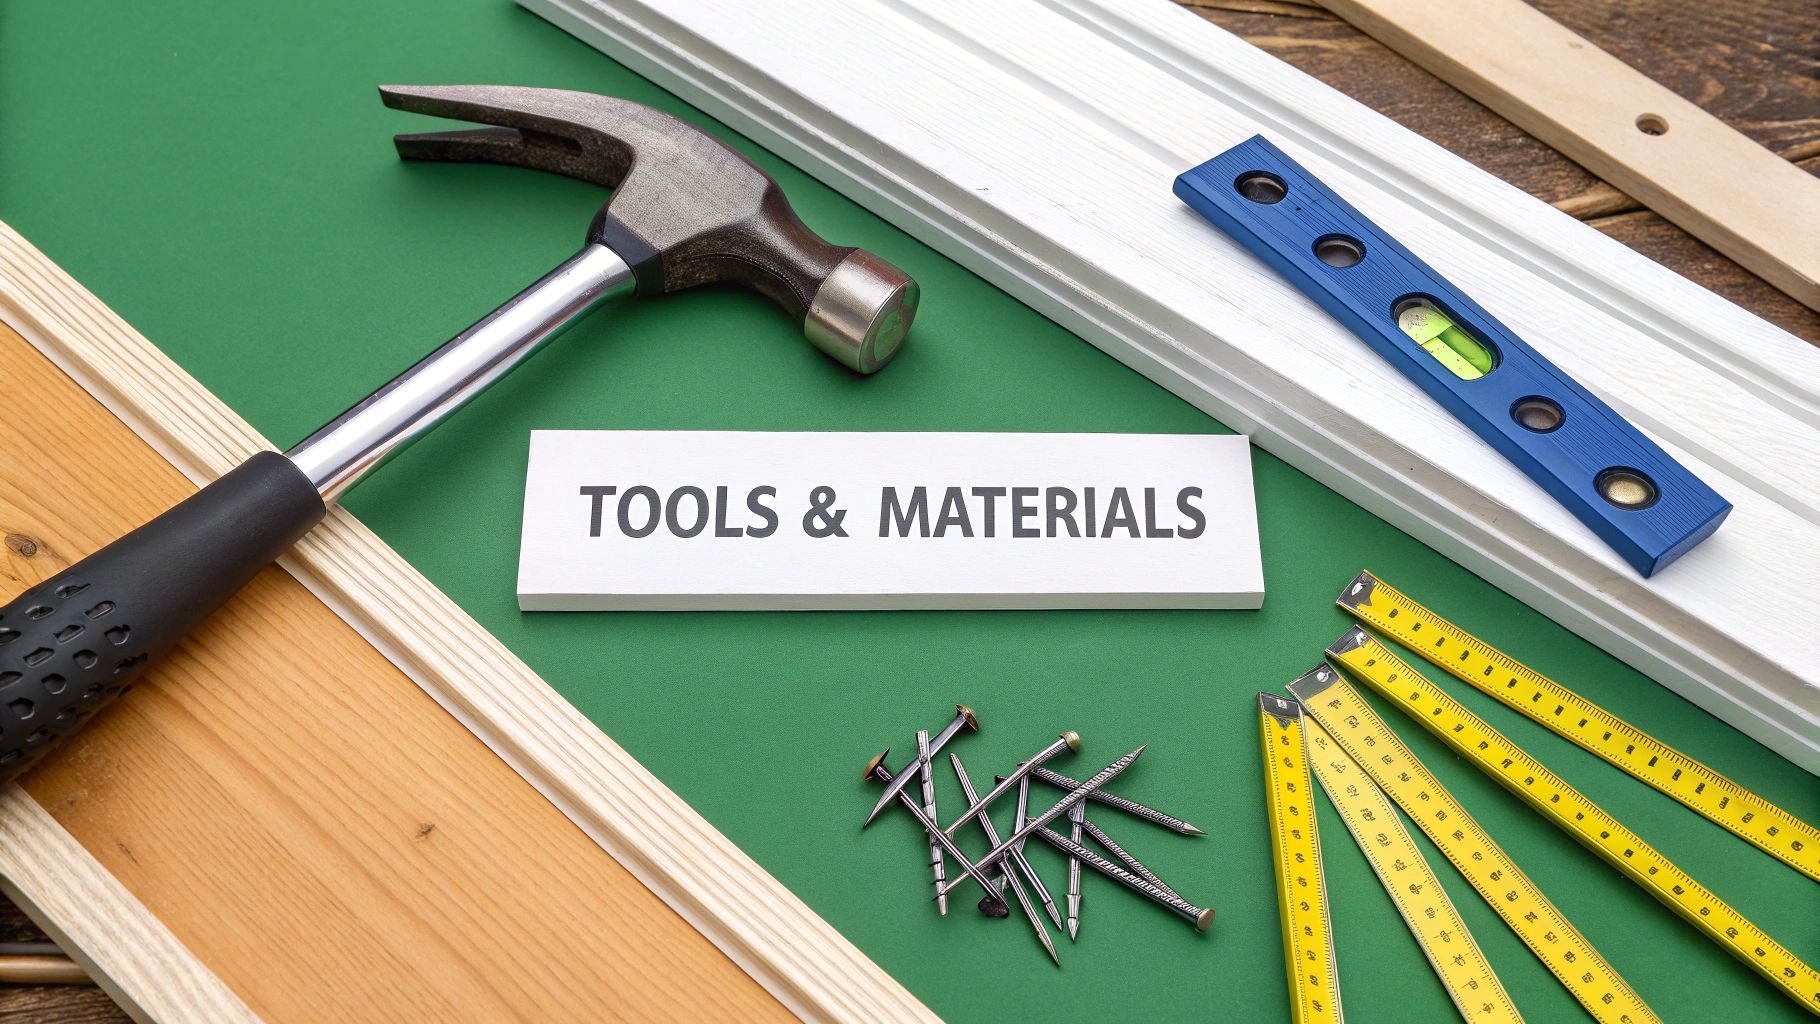
Gathering Your Essential Tools
There's nothing more frustrating than having to down tools mid-job to hunt for a missing piece of equipment. Whilst every project has its quirks, there are some core tools you absolutely must have. A good spirit level is non-negotiable—it's the only way to get the frame perfectly plumb and level. And you’ll definitely need a sharp saw for any trims and adjustments.
Here's a quick checklist to make sure you've got everything you need before you start.
Essential Tools and Materials for Installing a Door Frame
A quick-reference checklist to ensure you have everything needed for a successful door frame installation.
| Item Category | Essential Items | Recommended for a Pro Finish |
|---|---|---|
| Measuring & Marking | Tape Measure, Spirit Level, Pencil | Combination Square, Plumb Bob |
| Cutting & Fitting | Hand Saw or Mitre Saw, Hammer, Chisel | Power Planer, Utility Knife |
| Fixing & Securing | Drill, Frame Fixings or Wood Screws, Packers/Shims | Expanding Foam Filler, Silicone Sealant |
| Safety Gear | Safety Goggles, Gloves | Dust Mask, Ear Protection |
Having the basics is one thing, but a well-stocked toolkit makes all the difference. For a more comprehensive rundown, check out this guide on the essential tools for homeowners which is a great resource for this job and future projects.
A classic rookie error is grabbing any old screws from the toolbox. If you're fixing into masonry, you must use proper frame fixings or masonry screws. For a timber stud wall, standard wood screws of the right length will work. Using the wrong fixing is a sure-fire way to end up with a wobbly, insecure frame.
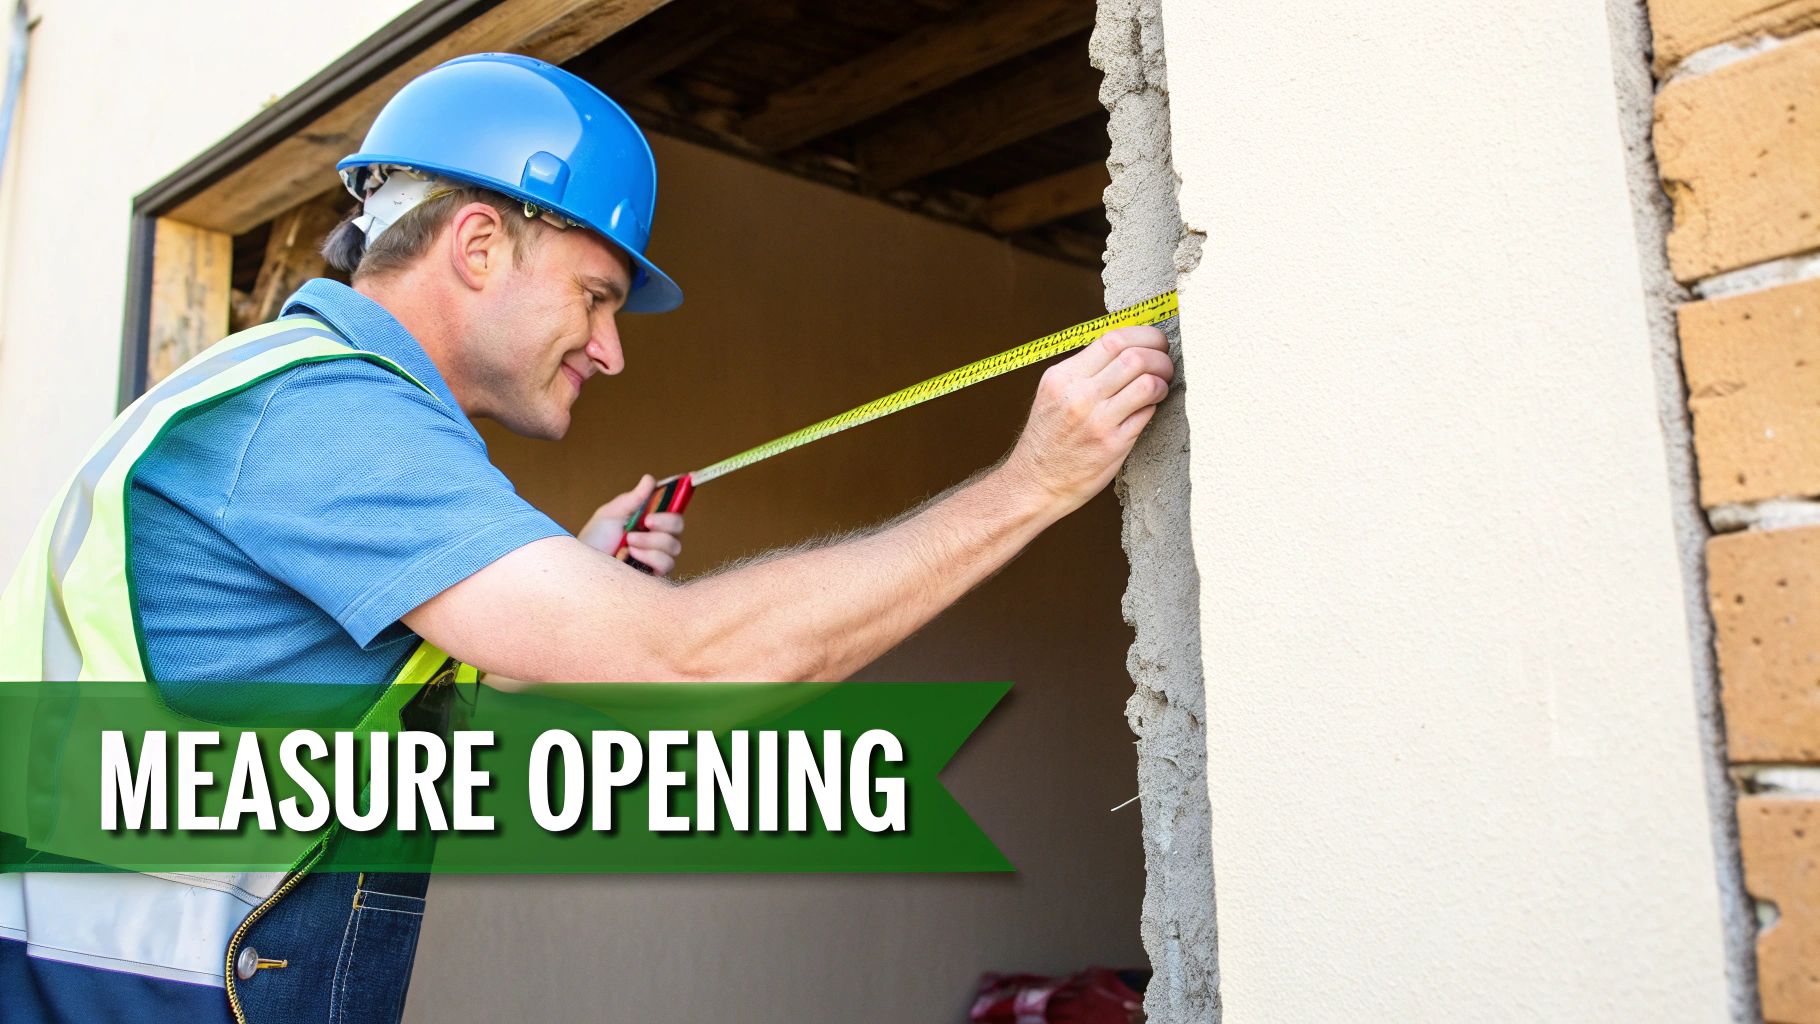
Measuring the Rough Opening Accurately
Now for the most critical part: measuring. The 'rough opening' is the raw, unfinished gap in the wall where your frame is going to live. You need to be precise here, but you also need to build in a little bit of wiggle room on purpose.
Your goal is to have the rough opening just slightly larger than the outside of your door frame. This isn't a mistake; it's intentional. That small gap is your key to getting a perfect fit.
- Height: Measure from your finished floor (the top of your tiles, laminate, or carpet gripper) up to the underside of the lintel.
- Width: You need to measure the width in three spots—at the top, middle, and bottom. Walls are rarely perfectly straight, so always use the narrowest of the three measurements.
- Tolerance: You're aiming for a gap of about 5-10mm on each side and at the top. This space is essential for using packers or shims to nudge the frame into the perfect vertical and horizontal position before you fix it for good.
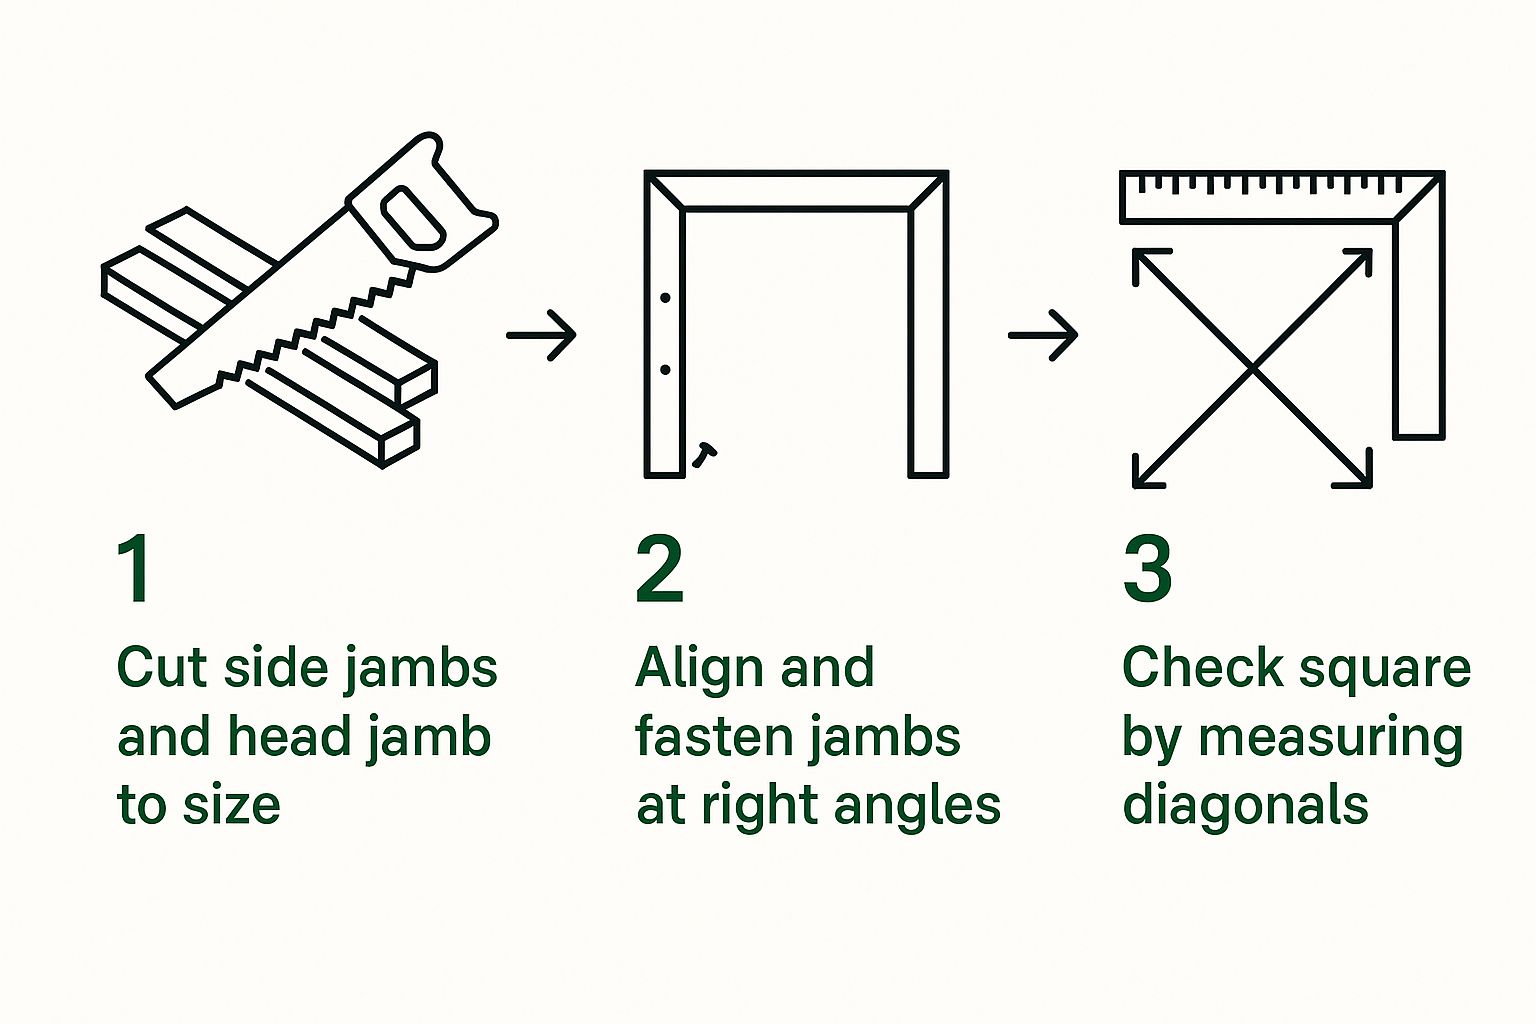
Putting Your Door Frame Together The Right Way
Most new door frames will arrive flat-packed, and this is where a little bit of care goes a very long way. A frame that isn’t perfectly square will cause you no end of grief later on. Trust me, you'll be dealing with a door that scrapes, sticks, or mysteriously swings open by itself.
Your kit will have three main parts: the two vertical side pieces, which we call jambs, and the horizontal top piece, known as the head. The whole game here is to join these together into a perfect three-sided rectangle.
Getting to Grips with the Joints
The way these pieces fit together can differ. A lot of modern frames, especially the ones you'll pick up from DIY shops, use simple housing joints. This is where the top of the jamb neatly slots into a groove that's already been cut into the head. Older, more traditional frames might use a classic mortise and tenon joint, which is a bit more work but incredibly strong.
Whatever the joint type, the method is basically the same. First, find a flat, level surface to work on – a clean garage floor is ideal. Lay your pieces out and apply a decent wood adhesive to all the contact points before you push them together.
To really lock it all in place, I always drive two screws through the head and down into each jamb. This combination of glue and screws creates a rock-solid joint that simply won't shift.
The All-Important Squaring Up
Pay close attention here, because this is the single most critical step. A frame can look square to the naked eye but be a few millimetres out, and that's all it takes to cause problems down the line.
Here’s the old-school trick every chippy uses: measure the diagonals. Run your tape measure from the top-left inside corner down to the bottom-right inside corner. Note that measurement. Now, do the same for the opposite diagonal. If those two numbers are identical, your frame is perfectly square.
What if they don't match? Don't panic. Just give the longer corner a gentle tap with a rubber mallet to nudge it into position. Measure again. It's a game of patience and small adjustments, but it's a game you absolutely have to win.
Once you’ve got it spot on, tack on a temporary brace. This is just a length of scrap timber lightly nailed across the bottom of the two jambs. This little piece is a lifesaver, as it holds the whole assembly perfectly square whilst you manhandle it into the wall opening. You'll pop it off later.
Figuring Out Your Door Handing
Before you get any further, you need to decide which way your door will open. We call this the 'handing'. To figure it out, stand on the side of the opening where the door will swing towards you.
- If the hinges need to be on the left, it's a left-handed door.
- If the hinges need to be on the right, it's a right-handed door.
This might seem like a small detail now, but it's crucial. The door stops – those thin strips of wood the door closes flush against – often come pre-cut. Knowing the handing ensures you fit them to the correct side of the frame before you even think about installation. If you're sourcing your parts, you can find a great door lining kit with everything you need. Getting this right from the start saves a lot of headaches later.
Fitting and Securing the Frame in the Opening
Alright, your frame is built and perfectly square. Now for the moment of truth: fitting it into the opening. This part is less about brute force and more about finesse. Getting this right is what separates a door that swings silently and true from one that sticks and scrapes for years to come.
First, carefully lift the frame and set it into the rough opening. Don't stress about getting it perfectly aligned just yet. The goal here is simply to stand it up so you can begin the critical work of positioning it.
The Art of Packers and Shims
This is where the real craft of fitting a door frame comes into its own. You'll be using packers (or shims), which are small, tapered wedges, usually made of plastic or wood. These little things are the key to bridging the gap between your frame and the wall, allowing you to achieve a perfectly plumb and level installation.
Start by getting the frame head roughly level. Slip a few packers under each of the side jambs on the floor until your spirit level gives you a decent reading. Next, move to the sides, adding packers into the gap. A good habit is to place them near the top, middle, and bottom of each jamb—right where your main fixings will eventually go.
A word of caution: don't hammer the packers in with all your might. You're aiming for a snug fit that holds the frame steady, not a forced one. Bashing them in too hard can easily bow the timber, undoing all your careful work.
The assembly process you've just completed is the foundation for this stage. As a quick reminder, here’s what a good, square assembly looks like before it ever meets the wall.
Without this square starting point, trying to get the frame plumb in the opening becomes an impossible task.
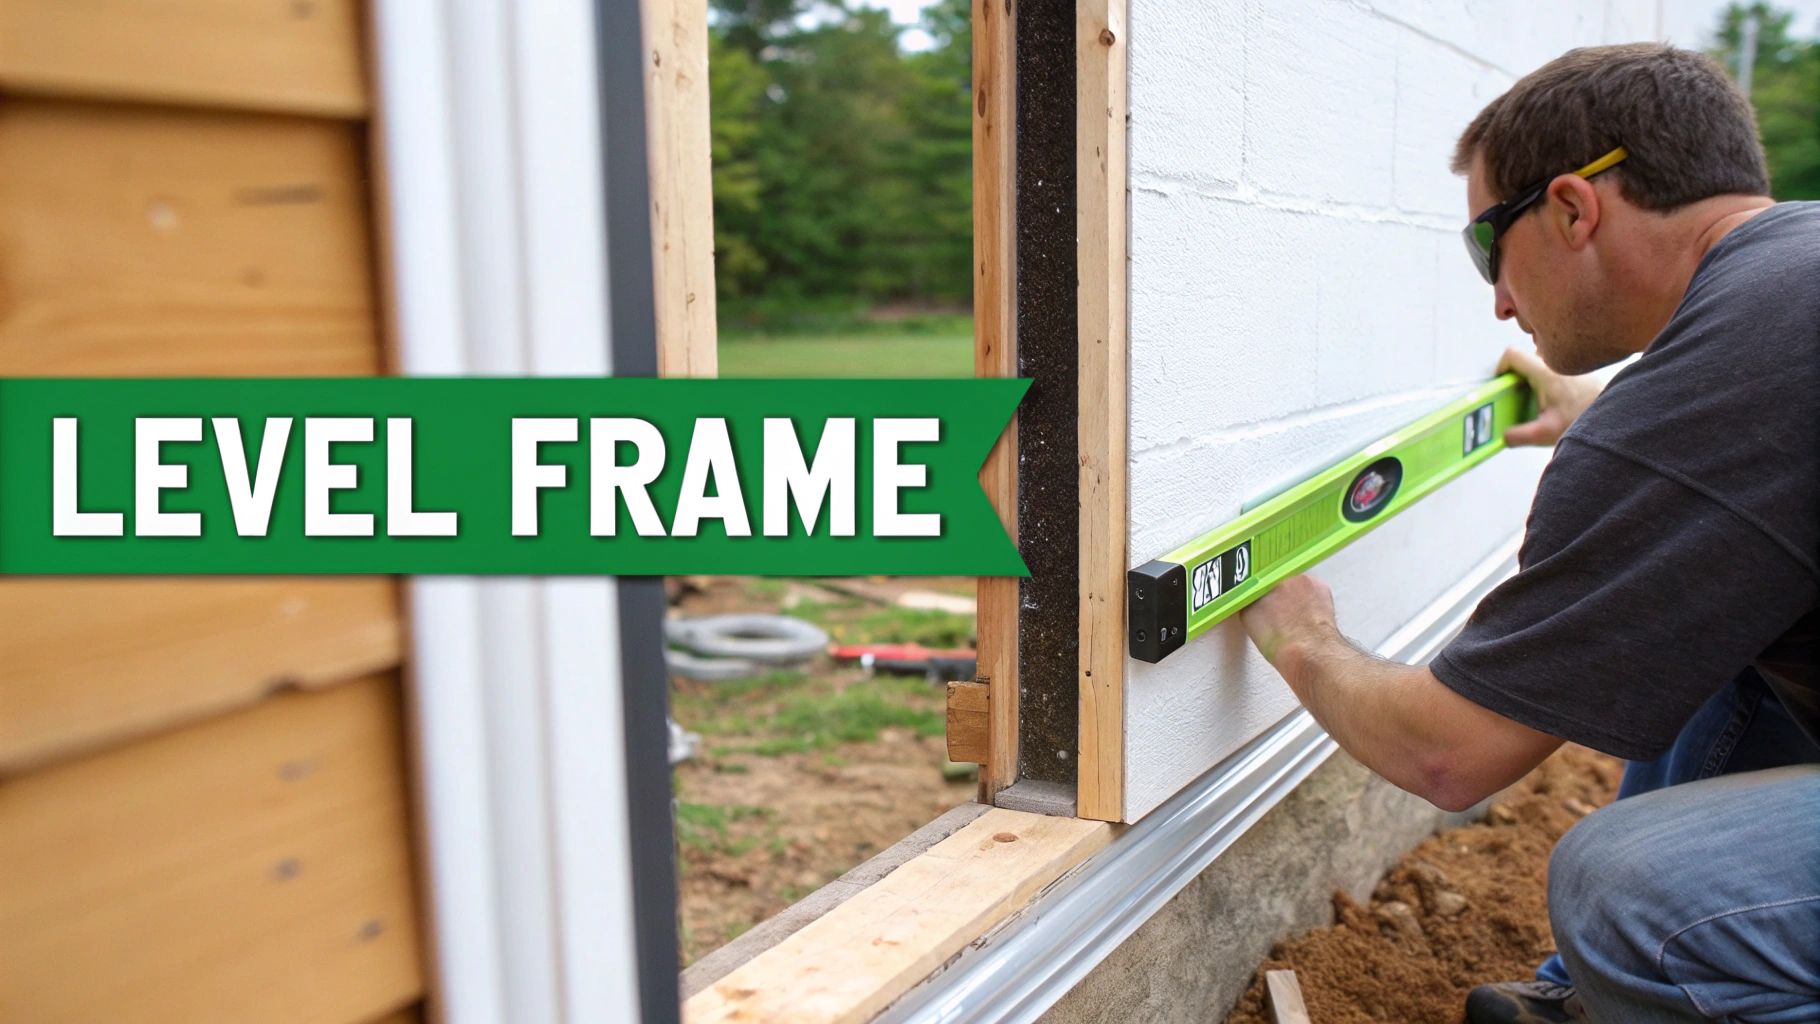
Getting it Plumb and Level
Now, grab your spirit level—it's going to be your most important tool for the next few minutes. You need to meticulously check three alignments:
- The Head Jamb: Place your level against the underside of the head. Is the bubble dead centre? If not, adjust the packers underneath the side jambs until it is.
- The Hinge Jamb: Press the level flat against the inside face of the jamb where you'll be hanging the door. Nudge the side packers in or out until that bubble is perfectly vertical.
- The Latch Jamb: Do the exact same thing on the opposite jamb.
This is a delicate balancing act. A tiny tap on a packer can shift the whole alignment, so work patiently. Check, adjust, then check again. It’s also wise to place your level across the front face of the jambs to make sure they aren’t twisted.
Securely Fixing the Frame
Once you are 100% certain everything is plumb, level, and square, you can finally fix the frame in place. How you do this will depend entirely on what the wall is made of.
-
For Masonry Walls: If you're fixing into brick or blockwork, drill pilot holes through the frame, making sure you go right through the centre of your packers. Then, switch to a masonry bit and drill into the wall itself. Use proper frame fixings or long masonry screws to get a solid anchor. Three on each side is usually plenty.
-
For Timber Studwork: This is generally a bit more straightforward. With a timber-framed wall, you can simply drill pilot holes through the frame and packers and drive long wood screws straight into the studs behind.
Whatever you do, always fix through the packers. If you don’t, tightening the screws will pull the frame towards the wall, bowing it out of shape and ruining all that precise alignment you just worked so hard to achieve. Tighten the fixings until they’re firm, but don’t go overboard and risk distorting the frame.
Meeting Fire Safety and UK Building Regulations
When you're installing door frames in the UK, it’s not always just about getting a neat finish. The moment you start working with fire doors, you enter a world governed by strict building regulations. Getting this wrong isn't just a DIY blunder; it's a serious safety breach with potentially tragic consequences.
There's no room for guesswork here. Fire doors are a crucial part of a building's passive fire protection strategy, engineered to contain fire and smoke. For them to do their job, every single component—the door, the frame, and all the ironmongery—must be a certified, compatible system.
Understanding Fire Door Frame Essentials
You can't just use a standard door lining for a fire door. It simply won't cut it. The frame itself must be fire-rated and certified to offer the same level of fire resistance as the door, whether that's FD30 (providing 30 minutes of protection) or FD60 (60 minutes).
This is where you'll see certifications like the BM TRADA Q-Mark or CERTIFIRE. These schemes are your assurance that the components have passed rigorous third-party testing and meet the required safety standards.
When it comes to the actual installation, the devil is in the detail. The most critical measurement to get right is the gap between the door leaf and the frame.
This gap must be consistently between 2mm and 4mm around the top and sides. If it's any larger, the intumescent seals won't expand correctly to block the fire. Any smaller, and the door might not close properly, rendering it useless.
This demand for precision is exactly why taking such care with packing and plumbing the frame, as we covered earlier, is absolutely essential.
Intumescent Seals and Certified Ironmongery
Another non-negotiable component is the intumescent seal. This is a special strip that fits into a groove, either in the frame or the edge of the door. When exposed to heat, it swells up dramatically to seal the gap and stop fire from getting through. Many seals also include a smoke brush to prevent the spread of cold smoke, which can be just as lethal.
Every piece of hardware, or ironmongery, must also be fire-rated. This covers everything:
- Hinges: You'll typically need at least three certified fire-rated hinges.
- Latches and Locks: These must be proven to not fail when subjected to intense heat.
- Door Closers: Often a requirement, these devices ensure the fire door closes automatically behind someone.
In the UK, fire safety is taken extremely seriously, particularly in multi-occupied buildings. The Fire Safety (England) Regulations 2022 mandate regular inspections, and one of the most common reasons for failure is poor installation.
It's a shocking statistic, but around 60% of inspected fire doors have faulty or missing seals, and a further 15% show damage directly caused by a bad fit. This just hammers home the need for competent installation, ensuring the entire doorset performs as it was designed to.
Sourcing the right components from the start makes everything easier. To ensure you have a fully compliant solution, it’s worth looking at integrated sets like these certified moulded 6-panel fire doors, which are designed and tested to work together as a complete system.
Applying the Finishing Touches
With the frame firmly in place, it’s time to shift focus to the details. This is what truly separates a decent job from a professional one—transforming a sturdy installation into something that looks seamless and polished. The frame is now part of the wall; our job is to make it look like it was always there.
First up, we need to deal with the gap between the new frame and the wall. This is a common culprit for heat loss, not to mention it just looks messy if left as is. You’ve got a few solid choices for this, each with its own pros and cons.
Filling the Gaps for a Clean Finish
How you handle this gap really depends on its size and the look you're going for. Getting this right is a massive part of a proper door frame installation, as it affects both the appearance and the insulation of the room.
- Expanding Foam: This is your go-to for larger voids. A low-expansion foam is brilliant because it fills the space completely, adding insulation and a bit of extra structural support. A word of caution: use it sparingly. It can expand more than you think and might even bow the frame if you overdo it.
- Plaster or Filler: For those medium-sized gaps that you'll be painting over, a multi-finish plaster or a good quality filler is perfect. It lets you create a smooth, invisible transition between the frame and the wall.
- Decorators’ Caulk: For the small, neat gaps—especially where the architrave will meet the frame—caulk is king. It's flexible, which is crucial because it won't crack as the house naturally settles or as wood expands and contracts with the seasons.
Once your gaps are filled and everything's been sanded smooth, it's time for the decorative trim.
Fitting the Architrave
The architrave is the decorative timber moulding that tidies everything up, covering the join between the frame and the plaster. The secret to a top-notch finish here is getting those corner mitre joints absolutely perfect. You'll need a mitre box or, even better, a mitre saw set to precisely 45 degrees.
Here’s a little trick I’ve picked up over the years: always 'cut proud'. That means you deliberately cut the architrave a tiny fraction of a millimetre longer than you measured. You can then carefully sand or shave it down for a perfectly tight corner. It’s a lot easier than trying to hide a gap from a cut that’s too short.
After cutting your pieces, run a bead of wood adhesive along the joints. Secure the architrave to the frame and wall using a combination of adhesive and finishing nails for a solid fit.
Finally, it's time to prep the new woodwork. Fill any nail holes with a dab of wood filler, give everything a light sanding to create a smooth surface, and apply a good primer. For a finish that not only looks great but will also stand the test of time, it’s worth looking into the best paint for trim options to protect your hard work for years to come.
A Few Common Questions About Fitting Door Frames
Even the most straightforward jobs can leave you scratching your head. When it comes to fitting a door frame, a few questions pop up time and time again. Let’s clear up some of the common sticking points you might encounter.
How Much of a Gap Should I Leave Around a Door Frame?
This is a classic one. For a standard internal door, you'll want to aim for a tolerance gap of about 5-10mm on each side and at the top. This gap runs between your new frame and the rough brickwork or stud wall opening.
Think of it as your essential wiggle room. This space allows you to slide in packers and shims, which are crucial for getting the frame perfectly plumb and level before you fix it permanently.
Fire doors, however, are a completely different ball game. The gap between the door leaf (the door itself) and the frame must be a very precise 2mm to 4mm to ensure the intumescent seals can do their job in a fire. Always, always check the manufacturer’s specific instructions for fire doors – it’s a non-negotiable safety requirement.
Don't be tempted to skip the gap to save on a bit of filler. That space isn't a mistake; it's a fundamental part of a professional installation. Without it, you’ve got no way to make the tiny adjustments needed for perfect alignment, and you’ll end up with a door that sticks or won't close properly.
Can I Fit a New Door Frame Without Ripping the Old One Out?
In short, it’s not a great idea if you want a proper, lasting job. You might see ‘repair frames’ that are designed to sit inside an existing frame for a quick cosmetic fix, but this approach is full of compromises. Not only will it shrink the width of your doorway, but it can also affect the overall stability.
For a structurally sound installation, the old frame needs to come out completely, along with all its fixings. This lets you see what you're working with, check the rough opening for any issues, and most importantly, fix the new frame directly to the structural wall. That direct connection is what ensures your door will hang true and operate smoothly for years to come.
What’s the Best Way to Fix a Door Frame into a Brick Wall?
When you’re fixing a timber frame into brick or blockwork, your best friends are long frame fixings or heavy-duty masonry screws. Forget about trying to use nails; they just don’t have the holding power in masonry and will inevitably work loose over time.
Here’s the right way to do it:
- Get it Plumb: First, position the frame and use your packers to get it perfectly vertical and level.
- Drill Your Pilot Holes: Using a good masonry drill bit, drill pilot holes through the side of the frame, through your packers, and into the brickwork behind. You'll want at least three fixing points on each side jamb – one near the top, one in the middle, and one near the bottom.
- Drive it Home: Secure the frame by driving the fixings straight through the frame and into the wall. This creates a rock-solid connection that won't budge.
Whilst fitting a door frame is a satisfying project, it's also important to know your limits. It's worth taking a moment to read about other DIY jobs you shouldn't attempt yourself to see where your task fits on the complexity scale.
At Burnt Oak Builders Merchants, we pride ourselves on supplying both the trade and dedicated DIYers with top-quality materials. From certified door linings to the right fixings for any wall type, find everything you need for a job well done at https://www.burntoaktimber.com.